Quick and Easy Gift Bags

Let’s make some Quick and Easy Gift Bags!

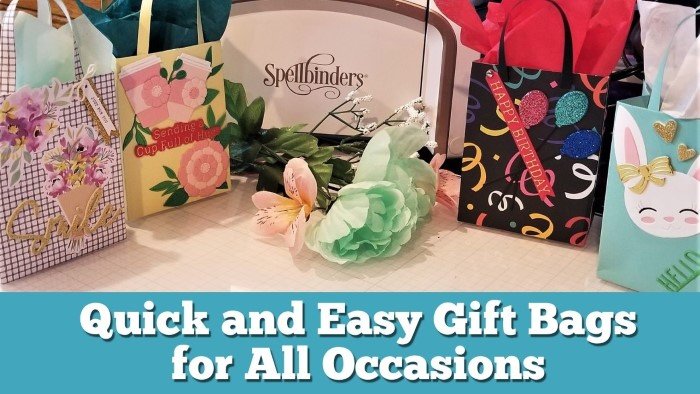
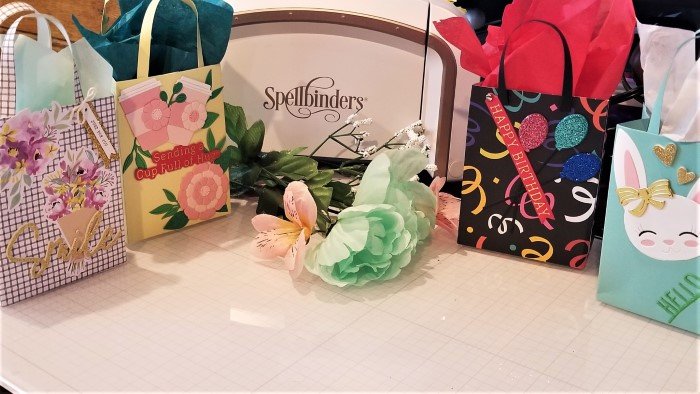
Today I’ve got another fun project using another of the March 2022 New Releases. This time I’m creating some adorable 4-inch tall gift bags using the Gift Bag Etched Dies from Spellbinders. These little bags are just so sweet, and you can decorate them for any occasion!
Quick and Easy Gift Bags

I’m sharing this project using products that Spellbinders sent me as a member of their Spellbinders Club Influencer Group.

So what is in the March 2022 New Releases from Spellbinders?

Well, there are several new collections.

You can see all of the new releases over on the Spellbinders Site.

If you’ve been following me here, or over on my YouTube Channel and Facebook Page and Groups, you know how EXCITED I get when I get to start playing with some new Spellbinders products. I think “excited” was a bit of an understatement this month.

First Quick and Easy Gift Bag
Quick and Easy Gift Bags

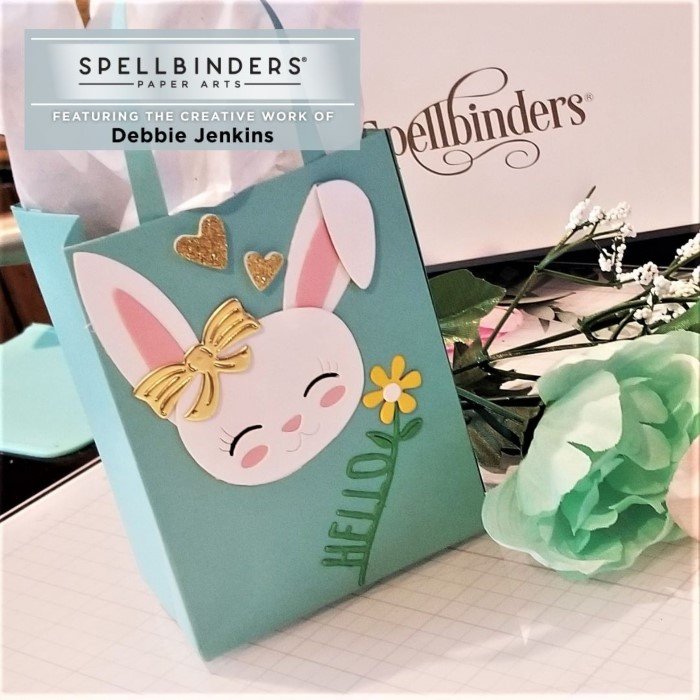
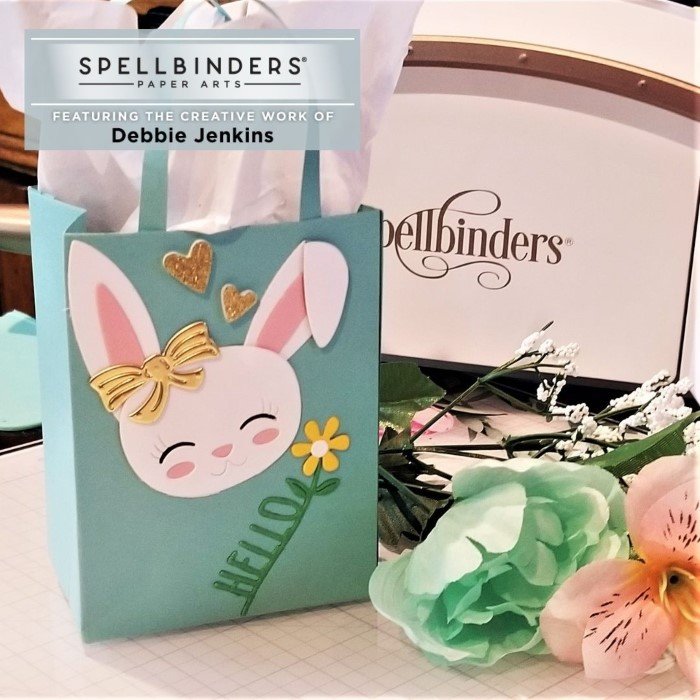
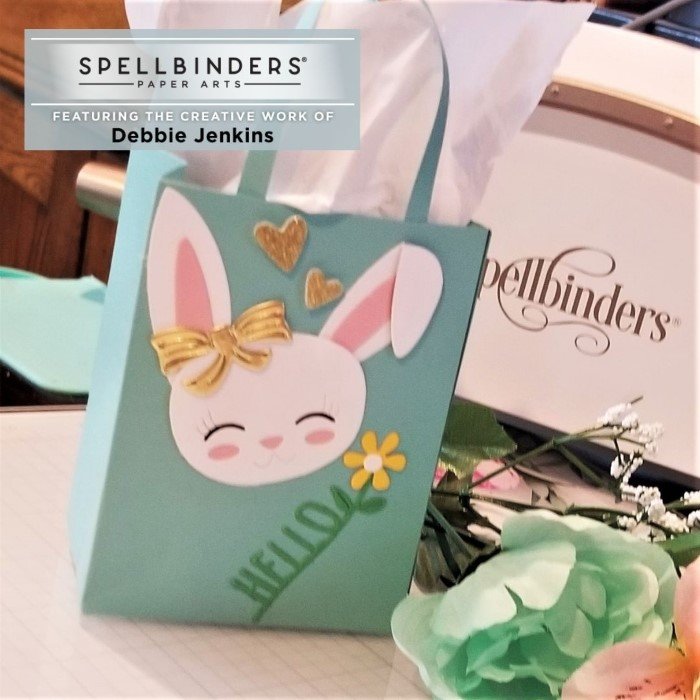
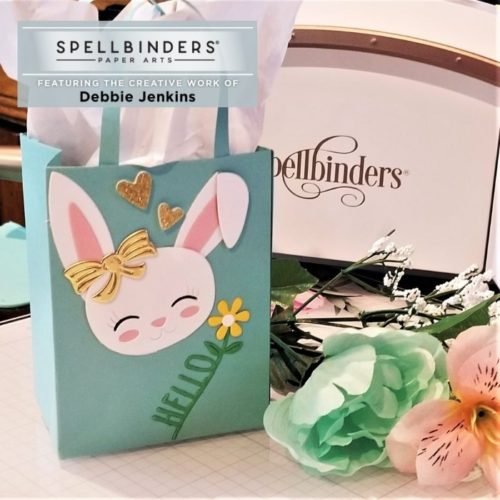
For the first bag, I used some light blue medium-weight cardstock to create the bag. Then I decorated the front with die cuts in my stash. The cute bunny and sentiment flower were extras that I cut out using the dies in this month’s Card Kit of the month.

Second Quick and Easy Gift Bag
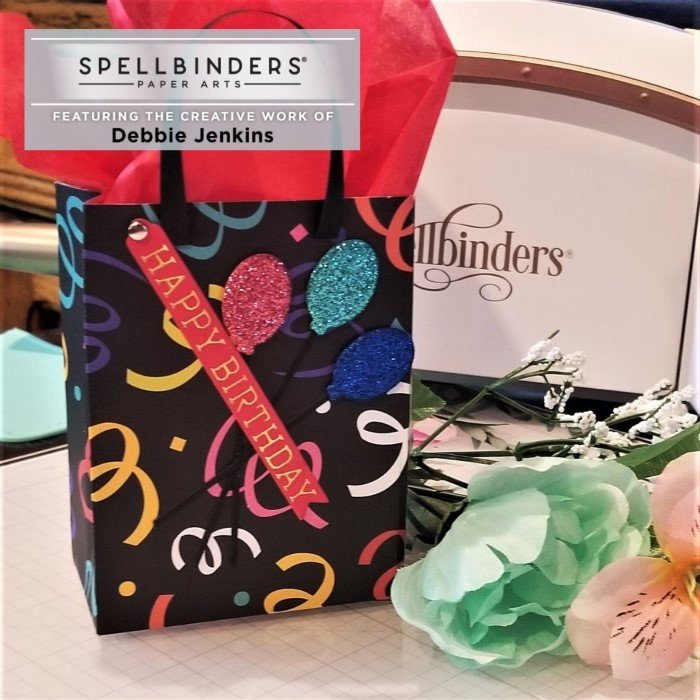
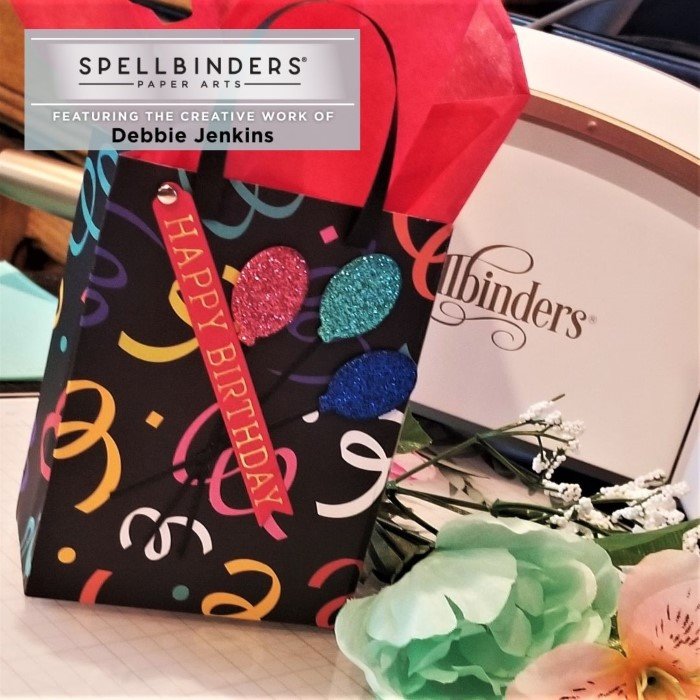
Quick and Easy Gift Bags

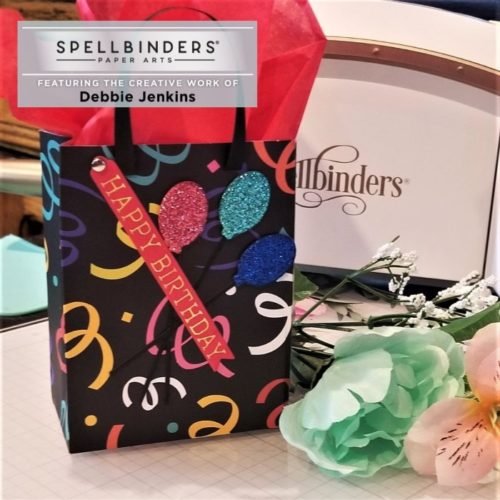
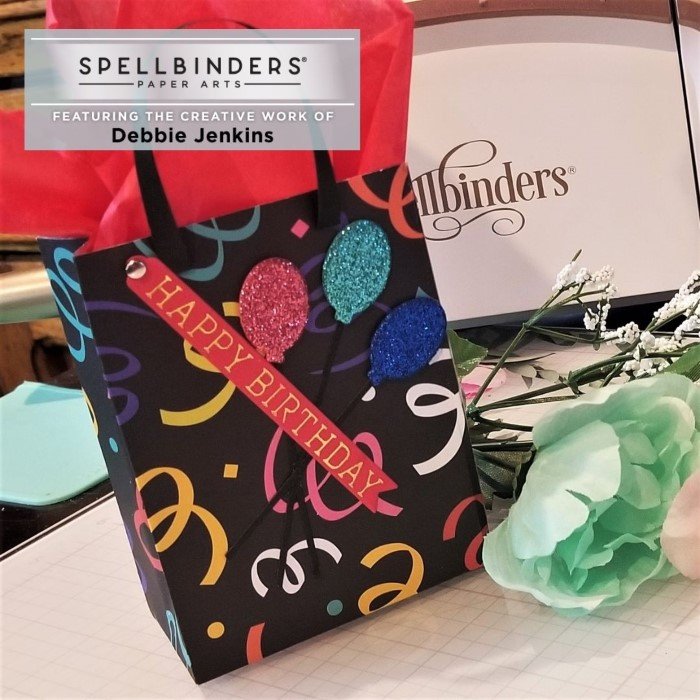
For the second bag, I used some lightweight pattern paper from Hobby Lobby and added some balloons cut from Spellbinders Glitter Foam using the Open Road Etched Dies. The sentiment is foiled in Gold Glimmer Foil using a glimmer plate from the new We Dance Glimmer Sentiments, cut with one of the new Swallowtail Tags Etched Dies and attached with a mini-brad from my stash

Third Quick and Easy Gift Bag
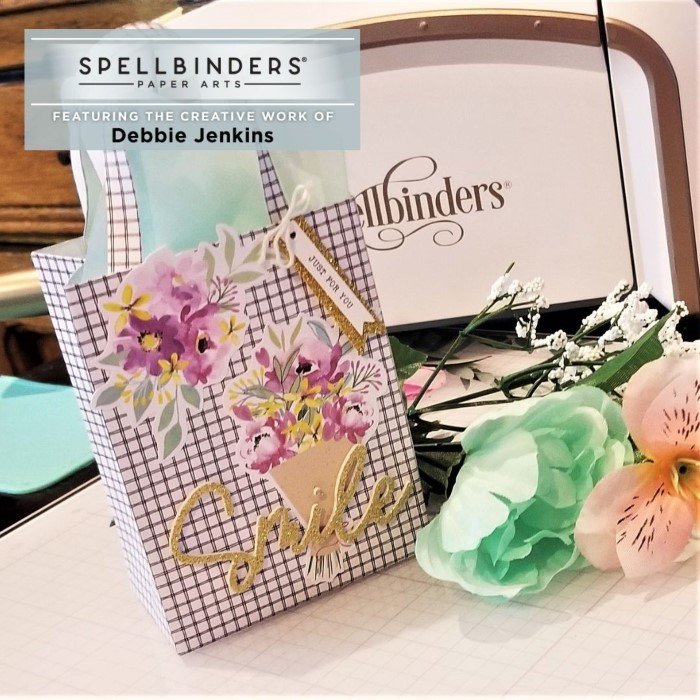
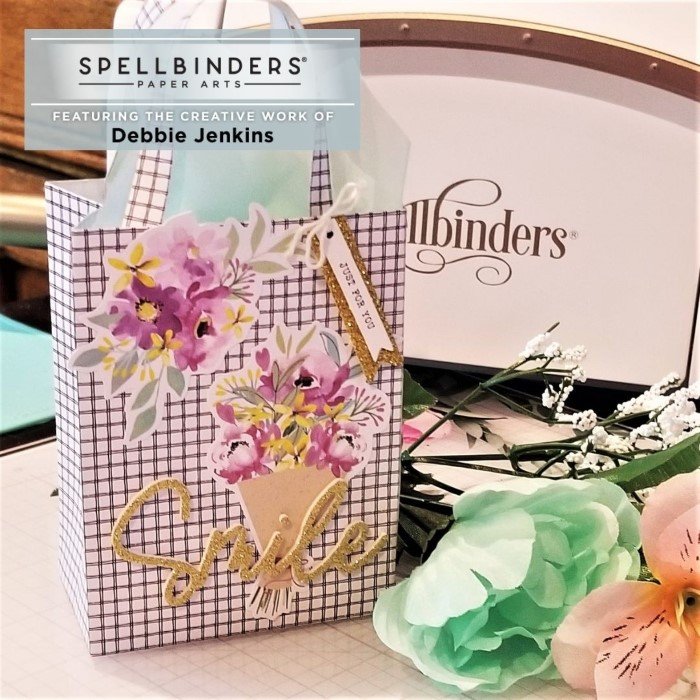
Quick and Easy Gift Bags

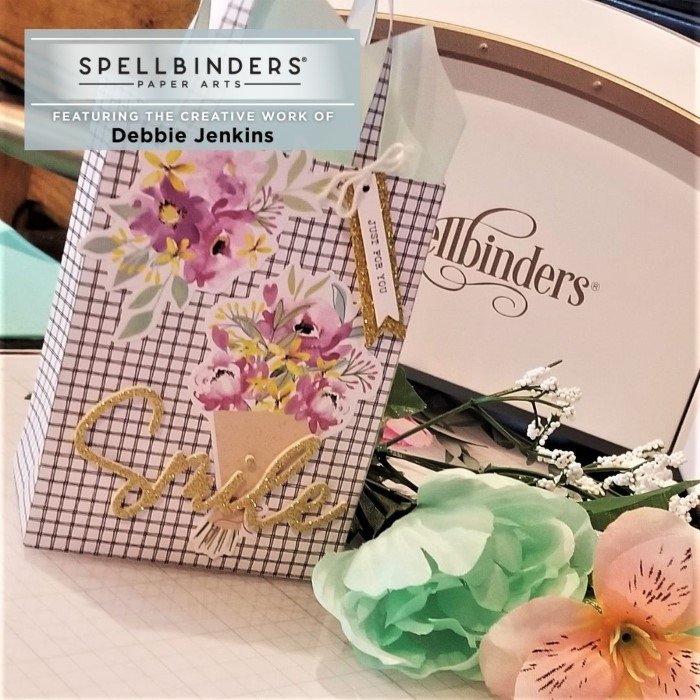
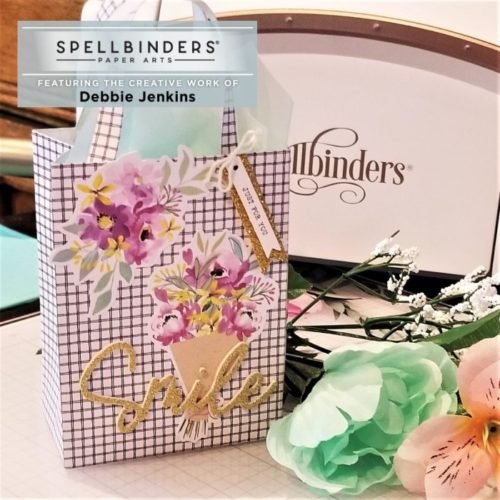
The third bag was probably the easiest! I cut the bag from a 6×6 pattern paper from the January Card Kit of the month and used ephemera and Thickers from the January and March Card Kits.

Final Quick and Easy Gift Bag
Quick and Easy Gift Bags

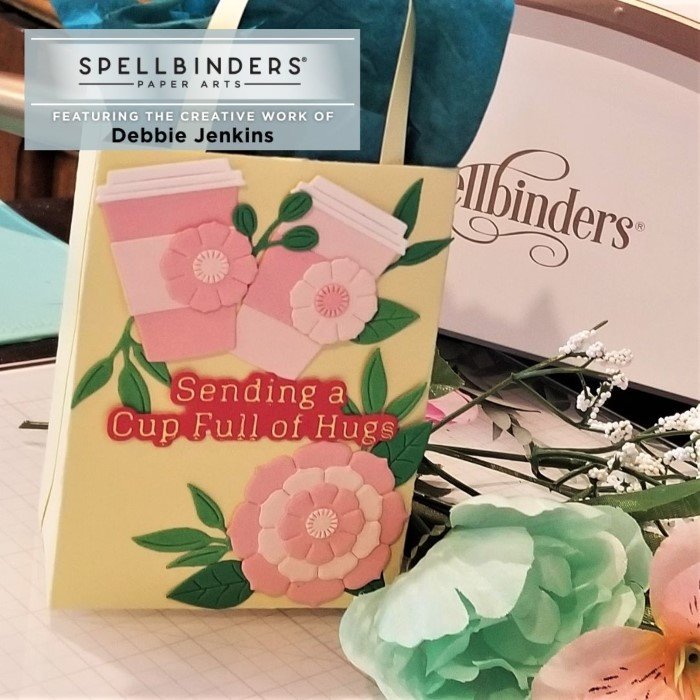
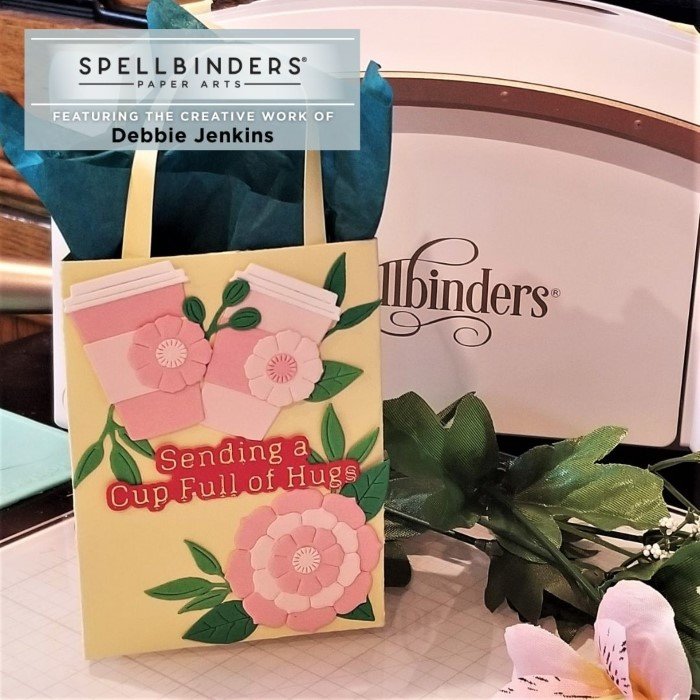
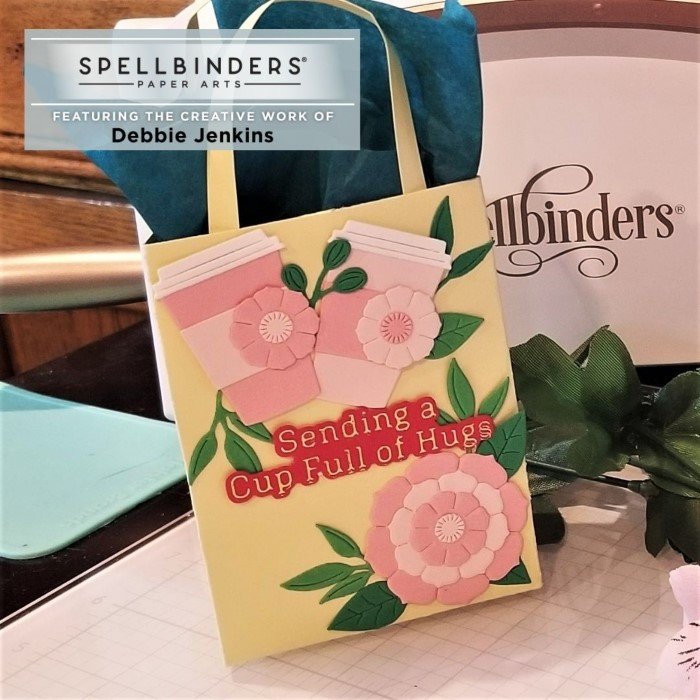
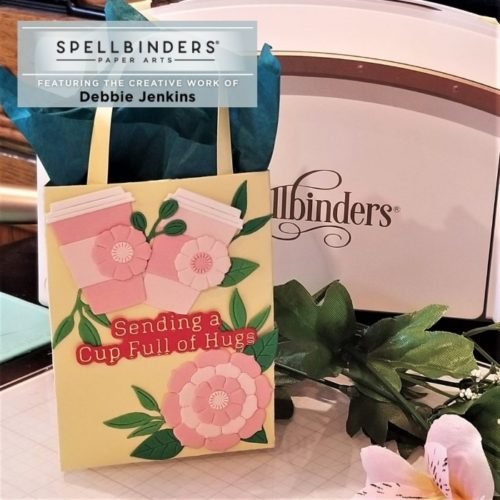
For my final bag, I used heavy-weight yellow cardstock from Spellbinders as well as some of the dies in the new I Dance Etched Dies. For the sentiment, I pulled out another Glimmer Sentiment made using one of the foil plates from the We Dance Glimmer Sentiments.

Quick and Easy Gift Bags Video!

YouTube player

[Music] hi guys this is debbie with debbie j’s crafting corner i’m actually restarting
0:11
um recording on this i created these cute little bags but for some reason
0:16
some of my recording didn’t work so i’m going to just start over these both were created using some patterned paper this
0:22
was from just a patterned paper pack from paper studio it is some thin paper
0:27
so you can make these using thin paper and i think they turned out great and they do
0:33
it’s not really that hard to fold all the pieces this one was using a piece of
0:38
a pattern paper pack from scrapbook from sorry from spellbinders
0:44
this is part of the have a springy day paper pack that was part of the card kit of the month this month and i figure i
0:50
can use some of the embellishments the ephemera from the paper pack to decorate
0:55
this one up so i’m going to be doing that in a bit but what i decided to try since i just did two different ones with
1:02
paper with patterned paper this one’s really pretty thin this one is thicker
1:07
but it is a bit thin too so this time i’m going to try it with some
1:13
cardstock this is some spellbinders cardstock i think this is a hundred pounds so what i think i’m gonna do is
1:19
actually cut them out of both the heavyweight that’s this one and some lighter weight cardstock that i’ve got
1:26
from this is some michaels i think that cover color looks kind of
1:31
cool i think this one’s kind of a tealish color so i’m going to do two more bags and do them out of some lighter weight card stock these are the
1:39
dies that come in that set from spellbinders this is part of the celebrate you collection and it’s just
1:45
the two dies but it’s everything you need to create the bags you do want to cut these out twice and you can see all
1:51
these little score lines that show you where you need to fold your paper which like i said when you’re using thinner
1:56
paper is pretty easy to do so let me go ahead and cut those out and
2:01
then we can start putting those little bags together okay first off this is right at
2:08
just just under five and a half you can see that this line i have drawn here on
2:14
the washi is right at my five and a half inch mark from the edge so that i have just enough room so you do have enough
2:20
room to be able to cut out an entire bag from one sheet of cardstock if you’re using the patterned
2:26
paper since it is six by six you’ve got plenty of room and you’ve got a little bit of extra on the side if you slide
2:32
the die all the way over the side to be able to cut out your your little
2:38
handle so that works out pretty good so first i’m going to cut these two
2:44
pieces of cardstock down to five and a half each
2:51
okay so now i’ve got two that are the heavyweight cardstock and two that are
2:56
the lightweight cardstock i think i’m going to start off with the lightweight
3:02
and just run that through my platinum six machine that i have sitting over
3:07
here off to the side and like i said because this is you know this is exactly five and a half inches
3:13
so you’ve got just barely enough room
3:22
okay so i’m basically lining that up on the edges there
3:33
and let’s go ahead and run that through my platinum six
3:46
okay and now you can see let me see if i adjust the lights if you can see the
3:52
score lights a little bit better
3:59
there you go so you can see that there are these little score lines there and those are the places that you’re going to want to fold your card
4:05
okay so i’ve got all of those cut out now with the scraps you have left over here because it’s only five and a half
4:12
it’s not quite long enough to count for this strap i’m
4:17
i’m thinking having it just a little bit shorter isn’t really going to matter all that much so i think i’m going to go
4:23
ahead and cut out the straps too from both up from all of this and they’re just going to be about
4:29
uh right about a little bit less than half an inch short and that should still be fine you also don’t have to use the die
4:36
for this you can just cut the strips for whatever width you want these are
4:41
basically right at a quarter inch so quarter inch strips would work fine
4:46
to be able to make your handles so i’m going to put that off to the side for the moment and i’m going to go ahead and
4:52
start working on assembling these guys now because they are you know because of those those score lines it is sometimes
4:58
a little bit tough to see them and i’m thinking it’s probably going to be a little bit more difficult to fold
5:04
them you know fold them easily anyway using this heavier weight of paper
5:10
instead of this lightweight this lightweight paper so what i’m going to do this time
5:16
is i am going to go ahead and use my scoreboard to score those lines
5:22
now the hard part is seeing exactly where those lines are
5:27
and then you’ll want to line up the line with the score
5:35
the score mark in your scoreboard in order to get them right so i’m first going to do the vertical
5:41
ones so now you can see that line a little bit better this one is right about here
5:49
so i’m actually going to crease that a little bit on the end so it’s easier for me to find and same thing with the
5:55
second one and that way i can just line them up with the mark in my scoreboard
6:07
and create that that score that i can see a little bit better so that i can fold it a little easier
6:12
do the same thing with this one
6:24
okay and then we’ve got so we’ve now got all of the vertical pieces now we need the
6:30
horizontal and do the same thing with it and i can see it a little bit but i want
6:37
to make sure that you guys can see it too
6:47
just adding to the existing score line okay then the other lines that are on
6:53
here that need to be scored instead of being vertical or horizontal those are at an angle
6:59
so i have this cool little tool it’s actually made for the score envy but i’m
7:04
just using it on the scoring board that i have and what i need is a
7:09
diagonal right there okay so what i’m going to do is i’m going to
7:17
butt the edge of my paper up and
7:22
find that piece there there we go
7:28
and then i’m going to score to this corner here
7:35
now this creates a bag that doesn’t fold flat so i’m just turning it over this
7:41
time and that way i can see where i’ve already scored i’m going to line that up with one of my
7:49
grooves and go ahead and score that side and now i’ve got this bit here that we needed to have to
7:55
be able to fold the bag i’m going to do the same thing with my other
8:01
piece of cardstock so now we can go ahead and start
8:08
assembling our card now the first step to do that is to basically glue the pieces together and the way that that
8:15
works is we’ve got this thin line here that’s going to attach to the wider line on that side
8:21
and the same thing on the other so i just need a piece of scor tape to go down that edge
8:31
okay and again i am using my trusty scoreboard to help me get everything
8:37
lined up
8:43
before i do that though i am going to go ahead and burnish these make sure everything is
8:50
where it needs to be
9:10
and this helps me to see that this that the gusset is actually the right size
9:20
okay so this gusset is going to be adhered right there see what i mean
9:26
okay so let’s take that double-sided adhesive off
9:33
butt everything up right at the edge and then i’m going to take this piece and it
9:39
basically tuck it down onto the edge and attach it to that double-sided adhesive tape
9:47
okay it should be right up against the edge
9:53
you do want to make sure that the parts that have got the um diagonals are both on the same end otherwise you’re going
9:59
to have kind of an upside down everything is nothing’s gonna work right on your
10:05
on your little bag okay so there we go we’ve got one side done and now we just
10:10
have to add some double-sided adhesive on this other side
10:24
take the release paper off
10:32
and press everything back down and now we have got
10:39
the beginnings of our little bag so for the bottom side what we need to do is the way i think of it is like when
10:46
you’re wrapping a package first you put the paper around your box and then at the end
10:51
you fold a couple pieces in right which this would have helped if i had actually folded
10:58
on the diagonals first which i did not do glad i scored them well enough
11:05
so we’re going to actually this was going to help
11:10
okay so that’s broken just a little bit the sides go in
11:16
the two sides go in and that’s going to form these little
11:22
triangles on the sides just like when you’re wrapping a present
11:28
so that’s like the end of the box down there okay
11:33
and then we just need to adhere these down to the bottom
11:41
so for that i am just going to use some more of that scor tape
12:08
go ahead and adhere that part down i’m putting my hand inside so i can give it a little pressure and help to burnish
12:15
that in and i’m going to do the same thing on the other side
13:06
and now we have this cute little bag
13:11
and there are a lot of ways that you can decorate it
13:16
i’ve seen folks do embossing on you know going through with an embossing folder
13:22
on the main panels putting panels on top all of those good things so i think what
13:27
i’m going to do right now is go ahead and gather up some things to start putting things together and then we can see about decorating our
13:36
little bags
14:07
so for my first bag i decided to use well i decided to go into my little scrap bins of all the extras that i’ve
14:14
had so far this spring and i’m going to use this cute little bunny and this is
14:20
basically just the scrap from where i created the box to give me an idea of what it’s going to look like flat
14:27
before i start putting everything together what i do want to do is add a little dimension behind the ear so i’m going to
14:33
do a few layers of cardstock behind that so that’s the first piece that i’m going
14:38
to do and this is just like i said just a piece of scrap from my scrap bin
14:48
and i think i think four layers of cardstock behind
14:55
that ear should be enough to pop it up nicely
15:02
and if it turns out that i have any edges that are too you know too big for the ear i can
15:08
always just trim those down a little bit
15:17
and it all fits just fine behind my little ear so that is perfect
15:23
and you could use some foam tape for this i’m just choosing this time to use some cardstock
15:31
okay let that dry for a minute and then i’ve got this little
15:37
this little flower i believe was from the same set and
15:43
there are these little centers that also come with that same die so i’ll go ahead and adhere that
15:49
together
15:57
and then i will put that right on the end of this hello stem
16:11
that is going to be adorable i’ll put the ear down first
16:27
because i want it to actually be on the bag instead of hanging off
16:37
and now we can go with the face
16:42
go ahead and add some adhesive to the back of this ear
17:00
i also have a couple of these gold bows that i had
17:05
die cut out during that other project go ahead and add one of those down
17:13
i think i want this to be a girl bunny so i’m gonna put it up in her hair
17:19
and then add a little bit of glue behind this little sentiment
17:36
that is super cute
17:43
okay so i’m going to start working on this bag decorating it up and what i’m
17:49
going to start off with not sure 100 what i’m going to do on that one but what i wanted to start off with is this
17:56
first this glimmer cinnamon now i had done this um sometime last week i went ahead and glimmered up a few different sentiments
18:03
from one of the new sets this one is from the week dance glimmer sentiments and i’d already trimmed it out but now
18:09
i’m deciding i think i want to use this cute fishtail banner that is another one
18:15
of the dies that is in the celebrate you set so i am going to center that
18:21
over my happy birthday and i’m going to basically re-cut it so that it’s got that nice little banner
18:27
and then another die that comes in that set is this piece which cuts
18:33
a cardstock string if you will to attach your little banner with
18:42
so let me go ahead and run both of those through my platinum six and tape this in
18:49
place first and what’s nice is this one is actually perfectly sized for this
18:57
little um for this sentiment the sentiment is right at a
19:06
looks like it’s might be a quarter inch but i think it’s actually a little bit bigger than that but let me go ahead and
19:11
tape that down and tape it to my magic mat so hopefully
19:17
it won’t shift at all and then i’m going to just take a piece
19:22
of scrap and i know it’s not the right size but i don’t necessarily need the whole thing and i’m just going to go
19:28
ahead and cut that one out as well at the same time
19:42
and i have a second string so that looks good let’s see how this one came out
19:51
and that looks pretty much perfect okay i am still going into my
19:59
extras and something that this made me think of is since we’ve got that little hole i’m thinking i want to attach this
20:05
to my bag with a brad so now i just need to decide which side do i want that to hang from
20:11
i’m kind of wanting it to hang at an angle as well so that means i’m thinking also i’m going
20:18
to put some adhesive on the back to hold it in place first let me go ahead and add my little
20:25
hole up here in the top and i’m just using my pokey tool to poke
20:30
a hole in there and then i’ll attach my little banner
20:38
i’m also wondering should i put another color behind it do another banner i can because i’m just doing this with the
20:45
the brad i can always change my mind later and add something more if i want
20:53
okay so i’m not going to attach that completely yet but that does look kind of cool i also wanted to add some of
20:59
these little balloons and i’m thinking that this little was supposed to hold our little banners
21:06
would work great to hold our little balloons
21:11
and it’s not going to really be seen but then again i think that’s pretty much okay so let
21:17
me go ahead and just add this to the back of one of my balloons here
21:35
and that i think will look good yeah that looks good let me go ahead and
21:40
add some adhesive to the back of the entire thing and then i can put this down
21:47
on the front of my little bag
22:09
my little brad with my little brat in the hall
22:18
and then right about there that’s gonna be good
22:32
okay and now my second bag is done
22:41
for this third bag i’m reaching into my ephemera and thickers and basically my
22:47
club kits stash this one is from the january set and had all these really
22:53
cute little flags and i think i want to use one of those and i think i want to use one of the
22:59
thickers that’s on the front too so i’m really liking this one that says
23:04
smile and then these little bouquets are from this last month’s ephemera pack
23:10
every one of the ephemera packs from spellbinders has got tons of flowers and i think that they are just lovely and
23:16
would work for so many different things i’ve also used these in my planner and i mean i have always had a problem with
23:23
trying to even use ephemera because number one i didn’t actually color
23:28
everything up so that’s one of the bits but the second one is you only get so
23:34
much and then you run out but i am finding that there is so much in each of the club kits
23:40
in each of the card kits of the month from spellbinders that aren’t unlikely to be able to use it all
23:46
up when you are on um when you’re getting these each month so
23:54
i have still got a lot from january and february and march that i still need to
23:59
use up and that’s going to be a lot of quick and easy cards for whenever i need some cards but this
24:05
is another way that you can use your ephemera it’s just adding it to a pretty little gift bag
24:12
to basically customize it so now taking this smile thicker
24:18
that’s what i call them i think there was a brand or something like that at least a couple years back but these are
24:25
basically a glitter foam sticker so they are thick because of the foam
24:31
and they are stickers because of the adhesive and they are all nice and shiny and glittery
24:37
so just add that
24:42
smile across there and i missed one of the little bits that’s stuck in there let me get that out of the e okay
24:50
and we don’t want to forget the little tittle okay so now it’s in the right place and
24:56
it’s kind of stuck there so i am going to press it in to make sure that that stays
25:05
and then i do want to use one of these and i think i’m going to go with this one that just says
25:11
just for you and then stick it up near the top so it
25:16
looks like it’s attached to the top and then that one is all done
25:27
for this last bag it’s kind of plain but it’s springy because of the yellow i
25:32
decided i’m going to use some of the dies from the idents die set is again
25:38
another one of the new ones from this new march release and i cut out a bunch of little flowers and a coffee cup and i
25:45
also had this sentiment left over when i was doing my doing a little bit of a glimmer session
25:52
last week so i’ve got this one that says sending a cup full of hugs and i think it’s from the celebrate you
25:58
so like i will definitely link down below which sentiments um which glimmer sentiment sets that’s from so i’ve cut
26:04
out a bunch of these flowers and a bunch of the greenery to go with it and the coffee cups and i’m just going to start
26:10
assembling some of these and then i’ll decide you know how i want them to go on the front of that little bag
26:17
and each of these pieces this um this little coffee cup has some embossed lines to let you know
26:24
where you need to line up your little koozie on the front
26:29
and then of course we’ve got the piece that is for the lid i’ll put that on there too
26:46
and this is probably more than enough to go on the front of that up front of that
26:54
excuse me in front of that bag for the flowers i figured i would go
26:59
alternating with the colors
27:06
we’ve got basically got some pink and light pink dark pink light pink and i think that’s going to be pretty cute you
27:12
could also go in and kind of round the petal shapes a little bit to give it a little dimension but this is a gift bag
27:19
so i figured i’m not gonna put that much dimension on and i figure this is gonna be quite a
27:25
bit of dimension anyway just from the layers of cardstock
27:45
and then i cut out a couple of the smallest bits and i’m going to make a couple of small
27:51
flowers to go on this as well
28:00
and i think that is going to be perfect for the front of this coffee pot um coffee mug
28:06
it’s kind of where you do it and then as an after you thought you think you know i bet that’s where it belongs and sure
28:12
enough that is exactly where that little flower belongs so for this one i’m going to put it on
28:18
one of the darker pink with the lighter pink koozie
28:27
and i really really love the way that looks okay i think this is kind of the basic
28:32
design i’m gonna go with i am gonna add some more greenery and though let me first start off with
28:39
my flower and leaving a little around the edges space so that i can add some flowers in
28:50
while not having it go
28:56
over the edges to snag on things okay
29:02
same thing with my mugs
29:32
so
30:00
so
30:49
and this i think needs a little bit i think it needs to be popped up just a little bit
30:54
so let’s cut a couple pieces of cardstock to go behind it
31:56
now you can always add more cardstock to the back or even use some foam tape
32:02
i just wanted a little bit of dimension for the sentiment just to pop it up just a touch
32:09
mostly that i don’t do a lot with gift bags but i have a feeling that some
32:15
of these bits may try to come off when it’s in use but the cool
32:20
part part of this is even if you give somebody a really sweet gift inside
32:25
they’re probably going to want to keep your little piece of artwork that you did with the bag
32:32
now i think that is just precious
32:38
[Music] so let’s take another quick look at all four of the bags
32:44
and you guys let me know down in the comments which one is your favorite so we’ve got this one that uses the bits
32:52
from i dance this one it uses some ephemera pieces
32:57
and thickers from one of the card kits this one uses the small die of the month
33:04
actually this was the that’s actually the card kit of the month from last month and then this one uses bits from
33:10
the open road set and of course the glimmer sentiments that go with a couple of these kits this month so i think that
33:17
they all turned out super cute you guys you know now because i’ve done it if i can do it you can too check out this
33:24
other video where i’m making some more projects using some amazing spellbinders products and you guys have a wonderful
33:30
day thank you so much

If you like this content, do all the things!

  • Show me (and Youtube) that you LOVE these videos and posts by subscribing, liking, commenting, and sharing them!
  • Become a sponsor of my channel and blog and help me create my next posts by making a one-time donation! All contributions are welcome!

Here are the collections and products that I’ll be making projects using and that you’ll be seeing videos, photos, and posts featuring over the next month or so.

Check out all the photos of my Quick and Easy Gift Bags!
——— SUPPLIES ———

(and where to find them)

JUST A NOTE: The stamp and die set were provided to me by Spellbinders to create inspiration to showcase these amazing products.  I was not paid for the creation of this post or video. I use affiliate links whenever possible in my blog posts and videos. It doesn’t change the way you purchase things, but it allows me to make a percentage off of sales. Thank you for using the links provided & helping me keep bringing you free content.

Other Crafty Opportunities!

If you just love crafting and want more ways to create with me, check out these other crafty opportunities. Each is super fun!


Check out our next Card Class!

❤To Be Announced Soon!

See you there!

Let’s hang out!

Planning Crafters Facebook Group
Crafting with Debbie Facebook Group

Thank You

Thank you so much for dropping by to see the cards that I created with these amazing stamps and dies from Spellbinders. Please give me a thumbs up, and comment because I love hearing from you!  

I hope you are inspired to create something AWESOME!  

Because, if I can make it, You Can too!

Big Hugs!

Debbie J

Logo

Deb Jenkins

Let me help you unlock your creative potential! 

Because, If I can make it, YOU CAN TOO!

Stalk me: 

Facebook Pinterest Instagram YouTube | Blog 

Visit my channel and Blog for tutorials, inspiration, and motivation! 

Please leave a comment

This site uses Akismet to reduce spam. Learn how your comment data is processed.