Hi, crafty friends! It’s Debbie from Debbie J’s Crafting Corner, and today we’re diving into some more Halloween crafting fun! 🎃👻
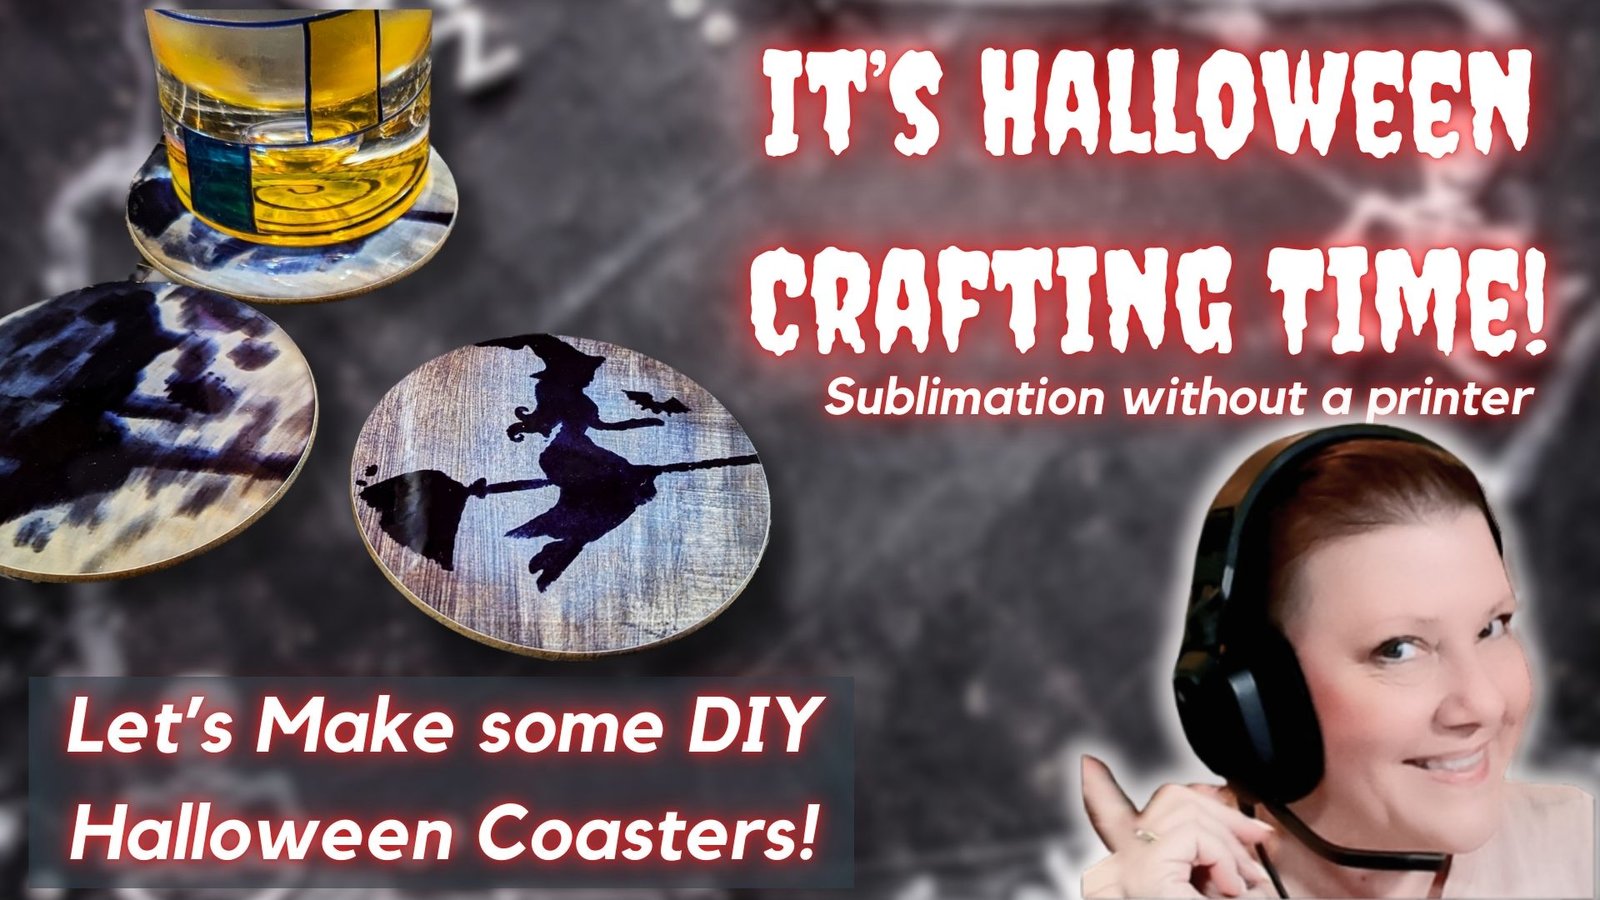
If you’re anything like me, Halloween is a fantastic time to get creative and experiment with different designs and techniques. Recently, I made a Halloween-themed card on my Twitch stream, and I just couldn’t get enough of the spooky vibe! So, I decided to take that same design and apply it to my next Artesprix blank—the polished circular coasters!

What is Artesprix Iron-on-Ink?
Artesprix Iron-on-Ink is a game-changer for crafters. It’s a specialized sublimation ink that allows you to transfer vibrant designs onto compatible surfaces with heat and pressure. Unlike traditional sublimation, which requires expensive printers, Artesprix makes it accessible for all makers. Once your design is transferred, it’s permanently infused, making it durable and long-lasting.

Supplies:
- ☑ Artesprix Blank – Polished Coasters
- ☑ Picket Fence Studio – Flying Witch A2 Stencil
- ☑ Picket Fence Studio – Haunted Moon Blending Stencil
- ☑ Picket Fence Studio – A Wee Bit Wicked Stamp Set
- ☑ Blending brushes
- ☑ Picket Fence Paper Pouncers
- ☑ Mint Tape
- ☑ Artesprix Blank of the month – Polished Coasters
- ☑ Artesprix Sublimation Acrylic Paint Set
Step-by-Step Tutorial:
Step 1: Trace Your Design Area
First things first—trace your coaster blank onto a piece of plain copy paper. This helps you know exactly where to position your design. I traced out two circles for the two coasters I planned to make.

Step 2: Mixing and Swatching Colors
For this project, I wanted to achieve a spooky, layered look with different shades of gray for the moon and a bold, black witch silhouette. To do this, I mixed Artesprix Sublimation Paints to create the perfect gray tones. It’s always a good idea to swatch your colors and press on a scrap piece of polyester fabric before committing to your design, as the colors can look different once heat-pressed.
Pro Tip: Mixing the paints and swatching them beforehand will save you from any surprises later!

Step 3: Applying the Base Layer
Using the lightest shade of gray, I painted the entire moon area on both traced circles. This will serve as the background for our layered moon design. Once that layer dried (I sped up the process with a heat gun), I used the Haunted Moon stencil to pounce on the darker gray shades.


Step 4: Stenciling the Witch
Next up is the witch! I centered the Flying Witch stencil on the coaster, secured it with mint tape, and applied Artesprix black paint using the pouncing technique. Be sure to use enough paint to get a solid, opaque silhouette. If you’re like me and tend to get a little paint where it doesn’t belong, don’t worry—just have fun with it!

Step 5: Create Your Sublimation Sandwich
Once your design is ready, it’s time to transfer it to the coaster. Place your design face down on the coaster and secure it with heat-resistant tape. Then, make your sublimation sandwich: protective paper on the bottom (the bottom bun), your coaster with the taped design (the burger and cheese), and another layer of protective paper on top (the top bun). This protects your heat press and work surface (or protective mat) from any transferred ink.
Make your sandwich like this:
1. Protective paper on the bottom (bottom bun)
2. Your blank with taped design (the blank is the burger, the design in the cheese)
3. And another layer of the protective paper on top. (top bun)


Step 6: Pressing the Design
I used my Cricut EasyPress for this project, pressing down firmly for 60 seconds at 400°F. (Alsays check with your blank supplier to know the heat and time needed. Artesprix includes this on the product page)
Be sure not to shift the press while transferring, as this can cause ghosting—a common issue where the design shifts slightly and creates a blurry, double image.

Step 7: Peek Test and Reveal
Before removing all the tape, do a peek test to make sure the transfer was successful. If it looks good, go ahead and remove the design for the big reveal! I had a couple of trials and errors, but that’s all part of the creative process. Even if the design didn’t turn out exactly as planned, I found that those “mistakes” added a creepy, ghostly effect that’s perfect for Halloween!


Final Thoughts
In the end, I created three spooky Halloween coasters that I’m absolutely thrilled with! Whether you’re going for a perfectly crisp design or a more eerie, ghostly effect, Artesprix Iron-On Ink gives you the flexibility to get creative and make something uniquely yours.

Thanks for crafting with me today! If you don’t have Artesprix Iron-On Ink in your toolkit yet, head over to the Artesprix Shop and check out their starter kit, which includes several blanks to get you started.
I’d love to see your creations using Artesprix Iron-On Ink. Share your Artesprix projects with us by using #debbiejscraftingcorner, #Artesprix and #IrononInk or post it to the Artesprix Facebook Group and to my Crafting with Debbie Facebook Group!
Because if I can make it, You Can Too!
~ Big Hugs, Debbie J
Want to see more Artesprix Projects? Check these out!


