
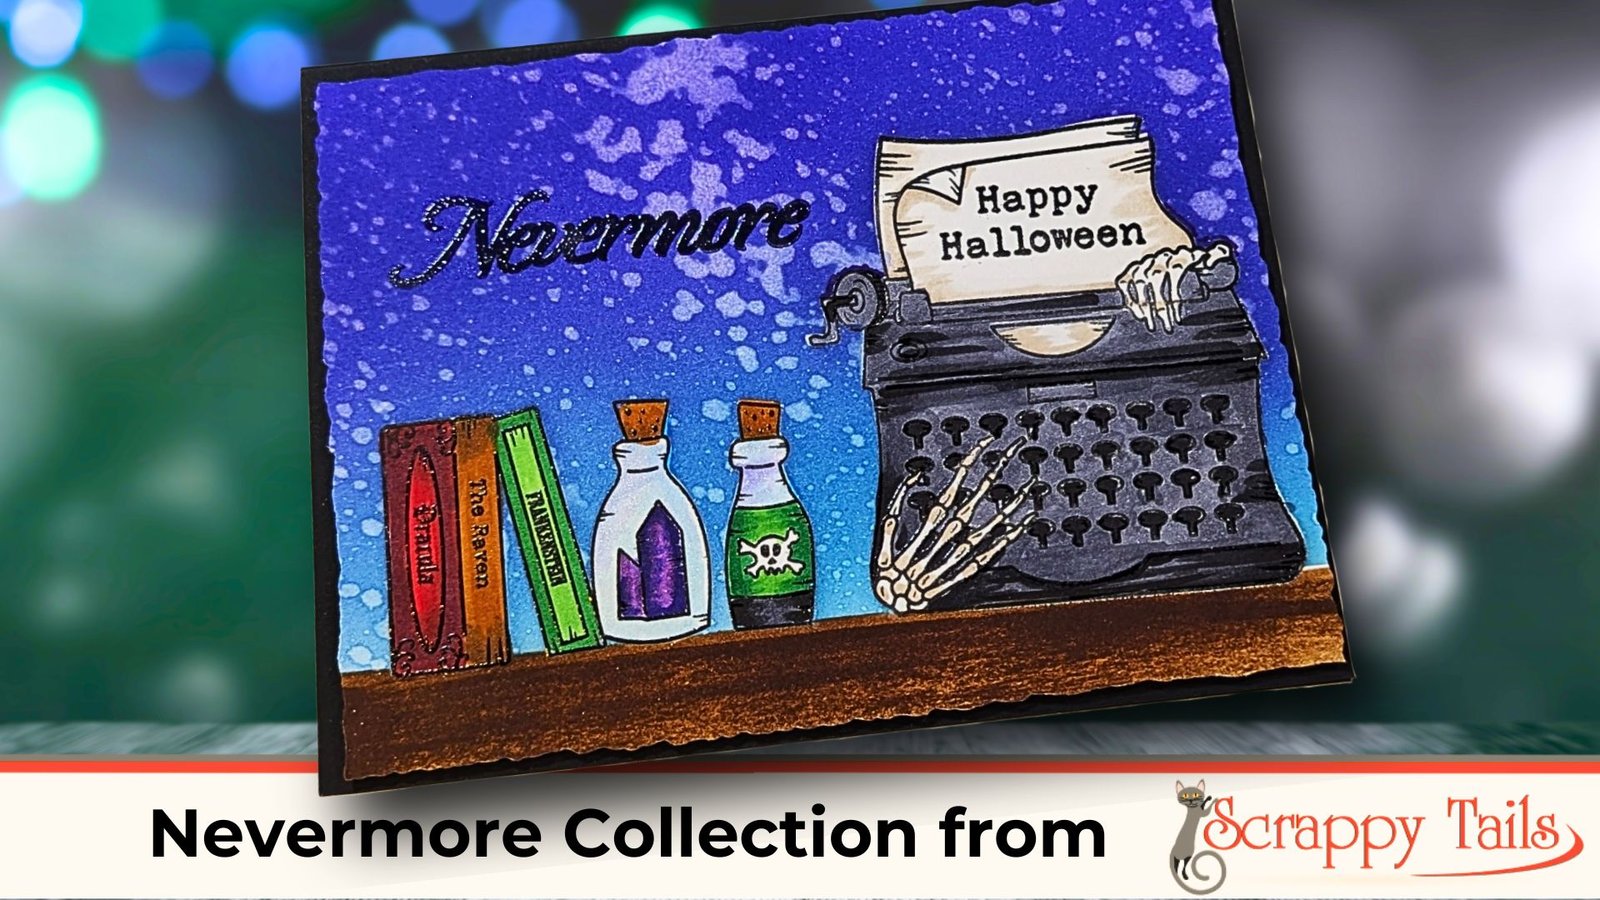
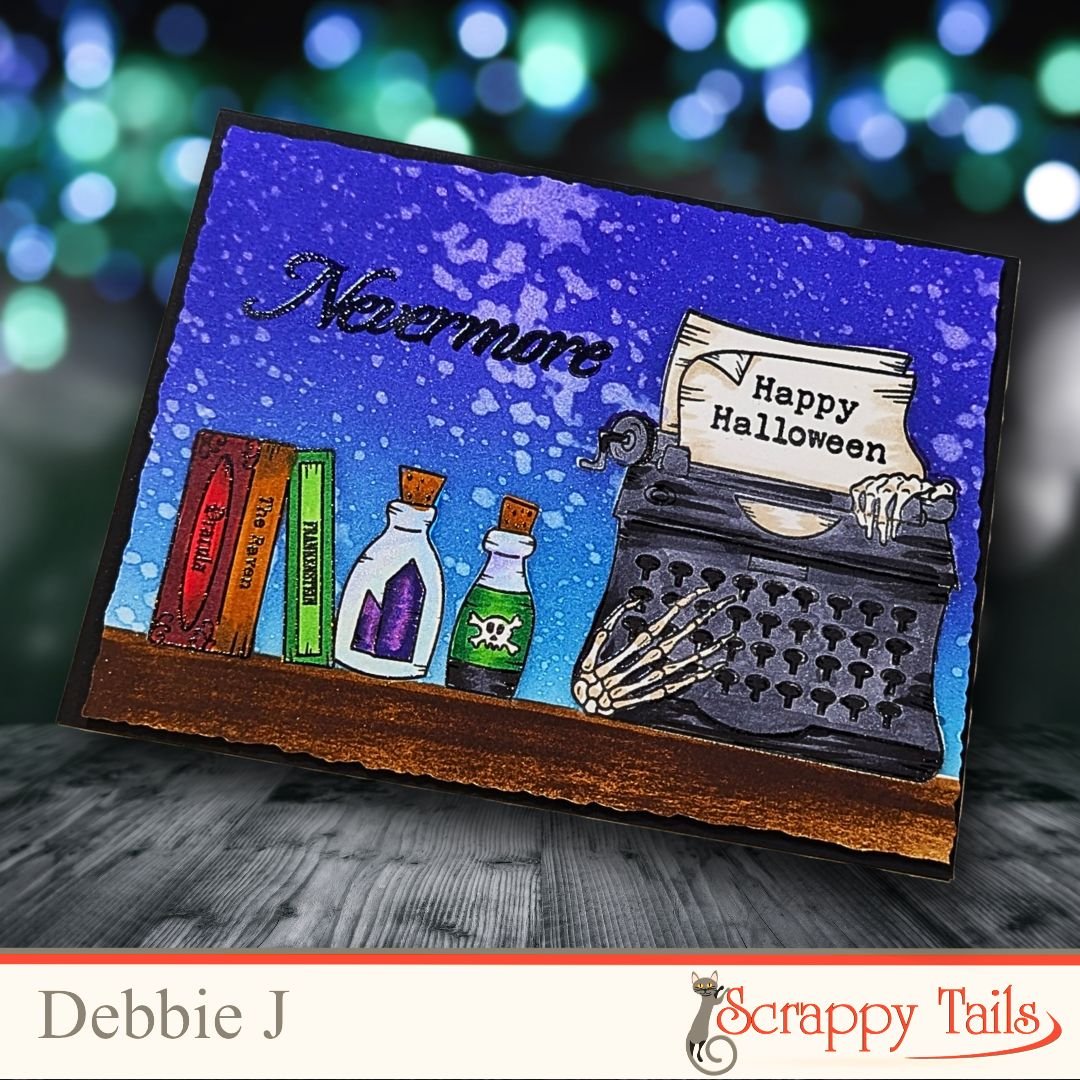
Hey Crafty Friends, it’s Debbie from Debbie J’s Crafting Corner, and I’ve got a spooky treat for you today! We’re diving into a fun Halloween card project using the Scrappy Tails Nevermore Collection. If you’re a fan of eerie elegance and ink blending magic, you’re going to love this! In today’s project, we’ll create a flat card with intricate stamping, embossing, and blending techniques. It’s a perfect way to showcase the stunning images from this collection.
Tools & Supplies:
- Nevermore Halloween Deluxe Card Kit
- 6X8 Nevermore Stamp
- Sizzix Stencil and Stamp Platform
- Versafine Clair Nocturne
- WOW! Clear Embossing Powder
- Large Flat Blending Brushes
- Simon Hurley Inks
- Ohuhu Honolulu B Series Markers
- Scotch Foam tape
- My Sweet Petunia – Glue Press
- Bearly Art Glue

Step-by-Step Instructions:
Let’s Get Started!
For today’s card, I’ve pulled out a few fun goodies from the Nevermore Collection, including some fantastic patterned papers and a hauntingly gorgeous stamp set. Now, while there’s a coordinating stencil that I don’t have, the rest of the collection is more than enough to spark your creativity. So let’s jump in and start crafting!
Step 1: Stamping the Scene
I began by laying out the stamps on my Sizzix Stencil and Stamp Platform. For this project, we’re keeping it simple by stamping directly onto cardstock to create a flat design. I didn’t stamp perfectly the first time, but that’s all part of the plan! I’ll be masking the images to add depth later with some ink blending.
Step 2: Masking for Ink Blending
Masking is key for this technique. After stamping, I cut out my masks on cardstock instead of struggling with the post-it tape (been there, done that!). It makes cutting the masks so much easier. Once the masks are in place, it’s time to create a spooky background with ink blending.
Step 3: Embossing for Extra Pop
Before we dive into the ink, I stamped and embossed my images using VersaFine Clair ink and Wow Clear Embossing Powder. The Wow powder is my absolute favorite because it includes anti-static properties, which means less stray powder and more crisp, clean embossing.
Step 4: Ink Blending Magic
For the background, I used Remember Me (a medium blue) and Crown Me (a rich purple) inks from Simon Hurley. I started with the blue, applying it in broad strokes behind the stamped bottles and typewriter. I love using big blending brushes because they give me a softer, more even blend without harsh edges.
Next, I came in with Crown Me, a newer, more saturated ink pad that adds that perfect spooky touch. When blending, the trick is layering. I added multiple layers of both colors to ensure a smooth, seamless blend.
Step 5: Adding Texture with Water Splatter
This is one of my favorite steps when ink blending—adding texture by splattering water onto the blended inks! Since these inks are water reactive (I’m using Simon Hurley’s inks, but you could also use Catherine Pooler or Tim Holtz), the water lifts some of the color, creating a cool, textured effect. It’s an easy way to add extra interest to your background.
Step 6: Coloring the Stamped Images
After removing the masks, it was time to color! I used my Ohuhu Honolulu B Series Markers, which are new to me, but I’m really enjoying practicing with them. I kept the colors rich and dark to match the spooky vibe of the card.
Step 7: Finishing Touches
Finally, I decided to add the word “Nevermore” to my card in the upper corner. This tied everything together perfectly, giving the card that extra touch of Edgar Allan Poe-inspired mystery. I stamped and embossed it just like the other images, ensuring it would stand out against the ink-blended background.
And That’s a Wrap!
There you have it, a spooky Halloween-themed card perfect for this eerie season! From the rich ink blending to the sharp embossed images, this card was so much fun to create. I hope you give this technique a try, especially if you’re a fan of layered stamping and blending.
Don’t forget to share your own creations with me in the comments or on social media. Tag me “@debbiejscraftingcorner” on social media and share your photos with us in our Facebook and Discord groups.
And be sure to like, share and comment on this post! I love hearing from you!
Until next time, happy crafting, my friends! And remember, If I can make it, YOU CAN TOO.
~Big Hugs!
Debbie J
* By the way, this post may contain affiliate links. That means that, if you purchase something through the link, I’ll get a small commission at no extra charge to you. Thanks for supporting my YouTube channel and blog.
Want to see more using Scrappy Tails Products? You can find those here!
Thanks for joining me in some crafty fun!
Let me inspire you to create something great!
Because, if I can make it, YOU CAN TOO!
~ Big Hugs!
Debbie Jenkins
Stalk me! You can find all my links on my LinkBio!
