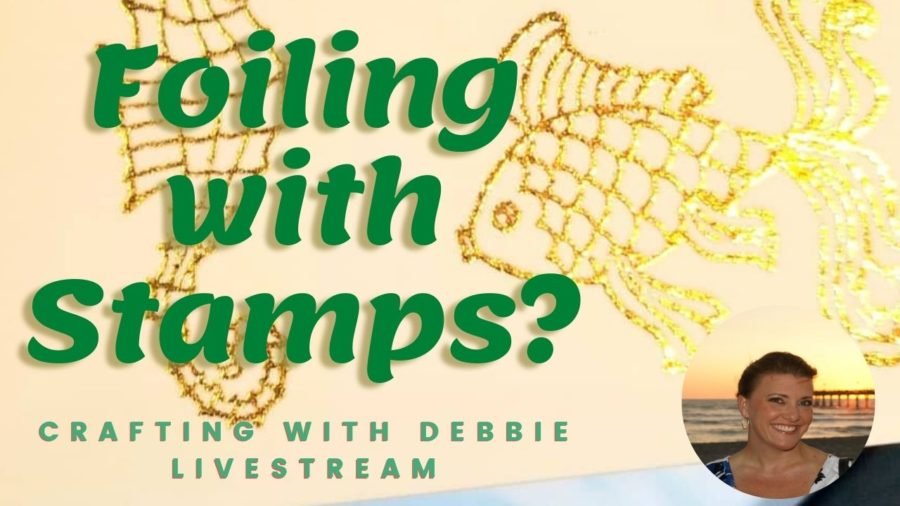
Today we’ll be Foiling with STAMPS!
Ok.. this isn’t really happening today. This LiveStream is from May 18, 2021. I meant to complete this post a long time ago.
Actually, Today I’m looking back through my blog posts (to see how close I am to being completely caught up). And what did I find?
There are still some older videos that I really want to get a post up for.
Like this one. Back in May, I was sharing lots of ways to use your foils and we did a livestream where we foiled using stamps! I like to keep it real with you, so there are some successes, failures and some that are kind of in between. All are usable for future projects.
For this post, I tried a different type of format and I’d love to hear what you think.
That being said, I put the following post together month’s ago. And I thought it was already published.
And Because I wanted to share good information from the LIVE, I tried using a software to grab the transcript. And I tried to clean up the text from that… I realize now WHY I never finished. That was taking days to clean up… so any future posts using a transcript may not be something I can due if it needs to be cleaned up.
Sooo… let me know what you think!
Video Transcript
Let me know what you think of this idea… I’m going to try creating a transcript of our next few live streams (and maybe some of the regular videos) to help you find ALL of the information and details that are in each video more easily.
It won’t have time stamps. Unfortunately the time stamp generated by the software I used this time were not correct… maybe next time.
Please leave a comment below whether this idea is helpful for you.
Check out the replay of “Foiling with STAMPS!”

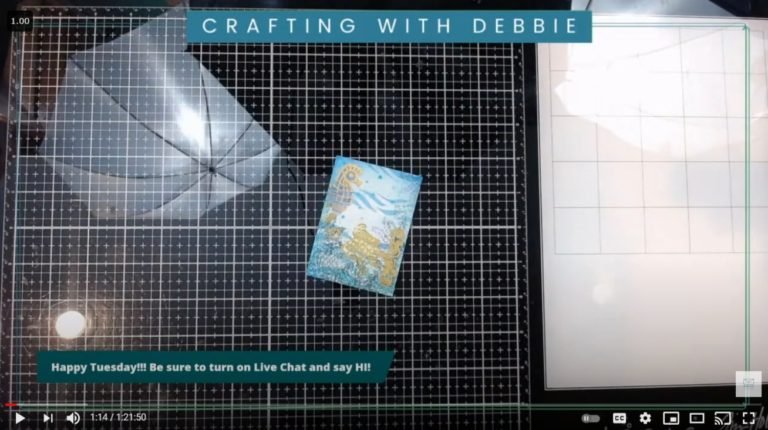
Here is the transcript from the live
Hi guys. It’s Debbie, from Debbie J’s Crafting Corner.
So I’m gonna go ahead and just start off with why I just decided to try doing this tonight.
I was making some artist trading cards this week and decided to revisit something I haven’t done in a little while and that was try foiling on stamped images.
Now this first one didn’t come out that well and I believe I’ve discovered what the issue was.
You probably can notice that there are some strips. That didn’t foil well.
Now what I used to do all of my foiling is my Crenova laminator and, because someone in the Foiling Snobs Group gave me an awesome recommendation a while back (that was a Miss Elizabeth), I’m using for my carrier sheet some parchment paper.
But you probably notice that there are some wrinkles in it.
I don’t know exactly why, but it’s been crinkling up a little bit as it’s it’s going through this machine.
So I think part of that might just be that I’m putting too large of pieces in. It wasn’t just this small. I was putting multiples in.
When I did this, but still you can see that I did get some pretty good foiling on there even with those little gaps if I didn’t tell you that it was there you probably wouldn’t notice.
So there are multiple ways to foil.
We already know that.
And it really depends on what kind of effect you’re wanting as to which ones gonna work for what you’re doing.
OK, so this is not for if you want it to be absolutely 100% perfect every single time because the things you use to make it happen are ones that we don’t always do 100% perfect.
Ok, so to start off with though, I’m going to show you some panels that I did yesterday and the stamp that I use for those and I’m going to do another test today and see if I can get a better result.
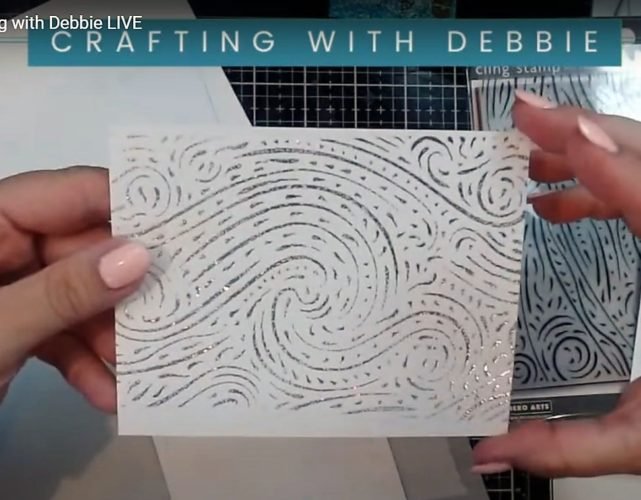
So I decided to use this big cling stamp from Hero Arts.
Because it is the starry night from Van Gogh. I absolutely love this. Hello, Miss Elizabeth, how are you doing tonight, Hun?
And we’re just getting started.
I explained that the reason that I decided to try this because I pulled out some stuff that I hadn’t tried in awhile to make some ATC’s over the weekend. Actually last part of last week.
And at the last minute decided to try foiling on them so all of them have got foil.
They turned out pretty cool, except.
Because I’m using the my carrier sheet that you had recommended has worked great so far of using parchment paper for some reason started crinkling in my laminating machine and crinkling the foil up.
I think it’s doing kind of a combination of both, so I’ve got some missed areas.
So when it comes to foiling, use what technique is going to work best for what you’re trying to do.
With mine I didn’t really care. This is kind of an artsy, kind of exercise that I was doing
So to me it didn’t really matter that much, it wasn’t perfect.
It’s also an ocean scene, so if there’s parts that you can’t see, that’s still good.
I think these turned out really good and I I’m super excited about it because, again, I forgot about it.
And I think you guys know that when I started doing all of these different foiling videos.
I think I mentioned that it had been ages since the last time I did any foiling.
I let my Gemini Foil Press sit for about a year before trying it out again and now I’m kinda hooked again.
Anywho, this I think turned out really good, when I made a bunch of these.
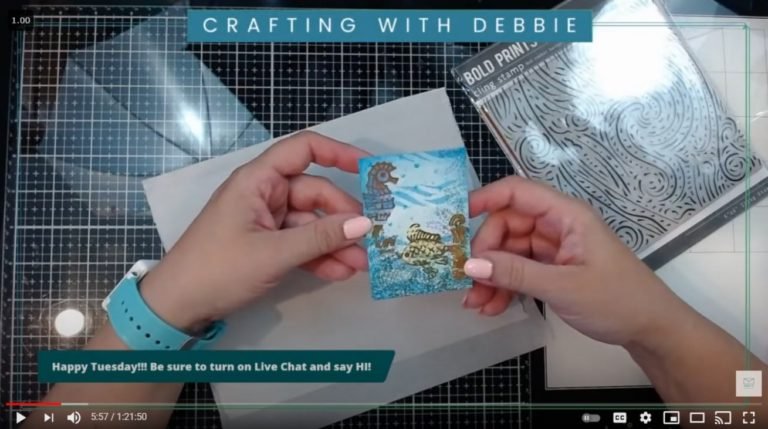
And then yesterday I made a bunch of different panels using this one.
I’m trying to figure out exactly why the first one I did didn’t work as well as I’d like, so I’m going to just go ahead and share that first before we go forward and try some more things.
So this is the first one that I get and I think it is gorgeous, but it does have that strip here.
And here and some space here and there that didn’t foil, and I want would have liked it.
However, I can use.
I’m actually thinking about using a heart die on part of it I’m having trouble figuring out which part do I wanna throw away.
Because most of it I like so that’s the problem with that one.
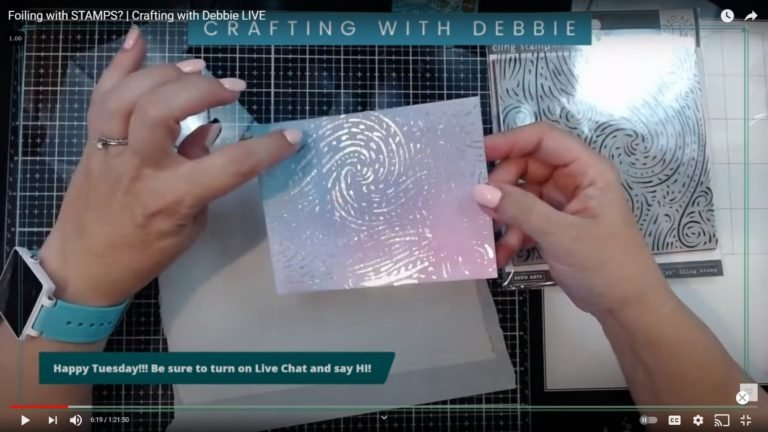
So what I wound up doing is pulling out different papers I had, ’cause I wasn’t sure if my papers could have been the problem.
I love all of these panels.
I think they turned out awesome and then I’m going to use them.
It doesn’t matter that they’re a little bit messed up, but that’s what I want you guys to understand.
If you’re expecting 100% perfect results in your foiling, like what we do when we send it through the printer or we’re using a foil able, or even on the Foil press.
We try to get it 95, 96, 98, 99% perfect.
Hello! OK should we call you not afraid of color or do you have another name you want us to call you?
I I love the handle though. That is too cold.
So anyway, I’ve got this one I did on Nina. I just wrote on their real light in pencil, so I’ve got Nina. I got some recollections cardstock.
Yeah, accent opaque and I did Another accent opaque as well. It looks like I did two and Nina and one on recollections.
Two on accent opaque because I was trying to say was it because?
Well hello Tracy. Thank you so much for dropping in again so I’m not sure.
I wasn’t sure whether or not it was the paper because I know sometimes the paper can cause the issue.
So I’m going to go ahead and show you what each panel looks like and then I’m gonna show you how I’m doing it and why you can get the same kind of results.
Or you may be able to get better results if your skills in this or better than mine.
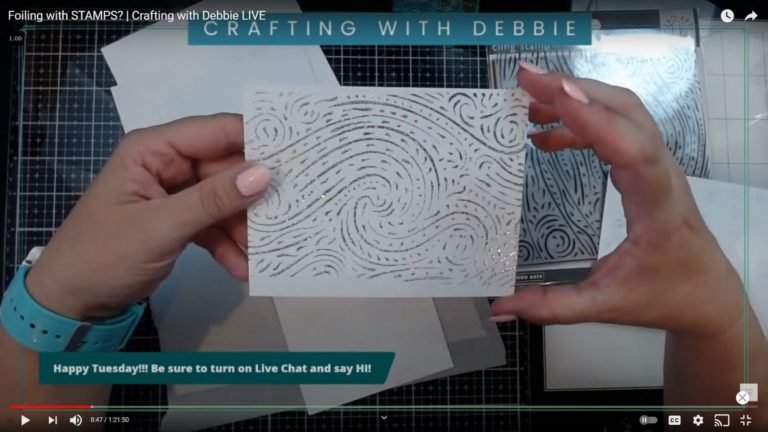
So this one Is all in white. And it came out almost perfect.
This was one of the last ones that I did. I was very impressed.
The reason that this edge isn’t done and you can still see that you can see the outlines of the stamping. The reason this part isn’t done is that the piece that I put on there of the foil was not big enough.
So that’s the reason that one didn’t do right.
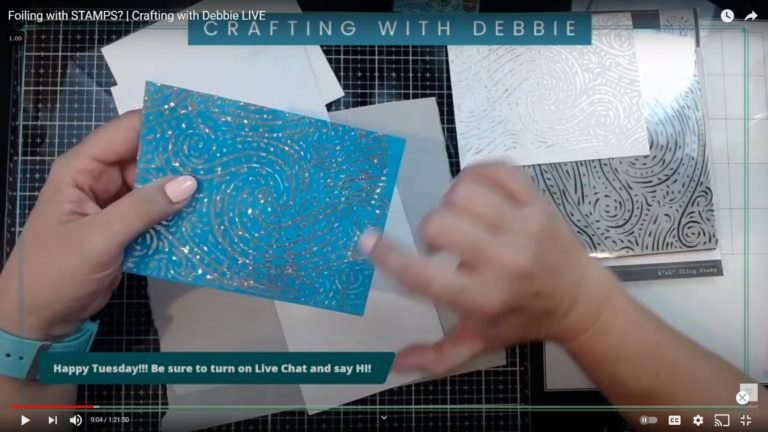
This one is mostly perfect, too. There are a couple of places, like here, you can see a little.
There’s different areas you can see some white and you can see it real bad here.
And then I’ve got some over foiling on this end too. But again, it’s really pretty.
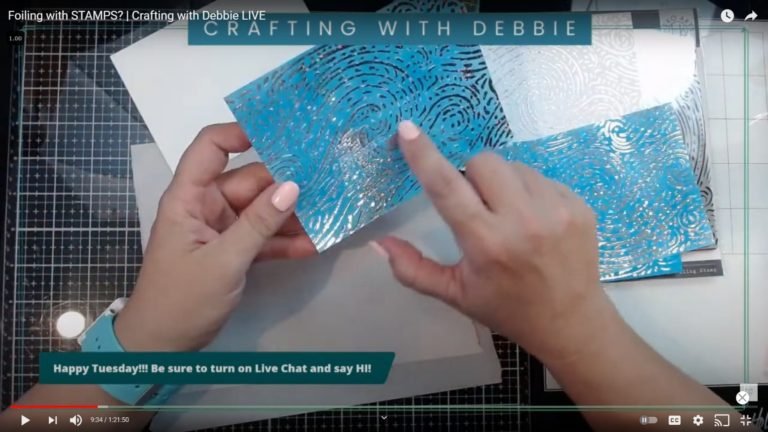
This one same kind of deal. There’s only a few places and they’re always in a line.
So that’s why I realized that it was because of the way that the the foil was wrinkling inside my carrier sheet and it wasn’t working as well.
And I think I may have figured out a little bit more tonight.
I’m going to do some more experimenting to see this one same kind of deal. You can see that line right across there.
But all of these are gorgeous and backgrounds on these blue ones. This is just distress ink. That’s all I did on those.
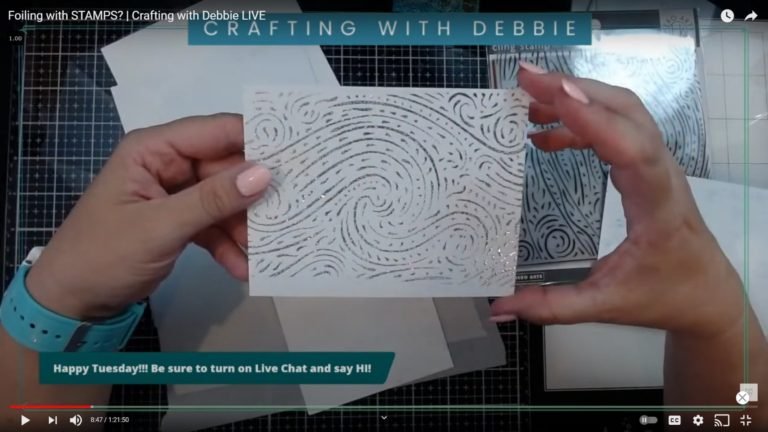
This is one of the first ones that I did. That made me realize I have a problem there is this big gap here that did not emboss well.
There’s multiple lines across and then there’s parts that are over foiled and don’t really look that good.
So the way that we’re doing this, and the way that we’re able to get the foil to stick, I mean you guys already know.
So we’ve got Cordelia in. I’m just gonna take a quick glance at the chat, and we got Kim. HI Kim!
So thank you guys for all popping in.
So the way that we do this, or the way that foil works is it has to have something to stick on.
For instance, last week we used the Deco foil transfer gels, which is basically a type of adhesive that we ran through the laminator with this one (the regular), it would heat up enough to cause the gel to get sticky at the stick to the foil.
And Miss Elizabeth I foiled the panel that you wanted.
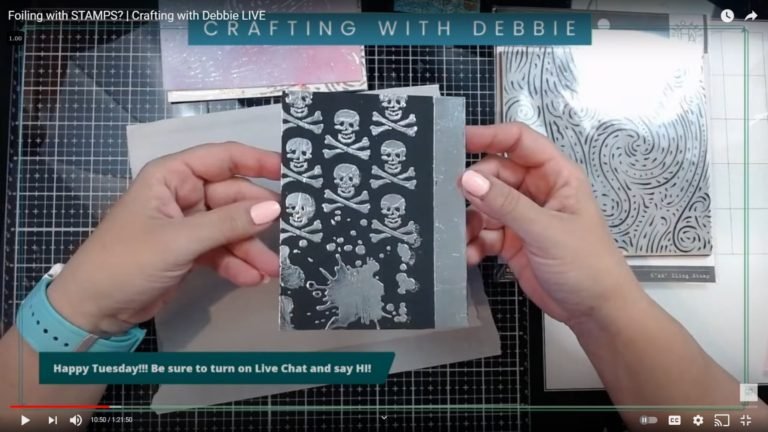
So I just had to show that and it turned out really, really awesome.
And the only ridges I’m seeing on this have to do with the way that I applied the the on paste, which means I don’t think that my problem is my laminator.
Now given, a Minc machine that gets hotter, may work better.
I don’t know on this technique, but let’s go ahead and stop.
Let me show you what we actually actually did for each of those.
I did the stamping with clear embossing powder.
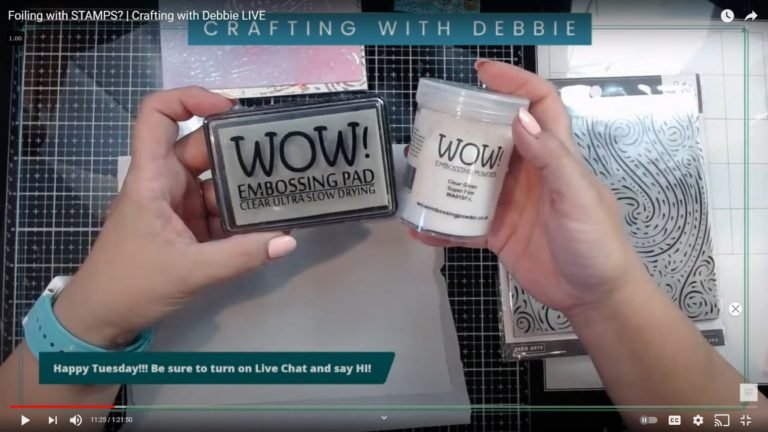
So if my embossing sucked, that would explain why I have over foiling in some areas or I didn’t have enough.
The image that you guys saw in the thumbnail shows that little fish and the lines are much better than this.
That was one of the first ones I did so, so I’m thinking that as my as my Crenova laminator got hotter, it wound up melting more of the embossing powder and causing it to kind of flatten out a bit before.
But again it didn’t really matter me. I got a good look and I love these.
Another thing I’m going to try ’cause when I was going to get my coffee before before the LIVE started, I thought “You know, I have got some Clear Sticky Embossing Powder that’s been in my stash three years. It’s from Ranger, but I picked it up at Michaels at one point, probably because of something I saw on a video and I think it might have been for doing foiling.
So I’m going to try both techniques to see.
OK, that’s what I was thinking. Thank you, Elizabeth.
Elizabeth just said that the texture paste in the Minc leaves marks from the paste too.
And that’s what I expect because the paste is basically adding a texture. And that looks awesome.
When it comes to the embossing, though, you’re basically putting a thin layer of plastic, a thin line of plastic, and then you’re heating it up with the foil on top.
So it really melts enough to grab ahold of the foil. That’s the reason that this works sometimes.
The problem is it’s hard to get a perfect emboss every single time you do it.
You guys know as well as I do that none of us really emboss perfectly every single time, and I’m getting better at a lot of the techniques that I did a couple of years ago because I’m doing so much more of them now.
Anytime you do things a lot, you’re going to better.
Hello Miss TR, we were missing you, honey?
So I think I’m going to go ahead and start.
Oh no, I gotta do this. First I have to show you what I tried right before right before I went LIVE I had to look and see how this looked first.
I came across this stamp set.
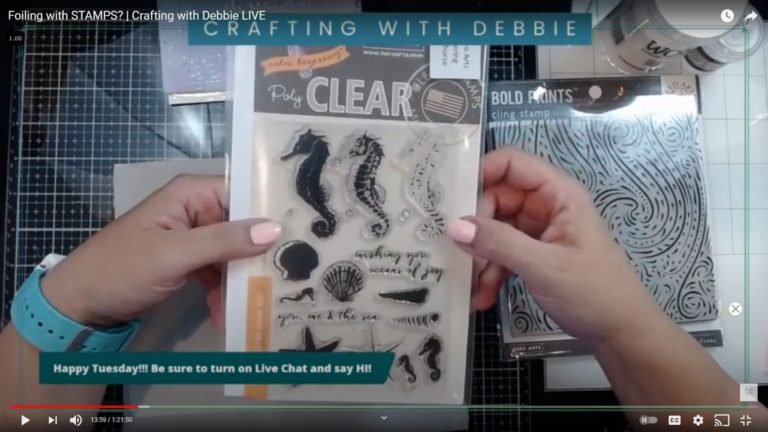
It’s a layering seahorse stamp and I thought and Elizabeth I know you’re probably thinking the same thing too.
I wonder what it would look like if we just did the accent in foil.
I thought that would look pretty cool.
So I did one.
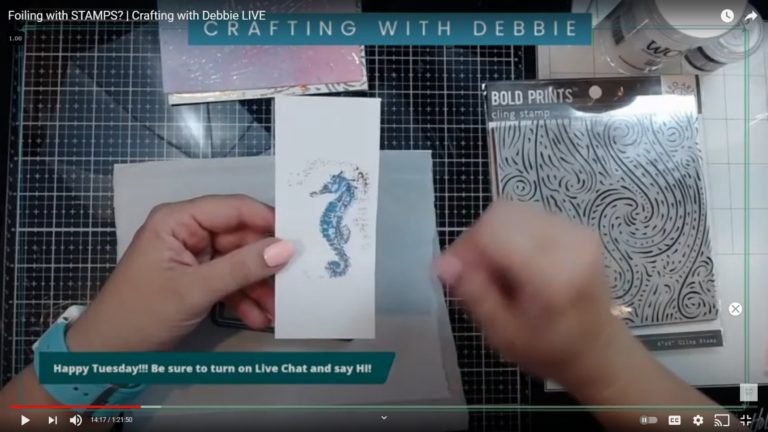
And I got a lot over foiling, but I figure I can have my scan and cut cut this thing out and it’ll be perfect. So I had to do a second one and you guys are gonna love this.
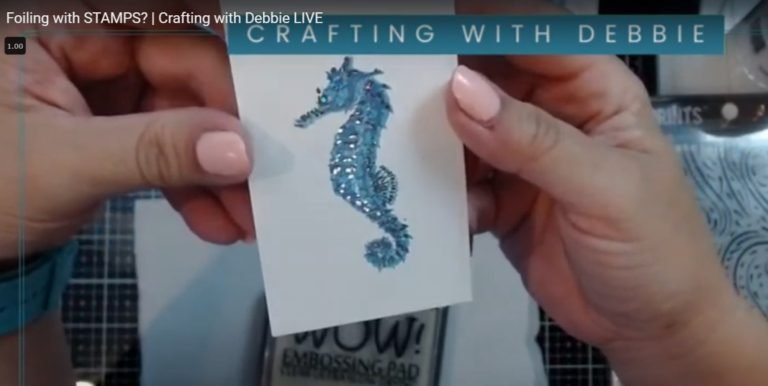
Now my stamping at that like it’s a layering stamp. My stamping isn’t perfect, but I think this is super cool and I just had another thought to you guys. If you watched my video from from the weekend he saw that I did some cards that were also a Hero Arts layering stamp set.
And did something similar to this. Now I did a full panel and I decided to make some other cards with little Heart. I thought that would be cute, but one of those layers is actually.
The little waves, the little accents and I think that would look really cool with the silver embossing because what did I do after I got finished stamping everything?
I took out a glitter pin and started doing glitter on there anyway, so I think that would be pretty cool, so I’m going to have to like if we have time tonight I’ll give that one a try.
If not, no worries, I’ll do it another time.
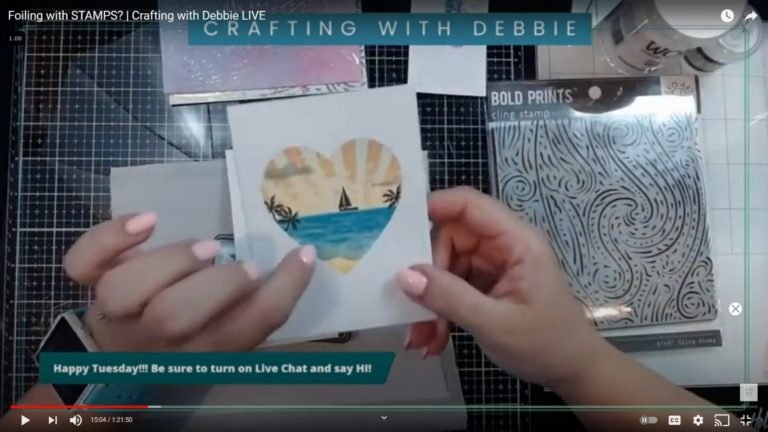
But I absolutely love the way that this guy turned out.
So I think what I’m going to do is I’m going to grab two panels and I’m going to do.
I’m gonna actually just cut one in half.
I’m going to do 2 panels though and do one using the regular Wow! Clear Embossing Powder and the other one using the sticky.
So that we can see right off the bat, which one is actually going to work better I?
I’m almost positive that the sticky is probably gonna work better because it’s got, you know, automatically have some stickiness to it.
So it may be kind of like use the difference between using Deco foil and Jeff oral Gel and Deco foil gel duo. This one might be able to be used without heat, but I don’t know if we are gonna have to try that.
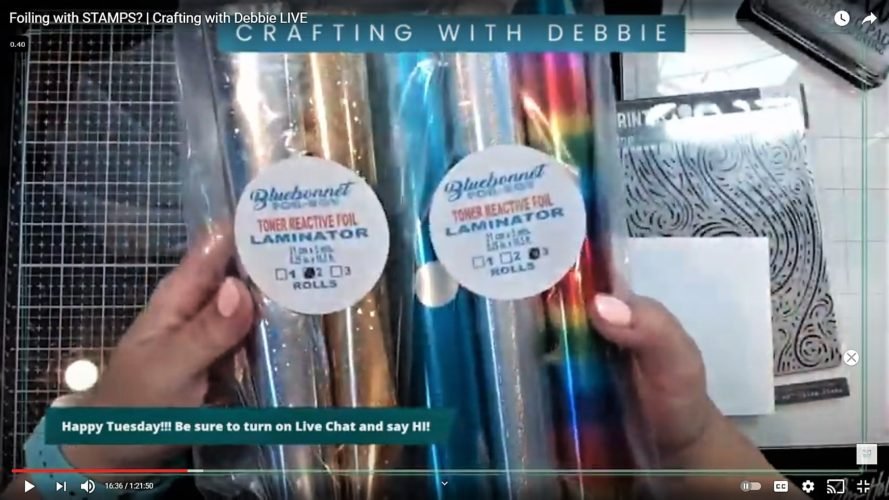
Also, because you guys have got me doing so much foiling, it’s all your fault, I ordered some more foil from from Bluebonnet and this came in the last couple of days.
I already let her know we’re doing a live and that I’d be using foil so she may pop in.
If she does, make sure you say hi.
But anyway that could be using some of these tonight.
And that’s actually the foil that I used for all of the all of the starry nights. It’s her Silver Stars . This one.
This scrap is the perfect size for using on that little seahorse.
So to do this, because it is a layering stamp, I’m going to use my stamp platform.
And I’m going to go ahead and just cut this one in half.
Actually, let me see how big is that Seahorse? Yeah I can do the whole thing on there, so I’ll go ahead and just stamp out in some colors
And I’m just using some Distress Ink ’cause it’s like basically. on my desk.
I’ll go ahead and do that seahorse.
And so to start off with, I’m starting off with the most solid.
And this is the first time that it’s been used. I’ve had this in my stamp set for a while and have not used it.
So, I think I’m going to go with some greens on this one.
So this one I’m using for color my using this one is cracked pistachio as the base layer.
Her store. (Bluebonnet) She is on Facebook. Let me get that real quick, for you guys.
And I was going to put a note over in Facebook that we are live and I didn’t do it yet.
Let me get into the Discussion on there will click.
Ok. That’s been added to the event.
And then let me find her link real quick.
If you hear an odd sound, my cat is in the background meowing at me. ’cause I’ve been ignoring her.
Here is a link to Bluebonnet. Hopefully that comes through for you.
I’m going to take that banner down ’cause I forgot that I had it up there. It’s in the way. There we go now you can see what I’m doing.
Only thing that kinda sucked is I also wanted some of her from rainbow hot foil and she’s out. Or at least she was last week.
OK, so that looks decent for a base layer and when I tried it with the Blues on blue it didn’t look right because you couldn’t see him if there wasn’t enough contrast.
So I’m just going to go in with this..
Actually, before I do that, let me do the second panel.
Because we’re going to do two different ones, so it makes more sense.
Tat way, I don’t have to keep repositioning the stamps and taking more time. That’s one of the genius things about a stamp platform.
Makes me wanna second one though because sometimes I’m doing the same thing over and over again, but I have to move stuff so I have to like move it each time. It’s kind of a pain.
OK, so that looks pretty good.
And since it’s Distress Ink, I’m just gonna spray it (the stamp) down with some water and wipe it off with a towel or my chamois, whatever.
Now, let’s go ahead and get the second step.
So this is the way they’re arranged. We’ve got the base layer. We’ve got some detail and then those final little accents there.
So now I’m going to get that second stamp.
So this is the way they’re arranged. We’ve got the base layer. We’ve got some detail, and then those final little accents there.
So I’m gonna get that second stamp.
And this stamp set is really cool too. It’s got seashells, and it’s got more seahorses. But this shell you can do the same thing with. It’s got the base layer and then the new detail. And you can do those in different colours or, like what I’m just gonna do with this guy and do it in foil. Maybe that later too.
I will try to line this up. And my lining up skills kinda suck.
But that’s OK.
I figured the Way that the background gonna be because this was going to have to have a cool background. It’s gonna be oceany. Sso because of that it’s not gonna really matter that much if I’m off a little bit.
And this is one of the things I’m trying very hard to learn, and you guys have seen me do this. I am a perfectionist and until probably within the last few months I wasn’t letting anybody see any of my goof-ups. I was just getting all stressed out if something didn’t work out.
Instead, I’m trying to share how you can use it.
Yeah, that is a little bit off. That’s more than a little bit off.
This one I’m going to put down a little bit further over.
And I’m gonna put some plastic down so I could see if it kind of sort of lines up.
OK, that looks like it lines up.
OK, so here we go with that blue again and this blue if you wanted to know is Salty Ocean.
And I really wish we could get the Tim Holtz Platform still. I love this one and I hate that it’s no longer sold in the states.
And I’ll show you one of the reasons I like it. And then of course I moved it over a little bit too much, but that’s OK.
So because I don’t really feel like taking the stamp off, but I don’t normally do is just take the top off, flip it on and set it to the side and I don’t have to worry about it messing up my platform portion of my stamp platform.
So I well, I’m going to be using Wow! for one of these. I’m not using it on both, but even if I was, I still decided using a power tool is a good idea. One of the things I’m not sure about on some of my other panels was whether or not part of that was due to my fingerprints. Did I get fingerprints on there and not realize?
I’m using a ton of this stuff. And then I’m hitting it with a heat tool to try to make sure that all of that ink is dry, and then I’m going to test it.
I probably did that backwards, where I should have heated it first, but Oh well.
TR, the reason you didn’t think of that up there? Just asked why she didn’t think of flipping the lid.
That’s probably because her craft space is probably neater than mine tends to be. I used pulled out drawers to hold stuff they’re like.
I’ve got what I’ve got my desk just great. It’s like 7 feet long, but I’ve got my Gemini junior on one end of it. I’ve got all of my my alcohol markers across in front of me. I’ve got my foil press and a scanner and a laminator all tucked in underneath three monitors. It’s like I’m I use the entire space. Plus I’ve got a lot of other junk kind of stacked up. It drives my husband crazy ’cause he’s more OCD than me.
WANT TO HELP SUPPORT MY BLOG?
- Watch, Like, Comment and Share this post with all your Crafty friends!
- Buy a card or digi! If you loved this card, you can buy it! Shoot me an email.
- Leave a tip in the tip jar!
- Check out the supply list later in this post for easy shopping. The list includes affiliate links that allow me to make a percentage from sales without any additional cost to you. So shop away!
But I started thinking I thought about that because if I tried to even with Versafine, you know I made that sticky mat.
So what I noticed is that if I close the lid with the stamp in there, it picks up some of that sticky which makes it makes the next stamping not work as well on my stamp and makes my sticky mat not as sticky.
So I decided, you know, I’m gonna try something different and this turns out it works better and I have a tendency not to lose my stamps as much.
I said I take my stamp off and I don’t have my stamp set right there, I yeah.
And I have a tendency that when I when I’m going to go start crafting, I grab out. I don’t know, 4, 5, 6, ten different stamp sets and then then I start figuring out what I want and then I don’t ever put them away. So I’ve got a stack of stamp sets for projects I want to work.
And I haven’t gotten around to doing any.
So now I’m going to test these.
Well, that’s just to say, if I didn’t do that, I probably would lose it.
OK, that one is perfectly dry, which is awesome.
Didn’t have anything stick and that one is good too because I’m running my fingers over it is because usually even when I think it’s dry, running my finger over it I can usually still feel a little bit of embossing powder.
And I don’t want that.
I think I’m going to have two separate (coffee filters). One is for sticky, one is for gloss. That way I don’t have to worry about that part. So now bringing my stamp platform back out.
Flipping it back over, that’s the part TR you have to remember because I have sometimes forgotten and then wondered why did my next thing not want to stamp, right?
And it was because I had it on the rubber side instead of the clear side.
So here’s that stamp set again, I’m going to just take this last one off and it doesn’t have a lot of pieces. It’s just a little little little details on there.
So it’s not going to stamp a lot of stuff on.
So go ahead and attempt to line that up. I’d say that is close enough.
Now I will take my embossing ink.
Add that and I always double and triple stamp.
Because I know that my stamping when I try to emboss, there’s almost always some part that doesn’t get it. I’m getting better, but I still don’t get it always.
At least my cat decided not to yell at me no more.
She just decided to lay down in the middle of the floor behind me.
Ok, I’ll go ahead and do this one first.
And I did just realize that I did not label these, so I have to make sure to to label them before they go through the laminator or I will forget what they are so.
If I start to send these through and I have not written on the back of them, please please please remind me.
I’m trying to hold it up high enough so I don’t mess with what’s in the coffee filter.
But you can see the little shine. And even just like that, it’s pretty.
OK, so this one is going to be the Rangers sticky. And this one is WOW! Clear.
And because I’ve been touching them too much already, again, I’m putting more of the powder on just in case his fingerprints do ’cause the embossing powder to stick just kind of sucky too.
It would be a good idea to remember where on your platform you want your paper.
I’m impatient, so I’m not gonna try to figure it out. Going again with the WOW! Embossing Ink.
I’m going to go ahead and get this out of the way again.
And I literally have it just sitting on over to the side of me on an open drawer.
Yeah, I don’t remember the last time I used this embossing powder so I have no idea how well or how bad it works.
But it looks like it covered pretty decent.
Don’t do that. Just don’t do that.
                                            <figure>
                                    <img width="768" height="390" src="https://debbiejscraftingcorner.com/wp-content/uploads/2021/05/Screenshot-5-21-2021-4-53-02-PM-2_LI-768x390.jpg" alt="Foiling with Stamps?" loading="lazy" />                                         <figcaption>Don't spill your embossing powder!</figcaption>
                                    </figure>
    <p>Another use for triangle trays. Just trying to save most of it, and hoping that there's not too much garbage in it.
Because if this one works better, you know, I’m gonna do a lot more.
And it’s one product I did not check to see if it’s still available. Like I said, I used this I I bought this several years ago and haven’t used it. (it is available. YAY! http://shrsl.com/12ri1-5qd-k0si1z_1-1)
Yeah, I know. I have one in there and just didn’t use it.
I didn’t get that embossing powder.
OK, let me get this one out of the way and then we will heat up that other Seahorse. Let’s see how this does.
It does still melt and I’m just looking to make sure I got all of it.
I’m not sure if I got all of it. It’s not really shiny.
And that was good. One of my issues also embossing is that it’s hard to tell when you’ve got it enough.
And not too much, because if you heat it up too much you’re going to burn the embossing off, and then it’s not going to do anything ’cause the plastic will be gone.
✨Quick Tip
Make sure to add foil immediately after heating up the sticky embossing powder. A little research after the LIVE, and I discovered that this is actually powdered glue, that is activated by heat. It won’t be sticky once it cools, and it cools FAST!
This time I did break out my rotary cutter. Cause last time you guys were saying that I should use that.
It definitely helps better on a roll. It’s like it’s easier to put the roll away and such, so I do love that.
Now I’m just gonna cut this one in half. And use this piece on each of them. And I’m really hoping that they both work.
So, when I did that last seahorse, what I had done before is I think I let them let my different panels slip down real close to the edge and that might have been part of the problem. So I’m going to try it back here and see if that works better too and hopefully that wrinkle there won’t cause a problem.
I’ll let this grab it, and then I’ll pull my laminator up here for you.
I mean, I do really love this laminator. It has worked better than my old Scotch one. My Scotch one couldn’t have had held up to everything we do. I mean I had to replace it because, in the back of it, where your where your laminating sheet comes out, there was this little.
Adjustable shelf thingy. That broke off. And when I asked about getting it replaced, they did send me a new one (part with no instructions), but still it was a pain in the butt.
OK, so it doesn’t look like it crinkled too much. That is good. So what I’m looking for is wrinkles bad wrinkles in the foil? I mean, this looks like it’s just where it adhered and it’s got a little bit of the air around it so that I think looks pretty good.
So this one is the one from the WOW! Clear embossing powder.
And I do have a little bit of over foiling on there, but how much you want to bet that that was little specks of embossing powder?
And I think it’s because I use lighter colors for the background for the rest of the seahorse. These parts are a bit bolder. That’s something else that I notice too. I think I mentioned to you that on my seahorse, on my earlier panels on these seem like the stamping kind of got flattened out as I went along.
I think that either it was where I was adding too much embossing powder or I was getting too much heat from the laminator at that point and it flattened it all out. So if it’s if it’s my error because of the embossing then should show us it how it should be.
OK, and this one is the sticky (powder) and it didn’t. I think that I just didn’t get this embossed well enough, but I do think the that looks pretty cool..
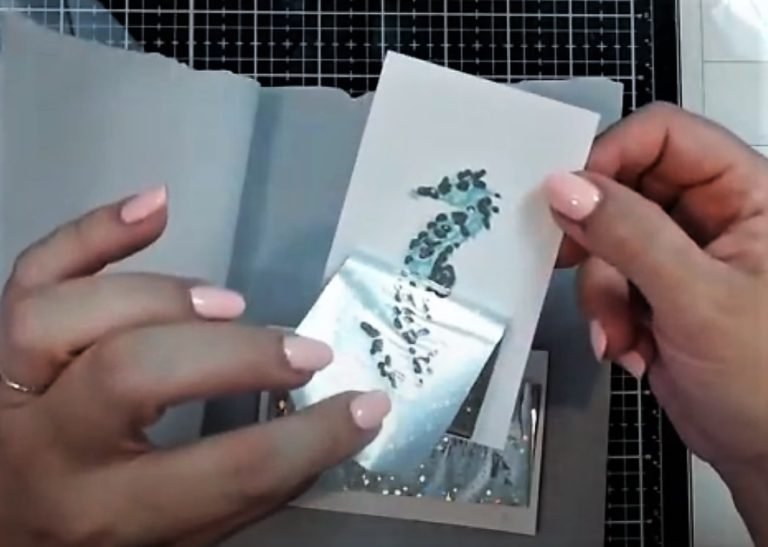
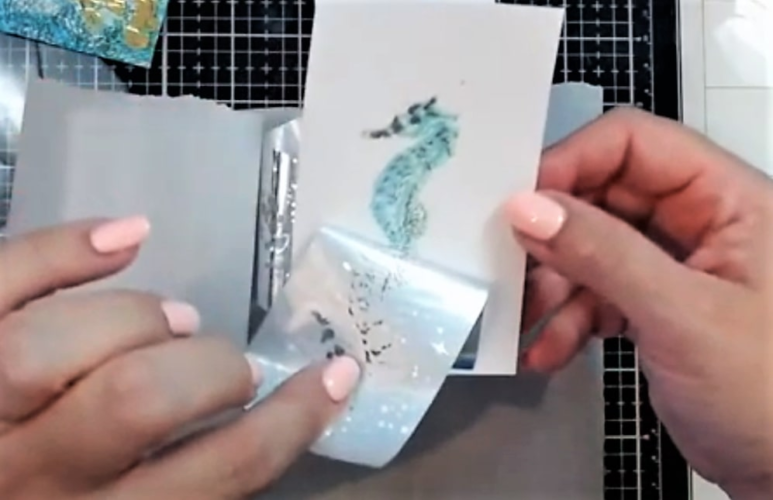
So one’s got too much and the other’s got not enough.
So it is just after 6:00pm, so we do have time for more.
Next thing I wanted to do, I was thinking more of the large panels, but I’m not real confident that I’m gonna go and get this one time.
I was thinking about not doing those because of how poor I think the other ones did. I don’t know if it was where I had the panel placed in the carrier sheet, then one of these should work out better.
Let me put this away so don’t lose it.
This is part of some of what you miss when you watch my regular videos. I don’t have you see me, move everything around all over the place.
OK, so this one is a really cool stamp too. It’s got all those cool bubbles. So that would be a nice background for our little seahorse.
And I do still have a rubber. I almost forgot the reason it was on rubber is because of this is where I flipped the cover before Miss TR. So it does say rubber, so I’m good for doing this one.
And for this one. I think I’m going to do that experiment like what I did before, but I’m going to just do them one at a time and then go with that, because maybe I just didn’t get enough of the embossing powder on the sticky one.
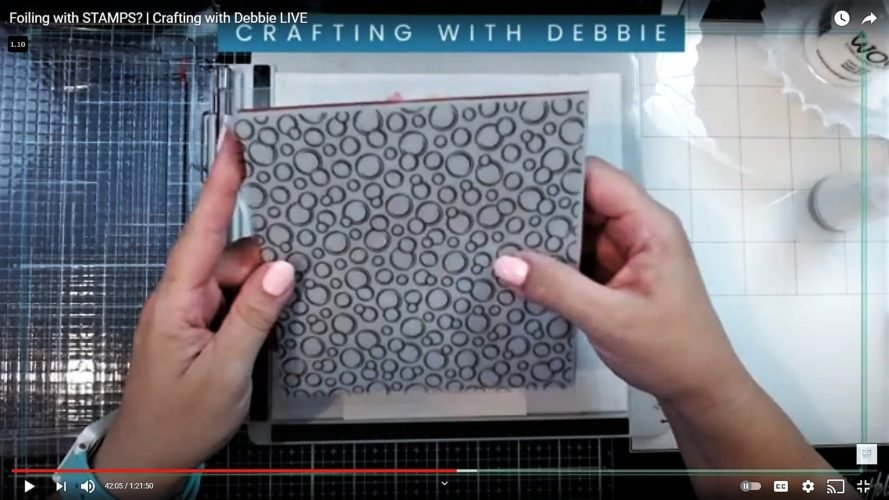
So I’m going to do just regular WOW! for this first one. And I think this may be the first time I’ve used this stamp, so I have no idea if this is going to be a good stamping or not.
I can see some of them, but not all of them. This is also some clear embossing ink, so just because this is the first time I’ve used this, I’m just going to run this over see if I can get a better impression quicker.
“Meow”
That was not my cat guys. That was my husband being an idiot.
He’s been working from home and I think today he kinda is feeling weird because he’s actually had to go to the office all day.
OK, that one I can see it better. This area looks like it doesn’t have quite enough though.
So I’ll go over the whole thing one more time.
So, Cordelia you think that’s funny, huh?
Yeah, I think it’s funny too. I keep telling him that the reason I married him is ’cause I’m easily amused.
And there’s this one section out in the middle that does not want to pick up. I mean one of the nice things is with it being this big background stamp, just like I was saying about the Starry night one. Is that even if you miss some spots, it’s OK. It’s still gonna look awesome.
But I want it to look better than awesome. OK, I can see it on pretty much, well…
Here’s the perfectionist in me. It’s one area right at the top now.
OK, now that’s good enough and you guys could you guys could see it just can’t see it that well, but I’m still satisfied.
So let me get this one. This is for the wow embossing powder.
And I don’t want to touch t his because I will get.
I don’t want it creating areas that I didn’t particularly want my fingerprints on it.
I’ll get this out of the way.
And this is a good way also to do the emboss resist. And that’s what I did on those blue panels of the starry night is I did this to it. Then I added the ink. The reason I did that is I wanted to see before and after where I actually had embossing in case the reasons that I was getting the Less than stellar result was because of poor embossing.
I think I’m going to do that this time too.
But I need to do is get enough along the edge embossed and cooled so I can grab over there.
It’s getting a little warm in my hand.
So I think I’m going to go over this just with some blue ink. Do a quick emboss resist so that we know where the embossing is so that when we go after the foil is added. I can tell whether or not I just messed up.
Yeah, this time I think I’m going to use. I’m going to use Mermaid Lagoon. And by the way, last night when I was doing this, or yesterday when I was doing this, I also had one of those silicone mats down on my desk and that helped make it so that everything didn’t wander off or try to slide away from me.
The embossing looks pretty good. Now there’s this area over here that I think I had some extra something. I don’t know what it was, but it’s like it’s not as white as I would have expected. But that probably means that there was something in my embossing powder.
And this panel looks like it’s pretty much ready for a card.
Basically, adding a little extra in some areas that don’t look quite dark enough just because I want that embossing to stand out a little bit more.
Next I’m just gonna buff it off real quick.
And that background, it looks like it’s pretty much perfect.
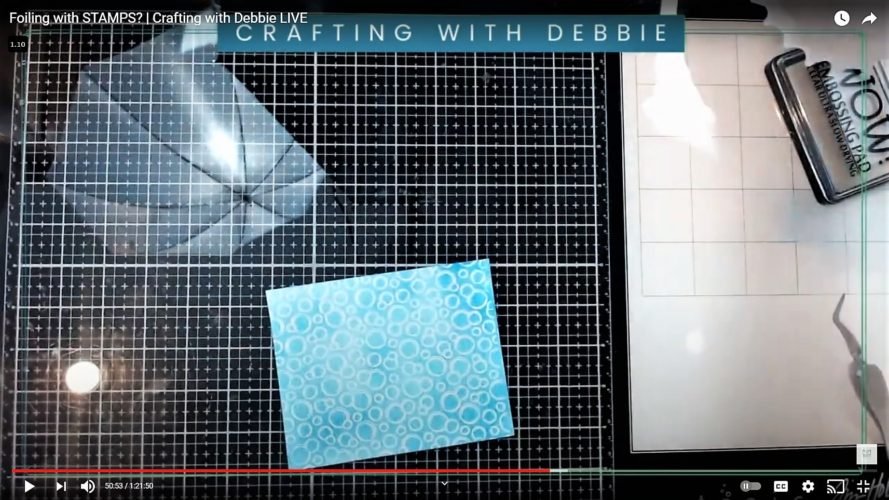
So next I need some foil and I think I’m going to try this silver. I’ve been using this starry silver a lot and that worked. I think really well with that other background.
I haven’t tried it on this one.
And then carefully lifting off the sticker that she’s got on here to hold it. And I do have to say I like the sticker she’s using.
00:49:09
They are not as heavy duty as some of the others, so this one did do a little bit of damage, but not too much.
00:49:23
And since my panels are.
00:49:26
Five and a half by 4 and a quarter by 6 inch roll isn’t isn’t quite big enough. Not quite quite enough to make to use one strip for two cards, but that just means I can use the extra for littler stuff. Now this number one looks like it’s also got some iridescence in it that’s kind of cool.
00:49:52
And she shipped really, really quick.
00:49:55
I mean, she’s just she’s in Texas, so.
00:49:58
Texas, yes, I think it’s Texas.
00:50:09
And it looks like I cut it a little bit too small, but it should still be OK, at least for our demonstration. So this time, what I’m going to do is I’m going to have it.
00:50:18
Number one I need to remember that there’s this fold in the foil itself.
00:50:24
And that little piece there from the sticker and then make sure I put it a little ways away from the edge.
00:50:32
Hopefully that will take care of all those ripples that I got in the last one.
00:50:39
’cause I was getting pretty frustrated last night when it wasn’t working as I wanted it to on those other panels.
00:50:49
Yeah.
00:50:58
So at this point, I think I’ve pretty much foiled and all the different ways with you guys.
00:51:04
So.
00:51:05
I’ll be doing something, probably something different next week, or some kind of a combination.
00:51:10
So if there’s something specific that you’d like to to see or to play with and hang out with me, go ahead and leave that.
00:51:19
Down in the comments after the video, come back and put a note down in there. Or you could send me an email or you could go over to my blog and send me a note there as well.
00:51:32
I said it was also putting it through a second time, but you see that when. How dependent this I don’t really understand.
00:51:37
It’s just kind of where the air is going in, but it’s causing these wrinkles and I don’t know exactly why.
00:51:43
I think I’m going to before pulling it off. I’m gonna turn it upside down.
00:51:47
And see if maybe heating it from the other side might help.
00:51:55
Yeah, so late. This Elaine is asking if this is through just a plain laminator. Yes it is. You do want to make sure that it gets hot enough though.
00:52:03
This one it’s worked perfectly fine for me. I am starting to notice because I’m getting more particular than I was before I am noticing.
00:52:12
That on.
00:52:14
Toner, like from my laser printer it doesn’t always transfer completely. I’m noticing on this it doesn’t transfer over 100% completely, but like last weeks were completely awesome.
00:52:28
I mean this panel here was one of the ones that we did on last week’s live stream and it’s using transfer gel.
00:52:34
Through the laminator and it worked perfect.
00:52:37
So.
00:52:39
I’m not sure exactly what it is that I’m doing wrong. I’m wondering if it’s maybe it’s just that the heat from my specific laminator isn’t either isn’t hot enough too hot.
00:52:51
Maybe it doesn’t have enough pressure. Who knows enough for what I’m trying to do with it? I mean the description on Amazon for this thing doesn’t say anything about boiling.
00:53:01
And when I did a review for it last year, I actually was contacted by the company and asked to do a review on their laminator and I did a review for crafters.
00:53:11
That’s what my my review on my YouTube channel and over on my blog says and there’s a lot of information over on the blog details about what it says on the website. On Amazon the whole bit, but.
00:53:23
If you have a mic machine, it’s going to be hotter and the make machine is designed to work with oil.
00:53:29
So let’s see how this would actually.
00:53:33
Oh my God.
00:53:36
It does have some wrinkles and it is in those little air pockets.
00:53:41
But look at that.
00:53:49
And it may also be that with this size of a panel like I didn’t have any problems like with that with you saw with this the smaller ones I did not have that problem with the the basically the the ridges of the airlines air blinds anyway.
00:54:06
I didn’t have those problems with it, but this one.
00:54:08
I’m not sure one of us, if I scared that card out with this, they wouldn’t really notice.
00:54:16
I am noticing that here is the original.
00:54:21
And you see that the bubbles are more detailed on here.
00:54:28
It’s all flattened out.
00:54:30
So we’ve got basically 2 little lines of embossing that are merging together, but it still looks stinking cool.
00:54:42
Yeah, that was horrible.
00:54:44
Don’t know that it really looks like bubbles anymore. It looks like basically a circle background. I still love the way that this looks now.
00:54:53
I would like if.
00:54:54
Anybody decides to try try this with their make machine.
00:55:00
Let me see what your results are. I mean I would love to see that I know that there’s are folks that say that you can’t, but you that laminating through a foiling through a lemon or with stamped images doesn’t really work.
00:55:14
It really depends on what kind of results you’re trying to get, and that’s what I was mentioning. You know an hour ago when I first showed the first ones.
00:55:24
So I think I’m still going to. I’m going to go ahead and do one more panel.
00:55:29
If you guys are wanting to stick with me and I want to do basically the same thing but do it with the.
00:55:36
Clear again and see if we get a better result or different result as that would be interesting.
00:55:46
I finally letting some of my scientific side.
00:55:51
Yeah, like I was never a scientist. I used to be a bookkeeper.
00:55:55
And then I was customer service Rep and I’ve done all that. That kind of stuff.
00:56:00
But it’s never been a scientist.
00:56:04
I’ve never been an engineer.
00:56:06
That’s my husband’s job.
00:56:09
Let’s go ahead and get some more embossing ink.
00:56:17
Yeah.
00:56:32
OK yeah, fat is just not getting enough of being down. That may also be part of the problem too. ’cause if on the ones that I was doing before, if I didn’t have enough embossing ink down.
00:56:46
Then of course it’s not going to stick right and I just remember that I did not use my anti static tool on this one and this is not wow embossing powder so I need to use this.
00:57:08
That is probably one of my worst habits is not using it.
00:57:13
And I just realized also what that extra that I was saying. I’m pretty much scraping this across.
00:57:20
The panel to try to get it to come out as a little felt felt tip vein.
00:57:25
And I think I may have scraped part of the felt.
00:57:29
And.
00:57:29
This has not been used much.
00:57:32
Or often.
00:57:34
So that’s probably what did the discoloration.
00:57:44
OK, so I’m checking the chat. Elizabeth says the Miss Lyons is probably the foil sheet sticking to the embossing powder. Not being able to move freely.
00:57:59
Do you have a suggestion as to how to fix that other than making sure I only do smaller panels ’cause it looks like I didn’t have as much of the problem with the smaller ones? OK, that looks better.
00:58:21
That actually is a good description of what I think may have been happening on my panels last night. As I mentioned, I was putting the panels pretty much all the way down to the end and slipping them in that way.
00:58:34
’cause that’s what I’ve done on all my other stuff. This is just a different method of boiling and the other ones turned out fine.
00:58:42
But you may be right, it may be.
00:58:44
That it’s sticking a little bit.
00:58:48
OK, I mean it’s more in the city there.
00:58:58
Yeah.
00:59:00
One more time.
00:59:09
Oh
00:59:21
I’m gonna say that it’s good enough.
00:59:25
Yeah.
00:59:35
And now we’re going to try and try not to spill it.
00:59:40
Get sticky embossing powder.
00:59:47
I mean, one thing I noticed just pouring it out is it is more granular.
00:59:52
So it’s not, it’s fine.
01:00:03
Yeah.
01:00:12
I think I am also going to go over it with some ink.
01:00:16
Because it doesn’t really. It looks like there may be some. Make some places that missed a little bit.
01:00:28
So if this doesn’t work like what I’m what I was hoping then when they wind up doing with this embossing powder is doing a little more research and.
01:00:36
Find out why did I buy it.
01:00:39
Now what was it for?
01:00:41
’cause I really don’t remember. I really thought that maybe it was for this purpose, but it.
01:00:47
Doesn’t look like that’s the case.
01:00:50
2nd.
01:01:02
2nd.
01:01:10
2nd.
01:01:14
6:00 o’clock
01:01:18
Oh
01:01:20
2nd.
01:01:25
It almost looks like it’s not working like it’s supposed to either.
01:01:28
I mean, I can’t really tell if it’s been sticking.
01:01:33
See my paper of finest ER.
01:01:40
Oh
01:01:51
OK, so I do feel some places on here that are tacky.
01:02:01
So this was not what I was planning on doing, but I’m gonna do it anyway.
01:02:06
Let’s see.
01:02:11
Yeah.
01:02:11
And this is just the excess from that last one.
01:02:20
Yeah.
01:02:21
And it is doing some, so I’m thinking that maybe it’s just old. I need to learn a little bit more about what I need, telling me to use this sticky.
01:02:33
Because it seemed like most of it came off when I was trying to to heat it up.
01:02:42
And I figure I might as well use this crap on here.
01:02:45
See if see how that works out.
01:02:52
So you can see that it was sticky, it’s just not sticky enough.
01:02:57
I think it stayed sticky longer this time.
01:03:00
And maybe you’re supposed to emboss it twice.
01:03:03
I don’t know.
01:03:10
Center again.
01:03:24
So I don’t know if you guys can see this or not, but it does have a little bit of that silver accent in the places where the embossing powder.
Kind of stayed.
So that does look kind of interesting.
Wait this part here. It looks like maybe I burned off the embossing powder. ’cause remember, I said that it’s hard to tell.
Now that’s an interesting idea. Elizabeth said that she wonders what would happen if you put the embossing powder on 1st, then the foil and then heated it up.
OK, I will sacrifice a piece of foil for that and I have a little tiny one.
And let’s see if I have a scrap laying around here somewhere.
Well, I’ll do this.
And I’m going to do it with a smaller stamp.
Cash can’t have enough.
Birthday sentiments anyway?
Thank you.
Let me get it.
Walk out.
Which of course was in one of the drawers.
Then I have other stuff on top of so.
It takes a minute to get out there.
Yeah, I’m gonna cheat and put extra.
Only problem with doing it this way and sometimes you wind up with way too much.
01:05:40
Embarrassing.
01:05:49
Hey, that looks pretty good.
01:05:54
And then I’m going to try it with the sticky.
01:06:04
Oh
01:06:12
It.
01:06:15
Oh
01:06:16
Does look like it’s covered pretty good.
01:06:18
OK, so this is.
01:06:21
One of those do not do at home. Do not try this at home.
01:06:28
So there’s my reading.
01:06:29
He
01:06:32
And then we get.
01:06:34
I follow.
01:06:45
OK, let’s see what happens.
01:07:11
I think Cordelia says, oh, this is Spence.
01:07:15
Oh
01:07:24
Yeah.
01:07:32
01:07:35
So just looking at it from here.
01:07:37
It looks like things stuck.
01:07:40
To me, no. From even from here from the shapes I have a feeling that it spread out and squished out, so it’s probably not gonna look like what we wanted.
01:07:49
But
01:07:50
Let’s see.
01:07:55
Oh my goodness, it not only did the embossing embossing powder squish out, but this because of the direction this went in.
01:08:03
It wanted squishing it out to the to the top, so it looks kind of like it’s got a couple peaks over the HB&D.
01:08:12
Yeah.
01:08:13
So it it worked. It definitely worked, but it does wind up squishing so much of it out, so I’m going to try it one more time with this smaller stamp and one of the I’ll do it.
01:08:25
The same stamp actually you see. Here’s what the stamp look like and this is what the image turned out like.
01:08:34
Now I can scan a copy of what the stamp is into my scanner cut and have it cut it out of the foil part. It will still look 5, so I can still use that. I think I can use that sentiment.
01:08:47
Anyway, that’s that’s that was fun. That was fun. One more. Where’s another piece of scrap?
01:08:58
OK so I’m gonna do that again with the HPD HPD.
01:09:03
Happy birthday
01:09:13
Yeah.
01:09:29
Then try again with the sticky.
01:09:32
Is it anywhere?
01:09:34
Coffee filter.
01:09:48
K I’m looking to see if it covered everywhere ’cause the coloring is a little bit. You can see a little bit of a shadow. I don’t know if that’s.
01:09:58
Where did it work well or?
01:10:00
Earth.
01:10:06
2nd.
01:10:11
2nd.
01:10:21
I’m burning my hands, give me a second.
01:10:26
Also not sure whether or not I.
01:10:31
I’m still on there.
01:10:37
It almost looked like the.
01:10:41
Embossing powder had blown away.
01:10:45
But now you can kind of see a thick layer of it on there.
01:10:49
Yeah.
01:10:52
2nd.
01:11:06
2nd.
01:11:14
2nd.
01:11:29
01:11:42
OK, so I think what I did on the last is I may not have heated it long enough because this is starting.
01:11:48
This looks like I’m starting to see more shine the longer I hold it on there. I’m always afraid of burning it off ’cause I have done that before.
01:12:04
I’m going to say that that is enough and I’m going to try. It’s pretty rainbow foil and hope that it that this works.
01:12:17
So it won’t be the fault of the foil, it’ll be the fault of my stamping at bossing.
01:12:27
Yeah.
01:12:35
Yeah.
01:12:46
Yeah.
01:12:50
01:12:55
So wish me luck for the last. Probably the last foiling attempt of the night.
01:13:04
And I’m hoping.
01:13:07
That you’ve got a little inspiration from this.
01:13:11
And now go ahead and give it a shot.
01:13:11
Yeah.
01:13:16
As I was saying before, it depends on what kind of result you’re wanting from your foiling. I mean, if you want it absolutely perfect.
01:13:26
Hit Miss Elizabeth up for some of her disease and print it out. On’s a really good laser printer and you will get fantastic results every single time with the toner foiling but if you want to try it out with a bunch of your stamps.
01:13:44
And just see how it goes.
01:13:48
Yeah.
01:13:48
Using embossing ink and embossing powder is a way to get those effects too.
01:13:59
OK, so looking at the you can see the ridges where it appeared. This looks like it actually here adhered better.
01:14:08
Well, Miss Elizabeth you have got some gorgeous stuff. You know that if you are OK, a lot of you guys are members of my Facebook group crafting with Debbie.
01:14:17
But some of you may not know that there’s another group out there that is mostly focused on foiling. They focus on a lot of things, but they know so so so much.
01:14:27
About foiling and then talking as much about it and doing as many things it’s like, sometimes I will watch one of their videos.
01:14:35
I’m like “I was gonna do that. They beat me to it again”. Or I’m thinking “Oh my God that would be so cool to try”. They are some awesome folks and they even know so so so much.
01:14:48
Now I would say take all the information you get everywhere and try things yourself. See if it works for you. I know that I don’t believe Nancy likes doing stamping with boiling.
01:14:58
That’s fine, she wants some absolutely perfect, and I don’t blame her. I love getting the perfect results, but if you don’t mind a little bit of a grinchy or look you know. Like maybe like Ryan with Gritter Grunge Greetings, this would work for you too.
01:15:14
So you never know, and Elizabeth has been putting out a lot of really, really nice.
01:15:20
Digital images that you can print out on your Laserjet and foil. She has print. She’s got a lot of foils, and she’s got some of them that are free.
01:15:29
If you’re a member of the foiling Snobs Club, so if you’re not a member yet, head on over there and join up and check out some of her free disease. You know you can read all the rules about.
01:15:40
How that works too? Also on our group on crafting with Debbie, we’re doing some monthly swaps. We OK so this.
01:15:51
Does look interesting, but it did not foil well.
01:15:55
So I’m gonna say.
01:15:58
This stuff is a fail.
01:16:00
It is not working like what we wanted it to.
01:16:05
And I think you guys are probably as surprised as me. I mean, it’s it’s a grunge look. This is definitely a grunge oil look.
01:16:13
But you barely have any of those.
01:16:21
Yeah, it’s my friend Elizabeth. My printer was working better and if I can manage to get it to print better, I’m gonna start taking some of your image.
01:16:24
It’s.
01:16:30
Both my legs and I was calling because they were gorgeous.
01:16:34
OK guys, well I’m gonna go ahead and let you go for now.
01:16:39
Remember, if you aren’t already, if you aren’t already subscribed to this channel, please go ahead and do so and make sure to hit the notification bell to be notified every time I upload.
01:16:51
I have had a couple of people say that they didn’t get a notification about one of the old lives or something that I did and they just.
01:16:59
Happened to show up on time because they know when I’m doing it. So if that’s if that’s you, make sure you go ahead and hit the notification bell.
01:17:07
Also on the Facebook groups, you have to also adjust your notifications on that too, otherwise you’re not gonna find out what’s going on. Facebook is changing their algorithm rhythms and they are changing the way that.
01:17:20
They notify your things, so make sure that you say that you want to be notified of all the stuff going on in the groups.
01:17:27
For for my group I love to see all this stuff that you guys create so you know come on and hang out with us and show us all of your cool creations. And I would also love for you guys to check out my YouTube channel.
01:17:41
And subscribe over there too. I send out newsletters. I send out a notification of every video and blog post that I put up and I’m working hard to put a lot more additional information over in the excuse me over on the blog about everything that I’m doing. So go ahead and sign up for those two. It would really really help me out.
01:18:01
Not much. I would really appreciate it. You guys have a wonderful night and until I talk to you again, see you have a great day. And remember if I can make it. You can Too. Talk to you soon.
                                                        <img width="400" height="400" src="https://debbiejscraftingcorner.com/wp-content/uploads/2019/03/logo-image823-e1599851718250.png" alt="Logo" loading="lazy" />
    <p><em><strong>Deb Jenkins</strong></em>
Let me help you unlock your creative potential!
Because, If I can make it, YOU CAN TOO!
Stalk me: Facebook | Pinterest | Instagram | YouTube | Blog | Tips are appreciated
Visit my channel and Blog for tutorials, inspiration, and motivation!

