Today I’m sharing the Club Kits for April 2022 from Spellbinders. I just love the selection for this month and decided to do a LIVE stream to show all the products I’ve received and let ya’ll decide what to play with first.
I usually just share the kits on the posts and videos where I’m using them, but thought you might like a little sneak peek to see all the goodies that Spellbinders sent me as a member of their I’m sharing this project as part of the Spellbinders Club Influencer Group. Especially since they’ve added a few more club kits to what I get to share with you!
Before we get into the haul, I want to make sure that you know how the Spellbinders Clubs work. All of this information can also be found on the Spellbinders website under “clubs”. The information in this blog is up to date as of February 1, 2022. However, Spellbinders may make changes to their offerings without my knowledge or it being updated on this post.
Here’s some information from the Spellbinders website.


There have been some recent changes to the clubs being offered. They now include the Card Kit, Small Die, Large Die, Amazing Paper Grace Die, Glimmer, Clear Stamp, Clear Stamp, and Die, and Embossing Folder of the month. THAT’S 8 DIFFERENT CLUBS TO PICK FROM. The prices range from $9 to $38.50 per month.
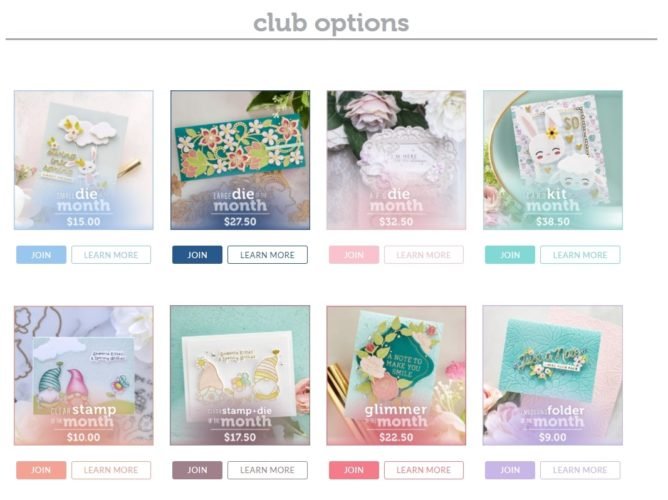
If you are interested in trying more than one, there are also 4 Value Clubs that offer a combination of kits for a discounted price.

” Your Credit Card card will be charged 5 days from the date of subscription and will ship within 15 business days.
Your subscription will renew each month on the 5th.
*Value Clubs contain the same monthly kits as stand-alone clubs.
*Please Note: international shipping charges will apply to each subscription/add on order at checkout.” – Spellbinders
Spellbinders Club Kits for March 2022 are available NOW!
Join March 1st – 24th and receive this kit.
In addition to getting fun inspiration straight in your inbox, club members get exclusive benefits!

Check out all the fun goodies in my Spellbinders Club Kits for April 2022 Haul!

I’m also adding a full transcript from the video in case you want to find something specific. This was pulled directly from the video, so I’m sorry for any punctuation, spelling, or other errors.
ys it’s debbie with wg’s crafting corner how are y’all doing this
2:14
afternoon i do see that we have miss john wilcox
2:22
in the house and show is dasia benjamin and bj clark from sea
2:28
view washington and we’ve got crystal y cup in the house as well welcome welcome
2:34
welcome and give me just a second because it turns out my lighting is not
2:40
looking right i need to get that fixed for you guys real quick not sure what happened with it there but
2:46
you never know sometimes things change and i don’t know what’s happening
2:52
okay probably having to do with auto exposure sometimes this thing just resets itself
2:59
and i have no idea why anywho that should look a little bit
3:04
better and hello miss melissa klepster she she’s watching from her class oh my
3:11
goodness are the preschoolers get to going to get to look at all of the cool dies and stuff too
3:17
miss genie ellis i’m so glad you were able to pop in honey how are you feeling
3:26
so while i’m waiting for a couple more people to pop in i’m also running on
3:32
um facebook i’m going to show you a couple of cards that i made today because these are samples for our
3:40
upcoming card class so you know i love those little swinger swinging little bunnies and the legs
3:47
moving and all that kind of stuff so i made a couple of i have a little swinger cards and
3:53
i don’t have a second camera on right now so i can’t really show you but isn’t that adorable
4:02
and then i’ve got another one over here with the flower although because the flower and her
4:08
hands are about the same size my husband says that it looks like someone like it looks like a ribbon
4:14
that has legs so he thinks that that’s what it looks like anywho um that’s just
4:19
a couple of them my thought on the class coming up in a couple of weeks is to do
4:25
actually i think it’s it’s on the 16th so it’s 15 days away so it is two weeks away is that we can do mother’s day and
4:31
father’s day cards using these cute little dies but i’m also gonna do another card using
4:37
a different stamp set where you don’t need the dies now i’m i haven’t done it yet it is a concept in my brain but i’m
4:44
thinking shouldn’t be that big a deal since i understand how the mechanism works on these and these are so easy to
4:50
do these dyes though are available from spellbinders they are not part of the
4:56
die of the month from last month these are actually new release from just a couple of weeks ago so you can still get
5:01
the dies this one is the i dance and then the one with the mail
5:06
is the we dance i believe i will definitely leave links to all of that down below for you guys and i will be
5:12
posting an official announcement coming up soon okay let me go back over into the chat
5:24
okay so i’m hearing yeah hello it’s actually bj deja is my granddaughter
5:31
is that right
5:36
so if i said that wrong please let me know don is going to be in and out of the
5:42
in and out of the hat chat because she’s making bohemian orange chicken and she’s not giving any of it to us that is just
5:49
not fair anywho anyway this is basically i wanted to get
5:55
started on getting things ready for the class and have to actually get started on doing the
6:00
official announcements i’m planning on sending out that email in the next couple of days if you believe you are on
6:05
my email list please make sure that you white list the new email address which
6:11
is edu at wj’scraftingcorner.com i’m having some issues with the things
6:17
bouncing so i don’t know for sure if you’re actually getting my emails or not if you do want to be added to my email
6:23
list and you haven’t been yet um there should be a link bio down below
6:28
that should have also another link to how to get in touch with me how to get up set up on my email list all that good
6:34
stuff or you can just email me at debbie j wj’s craftingcorner.com and i’ll get
6:39
you all set up while i have that thought up
6:45
there’s my email address but i just took down the rest of the screen i am so sorry
6:50
anywho let me get back to the main screen that’s what i want to be on right
6:56
so what we’re what we’re going to be doing today we do have a few folks in and again welcome um i wanted to do an
7:03
unboxing of all of the fun april club kits this one of course probably
7:09
recognized the box this one is the card kit of the month and the name of it is picket fences which you can kind of sort
7:17
of see but i think i’m gonna go through the rest of the stuff first this one has a bunch of stuff in it i have not seen
7:22
any of this yet so i’m gonna go ahead and show all the stuff that i have seen but haven’t
7:27
actually played with okay i need to change that i need to start getting things done faster so that i can
7:35
i can play with things earlier so this one is one that i actually did last month and hello miss g wilkins welcome
7:43
honey so this is the new embossing folder of the month and
7:51
it is called radiant burst kind of got it taped down so it would stay in my packaging and i
7:57
tried it out last month because i thought it was last month’s embossing folder and what i wound up
8:02
doing is this is a card front so i did partial embossing and you can’t see it
8:08
because the exposure is not working with me let me get that adjusted again
8:20
actually let me try this light here and see if that helps okay now well kind of sorta
8:32
okay i think you can kind of see that embossing this is on white on white it’s just embossed but i did partial
8:38
embossing meaning i lined it up with the middle of my embossing folder and i only cranked it through halfway so i could
8:45
get half of a five and a half by
8:52
eight inch five and a half by eight and a half inch panel embossed so that i think it’s kind
8:58
of cool hadn’t done that before so i decided to try it out and i love that burst it is so so pretty now to go along
9:05
with that kind of imagery you can see it better on that picture we do have a glimmer plate in
9:12
here this one is the glimmer of the month
9:18
and it has the same rays so i know that is super super cool
9:25
and then i haven’t really looked close at the rest of this so this is basically a little sun
9:31
and a die cut for in the center this part is actually these two are dyes so that you can cut out a
9:37
either a sun or it could be kind of a um
9:43
i don’t even know what to call it my brain just stopped again so sorry about that guys but we do have a couple more
9:49
glimmer plates to go with it this one says you are the starburst in my day
9:56
have a brilliant birthday and
10:02
smile smile sparkle shine so i think those are really cute and i think that
10:08
is going to be just just lovely one of my favorite uh cards from last year was
10:13
one that i did a a starburst i mean a sunrays kind of thing with and that was
10:18
with a lot of glimmer paste it was it was all rainbow and glimmer paste so that’s the first one and that
10:25
one again was the gl oh we had the embossing folder of the month and the glimmer of the month
10:31
this one is the
10:36
okay we’ve got the stamp and die of the month so this is kind of cool
10:42
so we’ve got these all these cute little packages and all of these sentiments to go with it and then we’ve got this
10:48
which cuts them out so we’ve got our packages
10:54
this one is
11:01
from all of us lots of little ones for all we all of our little um
11:07
our little ribbons this one is from
11:14
i think it’s from collecting happy moments
11:19
i have the hardest time lining these things up and figuring out which one is which that one is just a gift another
11:25
one of our little ribbons the last one of the ribbons i love that they give you a die for all
11:30
the things you know this one is for happy
11:35
and birthday and then to say thank you so the only ones that don’t have a diet that goes
11:41
with it are these basically square-ish or rectangular
11:47
sentiments janine says that she loves that sunburst yes me too oh my goodness this is so so
11:53
so pretty gonna go back up through the chat see if
11:58
i missed anything
12:07
thank you miss crystal no they were not part of the box they were actually from the um from the recent new release those
12:14
are the i dance and we dance they’re two different sets i’m planning on making something from both of those for the
12:21
card class but that just means pick what you like right or you can wait and see what it’s going
12:27
to be like when i try to do it using a julie nuttings stamp is what my plan is
12:33
to do one without using dies and i need to go ahead and get that made
12:38
in the next day or two so that i can share that with you so this set again is the stamp and die
12:44
of the month which i think is perfect for birthdays and we always need more birthdays along with that same thing is this one
12:51
this is the die of the month so this is a small die of the month
12:56
and you recognize that that is the same image that we just had on the stamps but
13:02
this is longer so this one is just under
13:09
it’s right at five and a half which means that is going to be perfect for a border
13:18
i’m grabbing a card base real quick so this is an a2 size card base and
13:25
you’d be able to basically line it up along the bottom but wait there’s more
13:31
i had to say that sorry there are these other dies which line up
13:37
this one lines up with the bottom i believe i thought that was the bottom maybe it
13:42
lines up with the top oh that’s because i’ve got it wrong side up okay cutting blade down right
13:49
so this one cutting blade down lines up with the bottom meaning you had can do a package
13:56
border along the bottom of your card or you could cut them all out
14:04
so you’ve got different options with one die set okay so that’s for the packages parts then we’ve got some sentiments to
14:10
go with it this one is
14:16
gift for you this one says day
14:22
as in it’s oh and we also have more dies for those little ribbon pieces
14:29
which means you know i’m going to be doing it out of that awesome awesome awesome gold mirror cardstock
14:36
those are going to be so pretty and we got a bunch of them
14:41
and then this one is happy
14:46
and this one is your so a gift for you happy day and it’s
14:51
your day all again good sentiments for a birthday
14:56
or for pretty much any kind of occasion where you’d want to give somebody something special
15:06
okay i am going to try adjusting this a little bit more a little bit brighter
15:13
because i hate it looking so dark but i didn’t like that you couldn’t see that embossing
15:18
anywho
15:23
so i’ll put those back in there and you see i haven’t even put these on my magnetic sheets yet
15:30
i have not gotten a chance to play with any of this stuff yet okay then we’ve got the amazing paper
15:36
grace now last night i got to see a video showing this thing put together
15:41
and it’s like oh my god this is so so so pretty and to be honest when i looked at it to
15:48
begin with i had no idea what it was
15:54
let’s see if you guys can help me figure out
16:00
it’s a little watering can i think it’s and it’s of course got some little flowers to go with it but it is a
16:06
dimensional one this is one of the ones that is it’s a pop-up so you basically wind
16:12
up cutting out like three different layers and it pops up like that little teacup that i did
16:18
a couple of months ago so it’s basically the same kind of design amazing paper grace they do these a lot
16:24
and we’ve got let’s see this is the piece to go back here in the spout and then we’ve got
16:32
the piece that is all the little holes so that the water can come out
16:38
and i want to make sure that you guys are able to still see me because you know what nobody has said anything in
16:44
the chat in a little bit so go ahead and say hi and let me know that you guys can still see and hear me
16:51
so this is of course the middle of our little daisies so it’s actually a separate piece
16:58
hello miss lynn she is watching from milwaukee awesome and this piece i think that is
17:05
kind of cool i had no idea what this one was until i was watching that video and what they do with this piece is they cut
17:12
it out you put glue in the center and you fold it in half and it’s your stems so that these guys can stand up better
17:18
so you’ve got a double layer of cardstock holding them up as a pop-up above your little watering can um the
17:25
one i saw in the video though was not one that would be able to fit into a regular a2 envelope so i’m thinking
17:31
these are gonna be five by seven cards i mean you could either put it on the front of a card or you could put it you
17:38
know you could make it as a standalone pop-up card all on its own hello miss vows
17:47
so thank you guys for talking to me again but yeah these are super cool right
17:54
and then what we have left is the card kit
17:59
what we do know is there’s going to be paper there’s going to be ephemera and there’s going to be other stuff in here
18:06
and i am not going to be able to use them all up
18:13
yes um val’s is my neighbor from down the road she is actually down in hollywood florida
18:21
i like it when i have some locals okay so first we’re going to just look at the little thing that comes with it
18:27
so this is saying there are as usual 10 pieces 10 cards and envelopes nine pieces of cardstock paper pad
18:35
puffy sentiments chipboard embellishments sequins die cut shapes adhesive tape foam
18:42
squares all the good things so here are the sequins these are some basically some clear sequins
18:49
they don’t look like they’re quite they’re not as iridescent as the other ones that i have but they’re more white so those are pretty
18:55
and i like that they’re different we’ve got our die set we just take everything out of the box real quick
19:02
puffy stickers instead of thickers oh this is cool okay everybody knows i don’t see that she’s
19:09
in here yet but pj b stamper is closing on her house so i’m thinking
19:15
this is a perfect this is going to be perfect for her little housewarming
19:20
so i’m going to have to send her a card for that i’m so excited for i know she was having
19:26
so much trouble trying to find just the right house and then not have all the issues
19:33
okay so we got our fabulous gold mirror cardstock as usual yay
19:39
and then some pretty colors of card stock oh that’s the first time i’ve had the dark dark green i think what
19:45
they do is they switch the colors based on what month it is kind of to go with the season so now i’ve got a darker
19:50
green to go along with a lot of the pastels which is nice so a bunch of cardstock to play with
19:57
my regular cards and envelopes and now let’s get into the gets of this
20:06
yeah i see that the colors in the paper pack seem to be a little bit more vibrant than what we’ve had the last
20:12
couple months and this is the first year that i’ve been with doing the kits so i don’t know
20:18
how they normally do things but it’s kind of neat seeing how it works hello miss maureen
20:27
so here is a quick flip through of the papers that is cute all those little signs
20:35
and a little park yeah this one looks like they’re getting ready for you know late spring and
20:41
getting ready for summer and travel and stuff like this one it looks like it’s a neighborhood map
20:46
like what you’d see on google love those hearts but who doesn’t love hearts and i love it when they do a scripty one i don’t
20:53
really have that much scripty paper what i need to do is get me some scrippy
20:59
scripty stamps okay so those are nice and love all of
21:07
that again there we have our double-sided tape here are the little chipboard
21:12
pieces that we’ve got a little cafe awesome
21:17
these look like things that would go in a planner to me a little bicycle that is too cute
21:23
[Music] going down memory lane yeah this does remind me a lot of stuff
21:28
that goes in a lot of folks planners because what do they do a lot of folks do their memory keeping there and we’ve
21:34
got all these cute little thicker i’m all these cute little puffy stickers now i would not put puffy stickers in my planner i probably wouldn’t put
21:40
chipboard because it’s too thick but anyhow but these are cute simple joys special day friends together quality
21:47
time all of that is super nice and we’ve got this cute little house
21:53
welcome to the neighborhood best neighbor ever so thankful for the sweet
21:58
neighbor life i miss your smile your laugh your company your hugs and everything about you that is super sweet
22:05
i hope your day is filled with all the things that matter most for all you do for all you are all our things
22:12
closeness isn’t measured by miles it’s measured by love that is sweet then our
22:18
little dies that go along with it i know there’s a fence
22:25
so we’ve got our little fence we’ve got some flowers we’ve got some oh that’s nice so we’ve got this little
22:31
die that does a little embossing on your cardstock to make the i’ll make the fence panels
22:37
so you basically put down cut this one out of one piece of cardstock cut a bunch of these guys out
22:42
and then layer the little fence panels on top of your fence and then it’ll get
22:48
a more of a realistic look so that is so cool
22:53
so crystal said let me pop that up
23:02
and i don’t know why it’s not showing over there there we go she said i saw christy marcotte open
23:07
hers too and decided i wanted this kit too because of the picket fence and everything else adorable set this time
23:14
absolutely we’ve got a couple of stems for our flowers lots of different little flowers
23:20
and some greenery to go with it and this one
23:26
not sure what that is but i will have to watch some more videos and see on the pieces that i don’t know what they are
23:31
hello miss bitty penny welcome honey by the way if you don’t remember benny
23:38
penny is going to be on craft roulette tonight
23:43
so be sure to stay tuned and i am not going to go too terribly long because i want to make sure everybody has time to
23:49
get over there for her and i think i seem to recall that tea was going on
23:54
at some point this afternoon too but i don’t quote me on that if somebody else knows for sure
24:00
please go ahead and pop that into the chat for me so that everybody knows who’s going on live because i want you
24:06
guys to be able to see the other folks okay so that is all of the stuff in the club
24:12
kits for this month i have not put a poll up so let me create a poll real
24:19
quick and then you guys get to vote on which thing you want me to play with i
24:24
don’t know that it’s going to let me put everything up so i’m going to just put a couple of things up
24:35
okay so we have got the watering can because i know some folks said they like to see that
24:44
got the watering can we’ve got the card kit
24:51
i think it’ll only let me like add like three things on here actually it looks like it might do four
24:57
um i do know i like those um that border packages
25:07
and then we’ve got the packages
25:13
stamp and die that would help if i spelled things
25:19
right okay so i’m going to just put those four things up there and you guys let me know what you’d like
25:24
for me to craft with first
25:32
and i’m just going to give you a couple of minutes on that and while you’re doing that i’m going to
25:38
go ahead and grab out some of my magnetic sheets i think i put them over here
25:47
don’t tell me i lost them again now that’s bad it’s where i could not
25:53
for the life of me remember what i did with them and then i found them and they were like basically right under my nose
26:00
here that’s that’s not them
26:10
todd i did it again i lost the magnets i have no idea what i did with him i could have sworn i put him over here
26:18
did you steal him okay my husband said he did not steal him do we want to believe him
26:29
okay so far we’ve got 75 percent is the watering can
26:39
okay okay cordelia says packages border die
26:46
because i’m getting that one whenever they mail them out awesomeness well i will be making some i think i’ll go
26:51
ahead and pick that one as being the next thing that i make something with so that video will be coming up in the next couple of days
26:57
so just for you miss cordelia
27:10
and to be honest i thought i was better organized than apparently i am because i cannot for the life of me find where i
27:18
put my magnets okay so we are at 75 percent wanting the watering can so i
27:26
guess that’s the one i’m going to attempt and i think i want to do it with some
27:32
silver just because it’s a watering can right
27:43
okay i want to put all the stuff back in here that belongs in that so i don’t get it
27:49
mixed up with the other stuff because i do that sometimes except i think i’m going to leave the
27:55
card stock on top and i’m going to leave this out
28:01
just because i don’t i know i’m gonna need to use that i didn’t show you all of the bits in
28:07
the ephemera pack but just looking at it it looks like it’s pretty much all of those flowers
28:23
okay so jenny janie um cordelia’s asking how you’re feeling
28:28
so i know everybody has been thinking about you and keeping you in our prayers
28:34
and all of that so i am so glad that you are starting to feel better and that you are able to
28:39
hang out with us again it was nice of being able to talk with you a little bit yesterday
28:46
okay this opens here okay
28:52
i already cut the top off dummy
28:58
okay i’m also trying out something a little bit different with my die cutting
29:04
because i found stuff and that’s one reason why i was able to get those cards done i cut out a ton in
29:11
little time and i’ve got an idea for another way to do this too but i went ahead and i found
29:18
my sizzix sticky grid
29:25
my husband’s being a pain he hadn’t gone on his bike yet he’s doing other stuff at the moment
29:31
hello miss pam okay miss pam i gotta show you this honey because i was thinking about you
29:37
the card kit of the month and i just dumped the dies out
29:42
the card kit of the month is all neighborhood and house and i was thinking that would make some really cute cards
29:49
for you because you are getting a new house
30:00
so want you to see that that is just too cute
30:07
and pam go ahead and tell us what other channel that you’re going to be on that you’re going to go over and hang
30:12
out with i mean i’d love for all of you guys to stick around here and catch their replay but you can always come back for my replay too it’s entirely up
30:19
to you guys i mean i tend to do the multitasking and
30:25
go between two different channels a lot of times
30:31
okay so this is
30:37
okay so this is a sticky grid and i’ve got it adhered down to one of my thinner
30:42
plates i believe this one is my one of my sizzix plates
30:48
and this is one of my other my gemini plates that is warped but this has been i’ve been using this off and on for like
30:54
a year and it hasn’t gotten any worse than that because i’ve been using the magic map which is awesome so what i’m
30:59
gonna do with this after i remember what i did with my watering can
31:06
is this is really good if you’re wanting to do multiples and i’ll just remember i have just tried
31:13
this out today today is pretty much my first time doing it so but i’m going to go ahead and put
31:18
that in place and it worked out really good for all the stuff that i was doing i think what i want i want to emboss
31:25
that into the metal a little bit and the same thing there and this is going to hold all the pieces
31:32
pretty much in place got my spout and i’ve got my handle if i can pick it
31:39
up and then
31:45
this piece is the one that makes for the side so that we can basically cut it
31:52
we can basically make it into a 3d and let me get the comment back down so you guys can see
31:58
and i think i’m going to move things around again
32:06
so i can try not to waste any more paper than i have to
32:11
so usually you need to tape this in place so that it doesn’t shift but the sticky grid is going to keep it in place
32:18
which is partly why i’ve got a couple of ideas that i think will probably work to do the same kind of thing but we shall
32:24
have to see
32:33
okay so i think that will work good and that’s my gold where’d i put my
32:38
silver piece that i had taken out okay so i basically need
32:44
that’s seven inches stitches i need at least seven inches by
32:53
five and a half
32:58
like i said i don’t want to waste any of this so i’m going to cut it down to
33:05
five and a half it does look like it’s about seven
33:22
kind of eyeballing it so i don’t waste too much so now that i’ve got that in place there
33:28
all i have to do is just place my cardstock over the dies
33:37
then i’ll put my magic mat on top so it’s going to cut into the magic mat and then place my other thicker plate on
33:44
top and then i’m going to run it through my gemini junior or you can of course do this through your spellbinder six i’ve
33:50
got it sitting off to the side too
34:00
okay let’s see how it looks
34:06
and one of the things that i don’t know is you can’t really tell really well whether or not it’s going to pop out
34:12
real easy but that one did look how pretty
34:18
oh that is so nice and then we’ve got the little handle
34:27
and then one trick i figured out while i was playing and making those other cards
34:32
was using some low-tech tape to pull them out of the dies
34:41
and that works perfect now i can pick up this
34:47
big piece here and trying not to bend it too much
34:52
because that’s the thing it does bend regular card stock anyway and we know the metal cardstock bends
34:59
more so now i can put another piece in and cut another one of those little
35:05
cans so for this one i’m going to need one two three
35:11
i think i’m gonna just use three it’s a video that i watch had where they
35:17
used like they used i think they cut it out like five times
35:24
and that was because well that actually is a better idea i think i’m gonna do two with the silver and then do the rest
35:29
out of some heavy weight for the inner pieces because you won’t see them as much i
35:34
don’t think and then i don’t have to waste as much of my card stock and now that this is all situated where i want it on there
35:41
all i have to do is lay my card stock on top
35:48
and make sure that the sticky grid grabs it and put my plates back on top and run it
35:53
back through i was shocked at how much the time it actually saved me doing that
36:01
what i’m thinking about doing is using one of those um off-brand
36:08
um mats for like your die cutting machine and see if that will work
36:13
but i thought i had one already cut out
36:18
i mean already out and you know cut for another purpose and had extra but i can’t find that anymore
36:30
there’s my second can
36:37
okay so we have two of these we don’t need any more than two
36:43
but we do need more of the watering can and the handle
36:48
and the spout so i’ve got two and the way that these are going to work
36:55
is they’re going to slide into those little grooves there and yes i do need if i want one on the
37:00
front one on the back i do need some more of those but i need those in white and then i will also need these guys in
37:07
silver so i’m going to go ahead and cut a piece of the silver down so i can
37:12
have the spouts because i do want those to be in silver
37:18
so pressing that down so it sticks on the sticky grid then
37:38
so
37:50
and then i will run it through my machine again
38:14
so now we’ve got one of the stabilizers i probably should have done that in heavyweight cardstock but i still have
38:19
all this michael’s recollection stuff that i want to use up so i’m just using that today
38:26
okay come on let go for me
38:31
got my handle
38:55
okay so we have one two three
39:00
i think i’m gonna do a couple more of the handle too just because i’m not 100 sure i only
39:07
watched the video once as to how this is supposed to go together so
39:26
bye yeah i know you guys are surprised at how fast i’m die cutting right
40:05
okay i’m going to see how we’re doing and see if i’ve got everything that i need and i’m just leaving that on there
40:10
because i’ll probably need to cut some more of them
40:23
that is just too darn pretty i do think i want to cut some more and i think i do need the heavyweight
40:28
cardstock this being mounted onto that looks like it would probably make it all pretty stable because the
40:36
the metal is thick enough but i think it does need to be backed with some white so now i need some heavy weight
40:43
white card stock so grabbing card base
40:49
my question is do i need more of the handles so i’ve got one two
40:55
handles and spouts three there four
41:06
i have one on the front yeah i’m gonna need a couple more of the spouts also might not need any more of the
41:13
handles but
41:26
let me go put those in my scrap bin
41:34
okay
42:18
here we go
42:44
so crystal’s saying something about having 45 12 by 12 card stock paper pads
42:50
so is that decorative paper like um pattern paper or is that the heavyweight card stock
43:07
my reason for having so much so many paper pads the 12 by 12 size is that
43:14
oh that is just too pretty anyway my reason for having so many of those is
43:19
because when i bought them i was thinking cost per inch
43:25
because the 6×6 paper pads were more costly for less paper and i didn’t like that idea
43:32
so okay let’s come on up
43:48
and i think i’ve got more than 45 paper pads which is kind of sad
43:54
so i’ve got a front a back and then one of the inners so i need two
43:59
more of the inners and then i’ve got one
44:05
two three that for the inside then one for
44:11
the front for the back so i’ve got enough of the silver
44:17
i’ve got enough of those so what i need is go ahead and take this one up
44:26
so what i still need are [Music]
44:32
i think it’s just this yeah i think that’s all that i need is just some of these
44:39
i need a couple more of those and then of course all the flowers and stuff but i’m going to do that after i let you guys go because
44:46
i know that there are other live streams that you guys want to watch besides hanging out with me all day
44:52
which of course i don’t mind hanging out with me all day but still hello ms shea
44:57
is there anybody that i haven’t said hello to and if you are out there watching and you haven’t said hello
45:04
if you haven’t posted anything in the chat please do so if you’re watching over on facebook please add a comment
45:11
over there as well and then come on over here to youtube and hang out with us
45:18
okay so i’ve got two i need one more of that size
45:33
and let’s see where is my other card base that i grabbed to pull over here
45:40
yes i did maybe i already used it
45:53
so cordelia is trying to watch and organize her markers well at least i’m not doing anything really super exciting
45:59
all i’m doing right now is just cutting everything out although i’m about to start putting it together
46:14
okay i think i’ve got all the pieces i need for the can
46:28
and i’ll put that off to the side and put these in my scraps
46:39
okay grab me a drink of coffee
46:48
well maureen i didn’t know that it was her birthday
46:53
so maureen just said happy belated birthday uh let me see where is that message in
47:00
here i’ve got too many different i’ve got a couple of different chats up and one of them has the message on there and the
47:05
other one i don’t see it
47:11
probably because it just hasn’t hit yet okay now it says new comments so happy belated birthday to g williams
47:19
and wilkins sorry about that and she had asked a little bit earlier about paper so she was saying that i always use
47:26
cheap 65 pound cardstock
47:31
okay so what i use and i’ll just kind of show you the difference on them this one’s heavy
47:37
weight i can tell by just feeling them this one is lightweight cardstock from
47:43
you take that down this one is lightweight card stock from michaels this is recollections cardstock
47:49
this is what i have used for majority of my projects for years i do have accent opaque nail which i
47:55
think is 85 i do have some neenahs that i think is 85 so those are kind of the lightweight ones and then this one
48:02
if you look at how easy the 65 pound bins and then you see how tough this one bends this one is 110 pound 300 gsm also
48:11
from michaels so this is the heavyweight card stock that i always use for my card bases so
48:16
any all of you guys if you get a card from me that’s the card stock that i normally put my cards on only time i
48:23
don’t is when i’m using up the card bases from from out of the card kits which
48:31
in my opinion are a little lighter weight okay this one
48:37
feels like it is lighter weight than this does and i’ve got lots of different colors
48:43
all of these are the this is the 300 gsm this is lighter weight than
48:49
my regular card bases so that’s just my preference i feel i like my my cards to be solid and part
48:57
of that came because i did of several different heart card hops five years ago and the cards that i liked the best
49:04
were from some folks that used number one they used heavyweight card stock and they layered up their papers you know
49:11
they started doing some of the layers and they felt nice i don’t always want mine to be that bulky but the 110
49:17
compound cardstock always feels awesome to me okay so first thing i’m going to do
49:25
so with these guys let’s start with that this is the pretty side and this one is the not so
49:30
pretty side you can see kind of some of the marks on there from my my board so i’m going to basically be folding this
49:36
away from the pretty side on that score line so i’m folding it down like that i’m
49:44
going to do the same thing on this other side and then do the same thing on the other
49:50
piece and this is because i want the pretty side to be facing out
49:55
when we have everything assembled
50:02
okay so i’ve got it that way then i’m going to take one of
50:07
yeah this is one of my heavyweight ones i’m going to take one of my heavyweight ones i’m going to put it in
50:13
i have to remember i said pretty side out right so we’re going to slide it in to one of the slots i think i’ll start with the one in the back
50:21
and i do remember having a little bit of trouble trying to get those in the last one i did like this which was that
50:27
teacup and it’s just because i don’t really do a lot of these type of cards
50:32
so you slide it into the slot come on go in there
50:40
okay
50:45
this is going to be able to basically fold flat your card’s still going to be able to fold
50:52
flat yeah accent opaque is is pretty good i’ve got some i believe i’ve got a thing of 110 pound of that as well so
51:00
once i get through my michael stuff i’ll have that to work with that’s kind of what i’ve been doing i’m not willing
51:05
to waste anything that i’ve already got so because of that i am
51:11
basically using up what i have and switching over to some higher quality things at this point it really just
51:17
depends on where you are in your crafting
51:27
and you may decide that neenah solar panel solar need a solar weight
51:34
nina solar white 80 pound is perfectly fine for you i just know what i enjoy the most okay
51:42
so that is for two of those those are in and this one is also my heavy weight
51:48
and you’re probably noticing that i’m picking them up and feeling the the thickness of the card stock and i’m able to recognize how thick it is i’m not
51:55
able to tell as big of a difference just from touching them when it comes to the lighter weight card stocks like the the
52:02
neenah and the accent opaque 80 pounds
52:07
but i can usually tell when it is the recollections heavyweight heavyweight just feels much better
52:16
how am i go in there all the way okay there we go
52:25
okay so that’s the first side so you kind of get the idea it’s gonna be a pop-up that’s gonna be so cool
52:32
okay and of course this is starting to come apart already
52:42
i’m wondering if it is because i’ve got it in the metal and
52:48
okay these do seem to have a little tiny slit at the bottom so that means i need to try to slide them down just a touch
52:55
to lock them in place
53:02
okay let me put this one back in there
53:12
and yes when you saw my teacup card you didn’t see me struggle with any of this stuff because guess what i edited that
53:19
part out
53:31
okay so for these i am going to adhere them down on top of my my
53:38
lightweight white cardstock and i am going to speed things up a
53:44
little bit
53:50
and i am assuming that it is going to stick to the metal
53:56
it’s a big assumption on my part
54:01
so this is some beacon value adhesive spray and i got this at dollar
54:09
tree months ago so much and it was it’s been long enough that it was really hard for me to get it
54:15
to spray at all it didn’t want to do anything and that is probably too much to me it
54:21
just feels kind of like it smells like elmer’s
54:27
and it just feels like you know like watered down elmer’s glue
54:37
okay but that is good on that one get the other silver and put that on top as well
54:44
[Music]
54:50
okay and i’ll get this guy out of the way
54:56
i haven’t used my glue box and i don’t know how long
55:05
and next i’m going to cut off these little these little tabs
55:10
and that’s a little bit off let me see if i could slide it still
55:16
barely okay that looks good though
55:35
hello miss bethany so i am going to glue this one on the front of this tab
55:42
and the part that i’m not real sure on is how well it’s going to stick with the
55:48
basically with the metal that at least is going to be metal to
55:55
card stock right i believe it goes right about there
56:05
actually it’s right about there
56:17
okay and turn it over and do the same thing on this side
56:24
trim these little bead bits off
56:42
and then glue this one on to that little tab
56:57
so now we have silver on the front and silver on the back okay so i think before i get started on
57:05
the other end i’m going to go ahead and start adhering these little guys on i’ve got
57:10
i actually have five i probably should have adhered one before i adhered this down
57:16
is it oh it’ll work
57:21
okay put that one in there and then let’s see if this one has set too much for me to be able to slide
57:28
it in nope i’m able to still get it awesome
57:37
it’s right about there and then add a little bit of adhesive
57:42
back here and put that to the top
57:52
and use one of my tweezers to make sure that it stays in place long enough for it to catch well
57:59
the hard part is since we are using that mirror cardstock
58:04
these i don’t it doesn’t stick quite as quick as regular card stock would
58:10
so let me add that one there so now we’ve got two of the handles
58:16
and of course that is coming off
58:27
i’m thinking the double-sided adhesive tape you know like red line tape or something would probably hold it in place faster
58:39
but i love using my art glitter glue okay bye-bye miss g wilkins you have a
58:45
nice night honey okay so while that is trying to adhere
58:51
on those two i’m going to go ahead and start putting some of these in place on
58:56
this side i think so we’re going to do it the same way we did the other
59:02
needs to go on the inside so they need to slide onto the inside pieces
59:09
let me grab the first one
59:16
yeah you guys would have to pick the thing that takes the longest to put together huh
59:22
but it is going to be really pretty when we get done and i i am having trouble getting these things to actually move
59:46
okay so that one is partially in awesome
1:00:12
okay so the first one is in there yay kind of sort it in there anyway so that
1:00:18
works so i’ve got the first one now let’s see if i can get the second one in there
1:00:23
and all this time we’re also waiting for the the adhesive to dry on the other side
1:00:48
and i am basically trying to widen the slits a little bit so that i can have less trouble putting
1:00:55
everything in there first off it’s it is metal so it is i’m sure it’s metal
1:01:00
but it to me it feels like metal so i think that’s part of the reason i’m having some issues with it going in
1:01:12
so
1:01:26
and of course one of the things came loose so anyway that’s all right
1:01:36
make sure i’ve got the embossing going the right direction
1:01:50
okay and let’s see if i can get it to go back out over there one of the positives is that i am going to be adhering
1:01:57
another one of those handles and that’s probably what i need to go ahead and do on this side so it doesn’t fall off i’m going to be adhering one of
1:02:04
the handles to the piece of white card stock that’s poking through
1:02:09
so those should basically should stay in place pretty well once all that’s done and tweezers
1:02:26
let me go ahead and add those
1:02:34
yes i do have three more left okay
1:02:41
so this one i’m gonna go ahead and slide in and if it will go in
1:02:50
hmm
1:03:05
okay so now that one is slid in there yes awesome
1:03:10
go to the next one i know i should have done this the first time around i’m still learning i told you i just got this
1:03:16
well i didn’t just get it but this is the first time i’ve been playing with it it’s been sitting in a cabinet waiting
1:03:23
for me to play
1:03:43
okay so that one’s there i am learning how to do this with the
1:03:49
metal though i’m basically having to bend it out a little bit so i can fit the next piece
1:03:54
in just good to know it doesn’t perform it doesn’t act
1:03:59
exactly like card stock you know so miss cordelia you’re going off to eat
1:04:05
huh okay well i will talk to you later honey thanks for coming by
1:04:13
okay so those are done on that end now i just need to adhere them to their corresponding
1:04:21
top of the can i’m going to start with the one in the
1:04:27
back okay that one has already been
1:04:33
glued i think no there’s not any glue it was in the right spot so i was surprised
1:04:50
okay this one move it over a little bit and press it down
1:04:59
and then the same thing for this one adding a little bit of adhesive on the tip and it is and there is a kind of a
1:05:06
embossed part that’s not embossed on the tip so that you can see where you’re supposed to glue
1:05:14
okay so far that’s what it’s looking like
1:05:22
and since i already know that this part does not really want to adhere well i’m going to go ahead and do that
1:05:28
and i need to put this one on
1:05:37
and this is going to go [Music] okay so this is basically going to go
1:05:44
right about here on to the outside so that’ll be fine
1:05:50
and i also forgot that i need to slide this one in there before
1:05:55
before i ah okay wipe that off start on the back
1:06:03
because that’s the one that i’ve already got in place is the one in the back
1:06:37
thank you shane shay thinks i’m going to stab myself with this little knife
1:06:48
i will do my best not to i haven’t stabbed myself with it yet which is good
1:06:59
get that in place again okay that one’s there yay
1:07:09
yes sometimes the really really really pretty and complex
1:07:15
designs are the ones that take a bit of time to finagle
1:07:21
yes that is a technical term
1:07:42
and they are not wanting to cooperate
1:08:18
and yes i pulled that back apart because i want to get this in there straight and seem like this one was not fitting in
1:08:24
their right was not folding the way i needed to be able to fold i need it to be able to lay flat
1:08:32
otherwise you cannot mail it out to anyone right
1:09:14
and of course now i just had an idea as to how to make it so that it does i am adhering this piece now it’s going to be
1:09:20
adhered to the metal and to that little white piece so now the white piece isn’t going to be able to pop out again
1:09:30
[Laughter] so um bethany is wanting to emboss
1:09:35
everything
1:09:43
oh awesome shae just got a an embossing tool fantastic
1:09:55
okay now i’m gonna put this back on to the back that of course came off
1:10:13
and i know that what i’m doing is i’m trying to do this too fast because i’m wanting you guys to see the finished
1:10:19
product before um before you run away and before miss um miss bitty penny has
1:10:26
her live stream and all of that and it’s not
1:10:31
it’s not basically not not working too well for me at the moment because everything is nothing’s wanting to stay
1:10:37
in place
1:10:49
okay so there’s that one let me go ahead and get this one in and of course the glue doesn’t adhere as
1:10:55
fast on this stuff as it does on on regular paper card stock so that’s
1:11:03
part of why i’m having some issues
1:11:08
okay let’s try again and see if this one works just like i’m hoping the other one did
1:11:14
grab my tweezers
1:11:26
this is gonna be really pretty when it gets done though i mean look at that
1:11:43
yeah what kind of crystal’s got a good question which kind of um heat tool did you get did you get the ranger heat tool
1:11:49
or a regular embossing gun because you basically need an embossing tool like um
1:11:54
something like this one this is my my marvie
1:12:01
and there are some that are better and there are some that aren’t as good but it’s kind of like this
1:12:13
okay that looks pretty good let’s try this one
1:12:24
so anybody else have a problem with patients like i do i’m not nearly as patient as i need to
1:12:31
be but i’m trying because having a little patience on your
1:12:38
projects is actually one of the things i’m finding more often more and more often if i’m i’m patient
1:12:44
and i do okay you got a wagon or a heat gun that’s supposed to be one of the good ones
1:12:49
my first one was a juris i think i got it at michael’s and it was
1:12:55
kind of cheap because i got it at michael’s
1:13:00
but it lasted me a good long time i still have it i switched over to this one i think i
1:13:06
got this one in like a a grab bag or something
1:13:11
so i wound up upgrading because basically an accident it wasn’t something i planned on and i’ve been
1:13:17
wanting to get the wagner at some point but this has been working fine and i don’t do really enough heat embossing
1:13:25
to in my analytical side of my brain to justify getting another one yet
1:13:33
okay so let’s do this one again yes fold it that way
1:13:39
so it’s nice it’s got these little folds this little score line so you know exactly where to fold it
1:13:56
okay and then grab my tweezers to hold it on there and of course now i
1:14:02
realize i didn’t do it all the last one but i think i’m not gonna because that kind of looks good
1:14:09
it has that little bit is where the spout is just a little bit from the edge so it looks like it’s
1:14:14
supposed to be in the middle of your of your can so that is going to be good
1:14:19
and then all i need to do now is add adhesive here
1:14:28
fold it flat
1:14:36
and the reason it’s not completely folding flat is that some of these pieces are not wanting to be in the
1:14:41
right spot okay so now everything is about where it’s supposed
1:14:46
to be that’s good pressing and holding [Laughter]
1:14:53
come to the dark side we have cookies where are my cookies
1:14:58
okay guys i know it took a bit but there is our cute little watering can
1:15:07
and just like with all of these kind of i don’t know accordion kind of pieces oh
1:15:13
that one’s not adhered down but anyway i will i will take care of the pieces that are falling off because i hadn’t had time to
1:15:20
dry well enough but just like all of these it basically is going to take some time to kind of move it back and forth
1:15:26
so that it actually moves right and this one is the one that’s not
1:15:32
adhering completely
1:15:38
and i know it’s not the fault of our glitter glue because our glitter glue is awesome i am just not being patient enough to
1:15:45
give it enough time to actually adhere thank you so much miss debra
1:15:53
and yes i know this one took a little bit more time than what you usually get from me
1:15:58
for one well okay i know i take too long anyway because i talk too much
1:16:05
but all i have to do now is basically decorate it up once everything dries so
1:16:11
that means i am going to be sharing those photos later on so you guys can see them
1:16:25
so that is all of the good stuff that we’ve got from spellbinders i have been on here for a little over an hour
1:16:33
did you guys want to see any of the the products again before i drop off and let you go over to the next live
1:16:45
yeah miss don says that she loves the watering tab if i had not used the metal
1:16:51
if i had not used the silver card stock on here the mirror card stock it probably wouldn’t have been so hard to put together
1:16:57
but i think it turned out pretty good hello simon hurley how are you doing okay so bethany wants to see once it’s
1:17:05
done kind of like it even stands up but what’s cool is like because of these
1:17:10
little stems you’re going to be able to put all your flowers in your little watering can that is going to be too cool you know something i didn’t do yet
1:17:17
i didn’t put the little pieces in the end though and this one still needs to dry a little
1:17:23
bit longer it is not wanting to stick to that metal
1:17:33
and i do want to thank simon hurley for dropping in i keep wanting him to come by and be on my channel with me at some
1:17:40
point but i know you got so much stuff going on with all your new products and stuff it’s gonna probably be a while before you get to before you have time
1:17:47
to come and hang out with us right i know i think the last um
1:17:52
the last one i saw you in the chat simon was where you were working on christmas for next year and so far you haven’t
1:17:59
been willing to share any of your your crafty goodness with us
1:18:05
we want to see what’s coming okay so for this one i think i’m going to cut that out of some black i know
1:18:12
i’ve got some scraps around here somewhere
1:18:17
you’ve been designing stamps all day you know we want to see them mr simon hurley
1:18:27
that would be awesome so i want that and then
1:18:35
i am torn as to what kind of what i should have on the inside there because
1:18:40
it kind of needs to be metal or kind of want it to be metal bye honey and my hubby’s going off for
1:18:46
his bike right now but i’m not sure on color
1:18:52
and the only ones that i have that are mirror
1:18:58
are going to be silver and gold
1:19:03
see i do have some other kind of foil card stock i think but i don’t know if i want to use that
1:19:09
what do you guys think
1:19:15
[Laughter] okay well simon you have an open
1:19:21
invitation hun um email me at wj’s craftingcorner.com and i will send you the link to my little
1:19:28
calendar so you can sign up for whatever day you want it’s always going to be a tuesday though because that’s what i’m doing unless you really want a different
1:19:34
day let me know because i don’t think these guys would mind coming on water droplets
1:19:41
oh i’m sorry i got distracted deborah says water droplets um
1:19:48
actually i’ve got an idea for that but i don’t know that i’ve got the stuff to do it but that would be kind of cool i’ll have to do that on another one but what
1:19:55
i’m looking at is this is the piece for in the spout that um where the water comes out of so maybe
1:20:04
maybe i will do that one out of silver and see how it looks and then do this out of black so we’ll have like the black behind the silver with the holes
1:20:12
and of course i was losing my
1:20:18
i lost my mind of course but you know and i don’t want to waste any of this
1:20:25
stuff that is too pretty i love love love that
1:20:30
silver okay so put that one down
1:20:42
one thing i did notice if you decide to use a sticky grid though when you’re doing your die cutting is that
1:20:48
if your paper isn’t big enough to actually adhere to the sticky grid
1:20:54
like these you have to tape it in place or these they don’t actually the paper will shift and of course i put it down
1:21:01
backwards
1:21:11
okay so debra is wanting bethany’s address
1:21:19
oh simon has tons more backgrounds oh my god
1:21:26
he’s been designing a lot yeah i try to avoid looking at rangers website because you
1:21:33
make me want all the things i already have too much of this right
1:21:54
okay so we’re gonna see how that does
1:22:12
and i’d love to know if anybody else has tried using the sticky grid like what i’m experimenting with
1:22:21
i mean this is this one is one i just put on here today and it is not sticking to my
1:22:27
um platform but it does hold the dies in place and that’s the positive right
1:22:35
why did i take those down because i’m gonna need it for all of them i need three i need two more
1:22:44
okay let’s do that again
1:23:20
oh bethany is getting her first batch of lunar paste
1:23:27
well simon got me thinking about blending and die cutting i haven’t done it yet but i went ahead and blended some
1:23:32
stuff this morning actually i think was last night while he was still doing it’s like i need to get ready for dinner
1:23:39
my husband was getting irritated because i wasn’t coming in to eat soon enough
1:23:44
but it’s like you know i want to play
1:23:50
okay here’s one let go
1:24:09
okay so there’s two of those now i need two more i have enough
1:24:16
of the silver left to get that one done now i just need another piece of black
1:24:27
tape them in place so they don’t shift on while it’s going through
1:24:37
yeah maureen i agree bethany is definitely embracing the dark side
1:24:44
um bethany i think i sent you an email yesterday um let me know if you got that okay
1:25:08
i think it’s so fun that i figured out how to get this stuff out of there because it was i had the hardest time
1:25:14
getting the first few to come out of the dies using that
1:25:20
that words are hard sorry guys i don’t know
1:25:27
what i’m saying get all the little bits poked out of
1:25:33
there real quick
1:25:39
actually if i can get the tape off the back that’s probably going to pull them all out for me
1:25:50
i’m just always afraid i’m going to mess up this lovely mirror cardstock
1:25:58
oh i don’t think i told you guys but i am i’m going to get to meet some of the folks from spellbinders because i’m
1:26:04
going to be going to creativation i asked if they needed some help and
1:26:11
they said sure and so i’m going to be going to creativation and it’s in orlando so that is going to be super
1:26:16
cool or whatever it’s called it’s namta but yeah it’s still creativation so that’s
1:26:24
going to be neat i’ve got a lot of projects and stuff that i want to try to get done between now and then because
1:26:29
otherwise i will go for about a week without any videos except for the
1:26:35
posts i do from the convention
1:26:44
kendra i know what you mean i was like i i didn’t know how it worked but apparently you have to be affiliated
1:26:50
with one of the companies in order to get to go which means i would not be a bit
1:26:56
surprised if simon hurley was going but i do know that aaron reed is going
1:27:02
to be there and i mean these are people that i know that i’m going to be able to say hello to for the first time
1:27:09
i did meet aaron reed in person when i went to texas back in november so that was cool
1:27:14
but um cheryl buglioli is going to be there and you know she was on my live stream
1:27:23
a month or so ago a month or two i don’t remember how long ago it was but we were playing with all
1:27:28
the gel presses and stuff but she’s going to be there and we’re going to definitely try to hook up
1:27:34
so that’s going to be super super fun and i’m planning on sharing my experience and stuff with you guys
1:27:42
and then i just found out that stamp stamp and scrapbook expo is going to be
1:27:50
here in june oh darn
1:27:55
well simon hurry up it’s florida and it’s nice and warm where i don’t remember where you’re at actually
1:28:02
but it’s been in the 70s here which means i’ve been able to go i’ve actually gone on a bike ride for i think today
1:28:07
was day six day six or day i think it was day six that i’ve gone on a short very short
1:28:15
bike ride um it’s i believe it’s in june
1:28:21
yeah okay you’re in wisconsin simon well guess what it’s nice and warm down here
1:28:27
you would love it and the convention center’s about 45
1:28:34
minutes i think from from here where i live so i’m going to be going to that to nam to from here
1:28:41
so that’s going to be kind of cool so i’m just putting some across the back i know some of the glue is going to seep
1:28:46
through but the um our glitter glue does
1:28:51
dry matte and clear so that’s good okay
1:28:58
set that aside to try to let it dry a little bit before i start putting it onto the other piece of metal
1:29:06
but yeah i would i would absolutely love to meet you in person simon
1:29:17
you have been an inspiration to so so many people
1:29:24
okay pressing it down
1:29:30
i should start taking out my acrylic blocks to help me with this but i figure right now i am too far gone to
1:29:37
do that oh thank you so much maureen i’m
1:29:43
assuming you’re talking to me you’re probably talking to somebody else but anyway i love the way that i mean you can’t really see it because it’s so
1:29:50
shady it is basically blinding you guys but yeah i do like the way that it
1:29:56
turned out it does take a bit of work and i know that some of you guys have said that you think i have so much patience it’s like no i am just chatting
1:30:03
with you guys while i play and i have gotten frustrated with some of the others but i think it’s just that
1:30:10
i’ve done i’ve done enough of them now that it’s starting to get easier not necessarily easier but
1:30:18
i’ve gotten more patient because i know how pretty it’s going to show up it’s going to turn out in the end
1:30:26
and doesn’t have to be metal i just decided to do this first one in metal
1:30:33
because of course i think of a oh that is perfect and now that i see it i’m thinking that
1:30:40
you could go instead of just doing the black you could do basically any color and have it coordinate with other pieces
1:30:46
of your card because that’s kind of the part that to be painted on the inside of that that nozzle and it really gives it
1:30:53
a really good 3d look love love love it
1:30:58
let me get the other two put on
1:31:27
okay that looks so cool
1:31:53
so there is our little watering can oh my goodness
1:32:00
oh kendra got a new webcam for her birthday awesomeness
1:32:07
that is fantastic honey
1:32:15
fantastic okay i am i told you i would i am going to let you guys go but
1:32:21
okay when i say that i think that this stuff is metal look at this this piece of my watering can is bent
1:32:28
just like as if it was like aluminum i’m pretty sure that these are all it is
1:32:33
basically it’s all metal i that’s one of my main questions i am going to ask the folks at spellbinders
1:32:40
when i get to meet them i am going to ask them what is this stuff made from
1:32:47
because it’s got to be metal it has to be but i think that that turned out super
1:32:53
cool i will be adding flowers and all that good stuff after it’s had plenty of time to set and dry
1:33:00
and um i will be back with another video in the next day or so i’m not sure what i’m gonna do for tomorrow um i think
1:33:06
what i probably need to do is work on that last actually a couple more of
1:33:11
those dancer cards and if you showed up later and didn’t
1:33:17
get to see those oh there they go i went ahead and made a couple because the class that i’m going to do for april
1:33:23
this is going to be on april 16th is going to be mother’s and father’s day cards using these cute little dies these
1:33:30
are from the march collect the march we dance collection from spellbinders
1:33:37
but my intention and this is one of the things i need to work on is um my intention is to also do a card
1:33:44
where you don’t have to have the dies but that does the same thing okay i’ve also got the legs and stuff already cut
1:33:51
out all basically all the pieces to do the one that’s the guy and he’s going to be holding a big blue ribbon and all
1:33:56
that kind of stuff so i think that’s going to be perfect for father’s day something like this i think is great for mother’s day like having a flower and
1:34:03
then have a mother’s day wish something like that but i think that’s going to be really cool so i still have another couple of cards to make as my samples
1:34:10
before the class but that class is on april the 16th if you haven’t already signed up there is a link in the chat on
1:34:18
the stream labs bot has been letting you guys know what’s going on so be sure to
1:34:23
click on over to that and go ahead and get registered for that class and that is only in a couple of weeks and that
1:34:29
means you should still have time to get this dye if you don’t already have it if you want to try it without using a die great
1:34:36
if you just want to watch and hang out and i’ll share your project with us after
1:34:42
the fact that’s awesome as well i’m going to do the same thing that i did with the last class
1:34:47
but better which is kind of do a presentation at the beginning and then move over into a craft and chat kind of
1:34:54
thing in zoom so that you guys can show me what you’re working on and all that good stuff so be sure to go ahead and
1:35:00
sign up just as a reminder because we’re we’re starting to run out of time and i really haven’t promoted it this month
1:35:06
anyway you guys have a wonderful day um just looking to see if i’ve missed
1:35:11
anything in the chat kendra says it’s this cool card
1:35:16
yeah i love these i’ll absolutely love these these are just too cute anyway i could have done
1:35:23
better on the background but it was kind of a quick thing
1:35:30
awesome so jeannie says that a great live event i look forward to being with you in may i
1:35:37
think that means that she signed up to be on our live again that will be totally awesome and thank
1:35:43
you so much bitty panty you are such a sweetheart you guys have a wonderful night and be sure to catch bitty penny
1:35:48
over on craft roulette in about an hour so you guys have a good one i will chat
1:35:54
with you soon and remember if i could make it and you saw yeah takes forever sometimes but if i can make it you can
1:36:01
too have a great day hug simon
I don’t know who gets more excited about all these goodies… me or you! The kit that you picked for me to create with is from the Amazing Paper Grace Club.
I die cut and assembled this lovely watering can popup during the live… and had to add the pretty flowers after the fact. So I created a second video for the Amazing Paper Grace Club, which has a shortened version of the watering can assembly as well as how to die cut and assemble the flower accents.
How to make a 3d Popup Watering Can | Spellbinders

I’m also adding a full transcript from the video in case you want to find something specific. This was pulled directly from the video, so I’m sorry for any punctuation, spelling, or other errors.
0:08
crafting corner today i’m going to show
0:10
you how i created this lovely wandering
0:12
can pop-up three-dimensional card uh
0:16
this is the new amazing paper grace die
0:19
of the month for the month of april 2022
0:22
and you guys got to pick that this was
0:24
going to be the first project that i
0:26
made out of the new club kids i did do
0:28
an unboxing a couple of days ago so
0:30
check out that video here but what i’m
0:32
doing today is i’m pulling some of the
0:33
um some of the footage from that video
0:36
to condense it down so that it’s easier
0:39
for you guys to
0:40
uh to manage and see what’s going on i
0:42
mean it’s going to be a better one for
0:44
me to go back and reference to be sure
0:46
to show how i put the can itself
0:48
together and then i’m also tacking on
0:51
where i put on all of the pretty flowers
0:53
and then you get to see the finished
0:55
product and how i got that all put
0:56
together so if you want to see the long
0:59
version the real time version of putting
1:02
together this uh this
1:06
pretty little watering can be sure to
1:08
check out that um the replay of that
1:10
live stream so let’s go ahead and get
1:12
started on putting together this card
1:15
okay so we are at
1:18
75
1:20
wanting the watering can so i guess
1:22
that’s the one i’m going to attempt
1:25
and i think i want to do it with some
1:27
silver
1:28
just because it’s a watering can right
1:32
okay so this is a sticky grid and i’ve
1:35
got it adhered down to one of my thinner
1:38
plates i believe this one is my one of
1:40
my sizzix plates
1:43
so what i’m going to do with this
1:46
is this is really good if you’re wanting
1:47
to do multiples and
1:50
just remember i have just tried this out
1:53
today today is pretty much my first time
1:55
doing it
1:57
so but i’m going to go ahead and put
1:58
that in place and it worked out really
2:00
good for all the stuff that i was doing
2:02
i think what i want
2:03
i want to emboss that into the metal a
2:06
little bit and the same thing there
2:10
and this is going to hold all the pieces
2:12
pretty much in place this piece
2:15
is the one that makes for the side so
2:17
that we can
2:18
basically cut it
2:20
uh we can basically make it into a 3d
2:22
and let me get the comment back down so
2:24
you guys can see
2:26
so usually you need to tape this in
2:28
place so that it doesn’t shift but the
2:30
sticky grid is going to keep it in place
2:34
then i’ll put my magic mat on top so
2:36
it’s going to cut into the magic mat
2:39
and then place my other thicker plate on
2:41
top and then i’m going to run it through
2:42
my gemini junior or you can of course do
2:46
this through your spellbinder six i’ve
2:48
got it sitting off to the side too
2:51
see how it looks
2:56
and one of the things that i don’t know
2:58
is you can’t really tell really well
3:00
whether or not it’s going to pop out
3:02
real easy but that one did
3:05
look how pretty
3:08
oh
3:09
that is so nice and then we’ve got the
3:11
little handle
3:17
and then one trick i figured out while i
3:19
was playing and making those other cards
3:22
was using some low-tech tape
3:27
to pull them out of the dies
3:32
and that works perfect
3:34
so with these guys let’s start with that
3:35
this is the
3:37
pretty side and this one is the not so
3:39
pretty side you can see kind of some of
3:40
the marks on there from my my board so
3:42
i’m going to basically be folding this
3:45
away from the pretty side on that score
3:47
line
3:50
so i’m folding it down like that
3:52
i’m going to do the same thing on this
3:54
other side
3:56
and then do the same thing on the other
3:58
piece
4:00
then i’m going to take one of
4:02
yeah this is one of my heavyweight ones
4:04
i’m going to take one of my heavyweight
4:05
ones i’m going to put it in
4:09
i have to remember i said pretty side
4:10
out right so we’re going to slide it in
4:12
to one of the slots i think i’ll start
4:14
with the one in the back
4:16
so you slide it into the slot
4:20
okay
4:25
this is going to be able to basically
4:27
fold flat your card’s still going to be
4:29
able to fold flat
4:40
okay
4:42
so for these i am going to adhere them
4:44
down on top of my my
4:47
lightweight white cardstock
4:50
and i am going to speed things up a
4:52
little bit
4:56
so this is some beacon
4:59
value um
5:01
adhesive spray and i got this at dollar
5:04
tree
5:05
months ago
5:07
so much and it was it’s been long enough
5:08
that it was really hard for me to get it
5:10
to spray at all it didn’t want to do
5:12
anything
5:14
and that is probably too much to me it
5:16
just feels kind of like
5:19
it smells like elmer’s
5:22
and it just feels like you know like
5:24
watered down
5:26
elmer’s glue
5:28
okay but that is good on that one
5:32
and next i am going to cut off these
5:34
little
5:35
these little tabs
5:38
[Music]
5:44
so i am going to glue this one on the
5:46
front of this tab
5:50
i believe it goes right about there
5:53
and turn it over and do the same thing
5:55
on this side
5:58
and then glue this one on
6:02
to that little tab
6:06
so now we have silver on the front and
6:08
silver on the back
6:11
okay so i think before i get started on
6:14
the other end i’m going to go ahead and
6:16
start adhering these little guys on i’ve
6:18
got i actually have five i probably
6:22
should have adhered one before i adhered
6:24
this down
6:25
is it oh it’ll work
6:30
okay put that one in there
6:33
and then let’s see if this one has
6:35
set too much for me to be able to slide
6:37
it in
6:40
nope i’m able to still get it awesome
6:44
and then add a little bit of adhesive
6:46
back here and put that to the top
6:54
okay so while that is trying to adhere
6:57
on those two i’m going to go ahead and
6:59
start
7:00
putting some of these in place on this
7:02
side i think
7:15
and of course now i just had an idea as
7:17
to how to make it so that it does i am
7:19
adhering this piece now it’s going to be
7:22
adhered to the metal and to that little
7:24
white piece and now the white piece
7:25
isn’t going to be able to pop out again
7:40
okay and then grab my
7:42
tweezers to hold it on there and of
7:44
course now i realize i didn’t do it all
7:47
the last one but i think i’m not gonna
7:49
because that kinda looks good
7:52
it has that little bit
7:54
is where the spout is just a little bit
7:55
from the edge so it looks like it’s
7:57
supposed to be in the middle of your
7:59
of your can so that is going to be good
8:02
and then all i need to do
8:04
now is add adhesive
8:10
here fold it flat
8:14
you know something i didn’t do yet i
8:15
didn’t put the little pieces in the end
8:17
though
8:19
okay so for this one i think i’m going
8:20
to cut that out of some black
8:23
and i don’t want to waste any of this
8:25
stuff is too pretty
8:28
love love love that silver
8:32
okay
8:36
so put that one down
9:05
i think it’s so fun that i figured out
9:07
how to get this stuff
9:08
out of there because it was i had the
9:10
hardest time getting the first few to
9:12
come out of the dies using that um
9:15
words are hard sorry guys i don’t know
9:17
what i’m saying
9:20
get all the little bits poked out of
9:23
there real quick
9:26
you would love it
9:30
and the convention center is about 45
9:33
minutes i think from from here where i
9:35
live so i’m going to be going to that
9:38
to nam to from here
9:40
so that’s going to be kind of cool so
9:42
i’m just putting some across the back i
9:43
know some of the glue is going to seep
9:45
through but
9:47
the um
9:48
our glitter glue does
9:50
dry matte and clear so that’s good
9:54
okay
9:57
set that aside to try to let it dry a
10:00
little bit before i start putting it
10:02
onto the other piece of metal i love the
10:04
way that the i mean you can’t really see
10:06
it because it’s so shady
10:08
it is
10:09
basically blinding you guys
10:12
but yeah i do like the way that it
10:13
turned out it does take a bit of work
10:15
and i know that some of you guys have
10:16
said that you think i have so much
10:18
patience it’s like no i am just chatting
10:20
with you guys while i play
10:24
and doesn’t have to be metal i just
10:26
decided to do this first one in metal
10:31
because of course i think of a oh that
10:33
is perfect
10:35
and now that i see it i’m thinking that
10:38
you could go instead of just doing the
10:39
black you could do basically any color
10:42
and have it coordinate with other pieces
10:44
of your card because that’s kind of the
10:46
part that would be painted on the inside
10:48
of that that nozzle and it really gives
10:50
it a really good 3d look love love love
10:53
it
10:54
next i’ll move on to the flowers i cut
10:56
out all of the pieces including that
10:59
night that interesting stem piece and
11:03
i’m folding those in half and then i’m
11:05
going to put some glue right down the
11:06
center so that it adheres to itself uh
11:10
basically what you’re doing is you’re
11:11
adhering it down so it’s a double layer
11:13
of cardstock
11:14
and that helps it so that it doesn’t
11:17
i don’t know fold over or fall when you
11:19
put the heavier flower on the end
11:28
next i’ll start assembling the flowers
11:30
there’s this one that has got almost
11:32
like
11:33
stick like petals i guess that i’m
11:35
putting on top of the one that’s larger
11:38
with um
11:39
rounded petals then i’m putting the
11:42
little yellow piece that is the center
11:44
right on top now i cut multiples i
11:47
basically cut like one of everything out
11:50
of several different colors so i’ve got
11:51
lots of different
11:52
flowers i’ll have a little bit of
11:54
variety there i also cut out a bunch of
11:57
the leaves so that i can decorate it up
11:59
a little bit more once i get the flowers
12:01
in place
12:02
so i’m just adhering one of each of
12:04
those flowers to the end of the stems
12:06
and i wanted to check it out to see how
12:08
high i really need it so i’m thinking
12:11
that i probably can use each of those
12:13
stem pieces for two of the flowers so
12:16
i’m going to go ahead and adhere one of
12:17
the flowers to each end
12:26
after assembling all the flowers i’m now
12:28
cutting the stems so that i can position
12:30
them in different heights now this is
12:33
not this isn’t something that i feel
12:34
like i’m an expert at i’m still a kind
12:37
of just i’m playing around with it and
12:39
experimenting but i do think that it
12:41
turned out pretty cute there’s also at
12:43
the top of that can there is a slit
12:46
basically so you could slide on these
12:48
little pieces in or whatever you decide
12:51
to decorate your little can with so i am
12:54
trying putting a couple of shorter ones
12:56
up in the front and larger longer ones
12:58
in the back and in the end i kind of
13:01
just put things everywhere i’m not sure
13:04
if this is the way that you should do
13:06
when it comes to um doing any kind of
13:08
flower arranging but i do think that it
13:10
turned out cute in the end
13:18
now that i’ve got all the flowers in i’m
13:19
adding a few little leaves around to add
13:22
a little bit of greenery to my little um
13:25
flower can full of
13:27
flowers i i think that the greenery just
13:30
it just adds that little extra something
13:33
on the end i’m not going to add any
13:36
additional bling to this though the
13:38
shininess of that can is just
13:41
almost i think it basically would we
13:43
would take away from that if we were to
13:45
add anything more than just the flowers
13:47
and the leaves so this is going to
13:49
finish up this card thank you guys for
13:51
dropping in and if you’d like to see
13:53
another video where i’m using some other
13:54
spellbinders products be sure to check
13:57
out this playlist over here you guys
13:59
have a wonderful day and remember if i
14:01
can make it you can too
Next, I moved on to some of the other clubs. The Die of the Month and the Clear Stamp and Die of the Month have a very similar look. I’d say that the biggest difference would be the size of the die. They both create fantastic cards for almost any occasion.
Birthday Gifts Border Cards| Spellbinders Die of the Month

I’m also adding a full transcript from the video in case you want to find something specific. This was pulled directly from the video, so I’m sorry for any punctuation, spelling, or other errors.
hi guys this is debbie with debbie j’s
0:08
crafting corner and today i’m going to
0:10
be using the large i’m sorry the small
0:13
die of the month which is this lovely
0:16
little package die and all the goodies
0:18
that go along with it to make a couple
0:20
of mini slimline cards i
0:23
discovered that this little border is
0:26
perfect it’s right under six inches i’m
0:29
yeah right under six inches so it’s the
0:31
perfect size to be able to do a mini
0:33
slim line and i’m also going to be using
0:35
some paper out of the picket fences
0:37
paper pack which is part of the
0:40
card kit of the month for this month
0:42
because i never use up all of this so
0:44
i’m going to use it up on as many cards
0:45
as possible this month so i’m going to
0:47
start off with just cutting some of the
0:49
paper down and then i’m going to start
0:51
die cutting my little pieces
0:53
i’m also going to be using some
0:55
heavyweight cardstock for my card base
0:57
and i am scoring it right at three
1:00
inches that way i can
1:03
cut it at seven more easily
1:05
with my little
1:07
my smaller paper trimmer
1:12
so now it’s the right height for a
1:15
regular slim line and then i can trim it
1:17
down a little bit
1:18
for so it’ll act as a mini slim line so
1:21
that will be perfect
1:23
so i’ve decided i want to do one of
1:25
those cool shaped borders for the front
1:28
so i’m going to start off with cutting
1:31
my pattern paper with this so i’ve got
1:34
that one positioned it says that it is
1:36
right at six inches so i’m going to go
1:39
ahead and line this up right at the edge
1:42
at that and try to get it as straight as
1:45
i can
1:47
and i don’t want to waste any of that
1:49
paper either
1:50
so i’m going to go ahead and run that
1:52
through my gemini junior
1:55
so i’ve got that nice border on there
1:57
and i can just cut off the edges when
1:59
i’m done with it
2:02
so what i’m gonna do with this
2:05
is i’m going to position my die down
2:09
here at the bottom
2:13
and then position my cardstock right
2:15
over the top same way that i did the
2:17
other i’m going to try to get it right
2:19
down here at the edge so that hopefully
2:21
it’ll stay straight
2:24
now if you plan better than what i did
2:26
and you won’t have problems like what
2:28
i’m doing let’s go ahead and run that
2:30
through
2:31
and then let’s see if i did it right
2:33
looks good looks like it’s going to work
2:36
also
2:37
i wasn’t too sure if it was going to
2:39
mangle the side or not but this turned
2:41
out to be the exact right height of a
2:43
card base to be able to
2:46
do this
2:49
so for this point i’m just going to trim
2:51
off
2:52
right where the card stock was cut with
2:55
the die
2:56
and i figure i can go back and fix it
2:59
later but
3:01
i can do the same thing with this
3:02
pattern paper and i’m going to trim it
3:04
down a little bit as well
3:06
but what it’s going to look like
3:08
it’s going to go right over the top
3:10
there that is exactly what i was wanting
3:13
perfect
3:19
okay so next i’m going to go ahead and
3:20
trim my card base down and then i’m
3:22
going to trim
3:24
my pattern paper down to make sure
3:26
everything is going to fit perfect then
3:28
i can go on to cutting out those pretty
3:31
packages
3:38
okay
3:42
okay so what i think i need to do this
3:45
point is grab some temporary adhesive
3:48
okay this one is my removable the reason
3:50
being is i want to be able to make sure
3:53
that i get the line straight
3:55
i mean i know that this edge is going to
3:57
match and that’s fine
4:00
but i want to also make sure that i get
4:02
everything else lined up just right too
4:04
and get it so it trims
4:08
keep on having issues with it going
4:10
right
4:11
there we go it goes right there okay
4:16
but now what i can do is i can trim this
4:18
edge and that means that it’s going to
4:19
be it’s going to basically if i
4:22
if i use this one as a guide the rest of
4:24
it will be square and i’ll be able to
4:26
pull it just a little bit from the
4:27
borders like what i want to do
4:30
and it’ll be fine
4:34
so now that that one is good i can trim
4:37
the rest of my borders my edges from
4:39
that
4:42
if i can trim it down to about
4:45
i’m going to trim it on both sides i
4:46
think
4:48
so a little bit on one side
4:50
and then turn it over and then trim it
4:52
down so it’s going to be five and a
4:54
quarter on that side and that should
4:56
give me a nice pink border
4:59
on three sides
5:04
and i think that’ll be perfect
5:07
so next what i’m going to do is i’m
5:09
going to cut out
5:10
the main piece
5:12
and its borders
5:14
with some gold mirror cardstock
5:19
go ahead and position all of my dies
5:22
onto my
5:24
sizzix sticky grid
5:31
and then i can position my gold mirror
5:33
cardstock right over that
5:37
okay so i’m gonna put it there and then
5:39
i’m gonna go ahead and run this through
5:41
my gemini junior
5:45
and that looks pretty
5:53
so i went ahead and cut out a bunch of
5:56
white this is heavyweight cardstock and
5:58
white um of that same
6:00
package image i went ahead and cut out a
6:02
bunch of those and i’m going to start
6:03
putting this card together to do that i
6:07
think i’m going to use my
6:09
art glitter glue mostly because i want
6:11
to make sure i get them real well along
6:13
that edge there
6:15
and using a dot liner is probably not
6:17
going to get enough adhesive close
6:20
enough to the edge for it to stay
6:22
together be too easy to peel it apart
6:24
and i don’t really want to do that
6:26
so i’m going to go ahead first and do
6:28
this background piece
6:31
also it gives me a chance to move it
6:33
around a little bit if i don’t get the
6:35
positioning exactly straight on the
6:37
first go
6:39
there we go and i’m also going to layer
6:42
up a couple
6:44
a couple of the white heavyweight
6:46
cardstock in that image behind my gold
6:49
so that it gives it a little bit of
6:50
dimension
6:52
so this is just some spray adhesive that
6:54
i picked up at the dollar tree
6:57
it’s beacon and i’ve heard that beacon
6:58
is supposed to be pretty decent so i’m
7:00
going to go ahead and try that out i’ve
7:02
done it on a couple of projects and it
7:04
seems to be working pretty good and i’ve
7:06
also got just an old box that i’m using
7:08
as a glue box
7:11
and i want to make sure i line
7:12
everything up just right
7:15
it doesn’t feel like there’s any
7:16
adhesive on there so i need to spray
7:18
some more on there
7:19
i think an aerosol would probably work
7:22
better
7:23
but use what you got guys
7:32
and for this gold i think i am going to
7:34
have to use
7:36
my art glitter glue for that because it
7:38
is not wanting to stick at all part of
7:40
that might be that when die cutting it
7:43
it does create because this is a kind of
7:45
a metallic paper it does create little
7:48
grooves on the back side and i don’t
7:51
think that that
7:52
spray was reaching enough and i didn’t
7:54
want to take the chance of over spraying
7:57
onto the gold or i would have done it
7:59
first
8:00
and that may have been a better choice
8:02
for adhesive as well
8:13
get that all lined up and that looks
8:16
lovely
8:20
now i’m gonna put some adhesive on the
8:22
back
8:23
so that i can adhere it down to my card
8:26
again just using some of that art
8:27
glitter glue
8:36
i’m going to just line it up with that
8:38
border at the bottom
8:40
and i think i’m going to put my phone on
8:43
it for a minute so that it has a chance
8:45
to adhere
8:47
now i had planned on using the it’s your
8:50
day dies that come with that package set
8:53
on the card but that is
8:56
it’s a little hard to read
8:59
probably because i’ve got too busy of a
9:01
background and there’s not really that
9:03
much additional space and it is just
9:06
it’s too much for this card so instead
9:09
i’m using a stamp from the shopping bag
9:12
sentiment stamp because it happens to be
9:14
on my desk because i just happen to get
9:16
it within the last couple of days and
9:18
some gina k amalgam ink this is the
9:22
obsidian black
9:24
and the stamp set just happened to have
9:26
a happy birthday sentiment so i’m going
9:28
to go ahead and stamp that down on the
9:30
scrap from my
9:33
card
9:34
base that looks pretty good and then
9:37
i’ll cut that out and i’ll use that as
9:39
my sentiment
10:19
and then there we go that card is done
10:27
now i’m going to go ahead and do a
10:28
second card using the rest of that 6×6
10:32
piece of paper
10:33
and for this one i went ahead and cut
10:35
out a bunch of those
10:37
little on those packages and i cut out a
10:41
piece of transparency using the
10:43
background so what i’m going to do is
10:44
i’m going to go ahead and adhere that to
10:47
the back of one and then i can create a
10:49
shaker out of the rest of these
10:52
because this is plastic and i want it to
10:54
have time to dry i’m going to use my art
10:56
glitter glue for this top portion
11:00
making sure to get all of the edges
11:05
and this is basically going to be the
11:07
decorative piece on the top i decided
11:10
not to go with the gold a second time
11:12
although i love that gold i just feel
11:14
that it’s a little bit busy and
11:17
this card i want the shaker bits to be
11:19
seen more where
11:21
as if i had used that gold as the top
11:24
layer it would have been detracting from
11:26
the shaker bits
11:35
okay so i’ve got that position pretty
11:38
well and i’m going to set that off to
11:40
the side
11:41
to dry
11:42
underneath my phone again and now to
11:44
adhere all of these to each other i’m
11:46
going to get out my splat box my sorry
11:49
my glue box again
11:51
and go again with that adhesive spray on
11:54
the back and this is basically going to
11:55
create i’m going to have like about six
11:58
six or seven layers thick i believe
12:05
okay and then i’m going to let this set
12:08
to the side to dry
12:11
okay so now i’m going to adhere this
12:14
piece down this is that thick
12:18
um
12:23
almost like chipboard it’s really thick
12:25
now that i’ve got like seven layers
12:27
and i’m going to go ahead and adhere it
12:29
down using my art glitter glue and then
12:31
give that some time to dry i know too
12:34
much dry time for this guy sorry but i’m
12:37
going to go ahead and do that because
12:38
what it’s going to create is a bunch of
12:40
little wells for some shaker bits to go
12:42
into and because of that i went ahead
12:45
and grabbed out my seed bead collection
12:47
i don’t use it very often wasn’t really
12:50
all that expensive got it at michael’s
12:53
probably two three years ago and haven’t
12:56
used much of it up but i think those
12:58
little beads are probably the right size
13:00
to go into most of these little um wells
13:04
that i’m creating here
13:06
so if you’ve got some seed beads i mean
13:09
sequins are kind of my preferred method
13:12
i do like using sequins and shakers but
13:14
yeah these little areas are too small
13:17
and i probably could have gotten around
13:19
that by cutting out the inside of
13:23
these packages and that would have taken
13:25
a bit of fussy cutting and
13:28
it probably is a good look and i may do
13:30
that again at another time but for today
13:32
this is the look i’m going for and i’m
13:34
going to go ahead and adhere this down
13:36
onto my background
13:39
and let it dry so that those bits don’t
13:41
get stuck
13:43
in the glue
13:45
and then once i’m sure that this has
13:48
adhered well enough then i can start
13:49
adding the rest so let me go ahead and
13:52
center that somewhat on my 6×6 panel
13:59
because once this is all done i’m going
14:01
to go ahead i’m going to put the beads
14:03
in and then top it off with this and
14:05
then everything’s going to be contained
14:07
inside each of those little bitty wells
14:11
okay this is probably going to be the
14:13
most difficult part each of these little
14:15
containers because i haven’t used them
14:17
are really full and every time i open
14:19
them i make a mess so i’m going to
14:21
attempt to not make that big of a mess
14:24
i’ve also pulled out several different
14:26
ones i’m not going to use all of these
14:28
believe me but i do want to put some
14:30
gold because we have the little touches
14:32
of gold there so i want some kind of i
14:34
think you have some gold ones in here i
14:36
want some white to go in and i’ve got
14:38
some white over here and some off white
14:40
here and i’m thinking some reds i don’t
14:42
have any paint but i think that red
14:44
would be nice in there
14:46
and so let’s go ahead and try not to
14:50
spill it all over the place
14:52
so this
14:55
i think it’s like a bead scoop but i’m
14:57
not sure i got it in like a d stash from
14:59
someone a long time ago and it looks
15:02
like these won’t hold a lot
15:05
but that is okay
15:10
i just want to put a little bit of
15:12
different colors in different spots
15:15
and try not to overfill
15:27
okay i am going to say that that is
15:28
going to be good
15:30
because mostly these are a little over
15:32
full i’m also dragging my finger across
15:35
the top to make sure that none of them
15:37
are poking up the top because if they’re
15:40
not to actually flush down in there then
15:43
my
15:45
cover isn’t going to fit
15:48
okay so that feels pretty good i’m going
15:50
to use some art glitter glue on this as
15:52
well
15:54
and the easiest way to do this because
15:56
now this side is plastic the easiest way
15:58
is going to be to go onto the paper so
15:59
it can start
16:01
absorbing
16:03
and this time i do need to go around
16:04
most of these
16:09
areas so that they don’t
16:12
so that none of the beads start to fall
16:14
out
16:16
okay i think i’ve got pretty much all of
16:18
the places
16:20
done
16:22
and i’m thinking i probably am also
16:24
gluing some of the beads in place
16:26
without really meaning to
16:28
okay let me put my phone back on top of
16:30
that
16:31
and give that a chance to dry
16:34
okay so that is looking cool it does
16:37
have the little shake
16:39
so that is good
16:41
i’m not positive whether or not putting
16:44
the words
16:45
yeah putting the words on or not going
16:47
to work on this one either it is just
16:50
these are too intricate and that is
16:52
still too busy so i’m going to do the
16:53
same thing that i did on the previous
16:55
card and stamp out a sentiment
16:58
i’ll use that same happy birthday
17:00
sentiment from that other stamp set
17:04
fussy cut that out
17:09
and this time before fussy cutting it
17:10
out i’m going to let that sit for a
17:12
minute so it has a chance to to dry well
17:15
enough while i’m waiting for that though
17:17
i’m going to use these little bits here
17:19
now i cut out a bunch of the little bows
17:22
that come in this die set too so i think
17:24
it’s time to start adding those to my
17:27
card
17:32
i thought about using some of the gold
17:34
bits to go in the wells but again those
17:36
walls are just a little bit too small
17:38
but that doesn’t mean i can’t save them
17:40
to use for later
17:53
do
18:21
okay i think that turned out just lovely
18:25
it has a little bit of shake not too
18:27
much not too little and all that nice
18:30
gold
18:31
foil cardstock the mirror card stock and
18:33
happy birthday i think they both turned
18:35
out just so cute
18:37
oh my goodness so if you’d like to see
18:39
some more videos where i’m making some
18:41
more cards using spelled binders
18:43
products be sure to check out this
18:44
playlist you guys have a wonderful day
18:47
and remember if i can make it you can
18:50
too have a great day
19:00
you
Let’s Make some Easy Birthday Card | Spellbinders March 2022 Stamp & Die of the month

I’m also adding a full transcript from the video in case you want to find something specific. This was pulled directly from the video, so I’m sorry for any punctuation, spelling, or other errors.
hi guys this is debbie with debbie j’s
0:09
crafting corner welcome back to another
0:12
video featuring some fun spellbinders
0:14
products for today’s card i’m using the
0:16
clear stamp and die of the month it has
0:19
this really adorable little packages and
0:22
then a die that cuts those out i do want
0:24
to give you guys a little bit of fair
0:26
warning though and the recent email that
0:29
came out from spellbinders it shows that
0:31
the clear stamp of the die the clear
0:33
stamp of the month is available however
0:35
the clear stamp and die of the month are
0:38
not available it says this club option
0:40
is not available in april please check
0:43
back on may 1st the clear stamp club is
0:46
available to new subscribers or you can
0:48
get a similar design with the small die
0:50
of the month the small die of the month
0:52
is very similar to this one and i’ll be
0:54
using that on a future video it just has
0:57
the packages that it’s a die to cut out
0:59
the packages but it is more of those
1:01
packages and i haven’t compared the
1:03
sizes yet so i’ll make sure to maybe do
1:05
a little bit of a comparison over on
1:08
that other video for this one though i
1:10
am going ahead and stamping out the
1:11
packages on some patterned paper the
1:14
pattern paper is from the new card kit
1:17
of the month because i never go through
1:19
the entire pad when i’m making my card
1:21
so i figured i’d start using it on one
1:23
of the other cards i want to create this
1:25
is a fun technique you can save a bunch
1:28
of time on doing all of your coloring
1:30
and stuff if you decide to actually
1:33
stamp onto your patterned paper i’m pat
1:36
i’m stamping on with some wow clear
1:38
embossing powder and then i’m going to
1:41
cover that in some gold
1:44
embossing powder and heat that up for a
1:47
nice pretty gilded look over that pink
1:50
and white dotted background that i’m
1:52
stamping on
1:56
i also went ahead and stamped and
1:58
embossed a bunch of the sentiments that
2:00
are in this set and then i die cut
2:02
everything out using the
2:04
dyes that came in the die of the month
2:06
again
2:07
from what i understand you may not be
2:09
able to get that now i am going ahead
2:11
and i am gluing the pattern paper piece
2:15
onto a couple of layers of white card
2:17
stock that i cut out using those dies as
2:21
well this is going to give my
2:22
embellishment there a little bit of
2:24
strength
2:26
also the pattern paper is a little thin
2:28
so i thought that this would be a better
2:30
option and i love that little bit of
2:32
added dimension
2:35
then i decided you know i think i want
2:37
to have a little bit of shading too so
2:38
you can see
2:40
kind of the roundedness of these round
2:42
packages so i’m just taking a couple of
2:44
my spectrum noir markers this is the ap1
2:47
and the ap4 ap4 is the darker color and
2:51
then ap1 is the lighter that i’m going
2:53
to blend it all out then i decided also
2:56
to get out my colorless blender and do a
2:58
little bit more blending
3:34
next i’m using another piece of
3:35
patterned paper that i think will
3:37
contrast pretty well with my packages
3:39
and i adhered that down onto a pink
3:43
heavyweight cardstock
3:45
card base and then i’m going to add some
3:47
foam tape to the back of my packages and
3:49
position them on the front i think
3:51
having the foam tape is going to give it
3:53
just a little bit more dimension help it
3:55
pop just a little bit more i also went
3:57
back and stamped a bunch of the little
3:59
bows that come in the stamp set and die
4:02
cut those out everything is stamped and
4:05
embossed in that gold embossing powder
4:08
and i think that that gives it just a
4:10
little bit more of a festive look
4:30
i’m also using some foam tape to pop the
4:32
sentiment up and i think that’s going to
4:34
be a really good touch there this card
4:37
really doesn’t need a whole lot of
4:39
anything extra because it’s got all of
4:41
that
4:42
nice pretty gold embossing so i’m not
4:45
gonna bother with even adding any
4:47
sequins or anything to the rest of this
4:48
card
4:51
these cards were just so quick and easy
4:53
to make absolutely love the way they
4:55
turned out and they would be great to do
4:57
for some mass producing now if you want
4:59
to see some more cards where i’m using
5:01
some spellbinders products be sure to
5:02
check out this playlist here you guys
5:04
have a wonderful day and remember if i
5:07
can make it you can too have a great day
The last card that I managed to get completed before running off to NAMTA Creativation for several days is this lovely foiled card using the Glimmer of the Month.
You are Stardust Hot Foiled Card | Spellbinders Glimmer of the Month

I’m also adding a full transcript from the video in case you want to find something specific. This was pulled directly from the video, so I’m sorry for any punctuation, spelling, or other errors.
Hi guys this is debbie with debbie j’s
0:02
crafting corner today i’m creating this
0:05
you are the stardust in my day hot
0:07
foiled card using the glimmer of the
0:10
month from spellbinders
0:13
so i’m going to start off by just
0:15
heating up my glimmer system so i’m
0:17
inserting the glimmer platform and
0:19
turning it on and i’m going to just wait
0:21
for the light to turn green to let me
0:24
know that it’s okay for me to start the
0:26
timer while i’m waiting for that i’m
0:28
going to go ahead and get my platform
0:31
and hot foil plate ready
0:33
this time unlike most of the things that
0:36
i do with this i’m going to actually try
0:38
to use the grids to make sure everything
0:40
is lined up just perfect
0:43
this is actually a little bit finicky
0:45
and i have never tried to position my
0:48
hot foil plate this exact before but it
0:51
is gonna turn out awesome
0:53
now that i’ve got a general idea of
0:55
where i want my hot foil plate to go i
0:58
am going to go ahead and grab out some
0:59
of this
1:00
new um hot foil and my quick cutter and
1:04
go ahead and trim that down this foil is
1:08
um this is actually prism it’s one of
1:10
the new colors i absolutely love it it’s
1:13
kind of like the um the aura that i used
1:16
last month last month it was goldish so
1:19
this one is an iridescent silver and i
1:21
think it is just
1:23
lovely so i’m going to trim it down so
1:24
that it’s going to fit
1:26
basically created right about the same
1:29
size as the foil plate because i don’t
1:31
want to have a lot of excess because
1:32
it’s going to be harder to tape down if
1:34
i have it close to the size of my plate
1:37
then i’ll be able to tape it down on all
1:40
sides so that it’s not going to shift
1:57
now that the platform has heated up and
1:59
i’ve got everything taped in place just
2:01
positioning everything onto my hot foil
2:05
um system with the hot plate touching
2:08
the bottom basically touching the plate
2:10
which means the card stock is on top and
2:12
then i just hit that timer and once that
2:14
timer um once that stops blinking i can
2:16
go ahead and run this through my
2:18
platinum 6 machine
2:25
looks like this hot foil plate is just a
2:27
little bit too heavy for me to pick up
2:29
with the tool that comes with my
2:31
spellbinders but isn’t that just lovely
2:33
i love all of those basically sun rays
2:36
star rays whatever you want to call it
2:38
it looks gorgeous so what i’m going to
2:40
do is i’m going to position it on the
2:42
opposite side and line up the bottom
2:46
most ray
2:48
to match the top one on the where i’ve
2:51
just put the plate back on basically
2:52
doing the same thing but being really
2:54
really really careful to get everything
2:56
lined up perfect and then i’m gonna run
2:58
that again through my platinum six
3:06
okay so i am
3:08
removing some of that tape where i’ve
3:09
got everything taped down and then let’s
3:11
take a look
3:13
okay i have to say i am in love with the
3:16
way that this looks and believe me it
3:18
looks so much better in person oh my
3:20
goodness it is so pretty so i’m going to
3:22
trim this down and make a focal point i
3:25
had already foiled and everything the
3:28
sentiments using some gold foil these
3:30
are the perfect size for this
3:33
i don’t know sun that would go in the
3:35
center or
3:36
i’m not sure exactly what you’d want to
3:38
call it anyway i went ahead and cut out
3:40
the the one with the kind of sun edges
3:44
in some dark blue cardstock and now i’m
3:46
using the circle die to cut out the
3:48
actual sentiment
4:04
next i’m going to add some little foam
4:06
squares to the back of the sentiment and
4:08
then center that on my
4:10
blue
4:12
decorative i’m going to call it that
4:13
anyway a blue decorative circle
4:28
by now you guys know that i love using
4:30
foam tape to add a little dimension so i
4:33
am going to put some um scotch foam tape
4:35
on the back of my foiled panel the one
4:38
with the starburst and then put that
4:39
onto a dark blue card base and then i
4:43
will center in my sentiment right in the
4:45
center of the starburst
5:00
since we’ve got a dark card base i
5:02
decided i’m going to put a white panel
5:03
on the inside of the card as a place to
5:05
put a personal message
5:15
but you know what i could not let all of
5:17
that pretty foil that i had to cut off
5:19
of the main panel i couldn’t let it go
5:22
away so i am trimming it down and then
5:23
i’m going to put it on the inside on
5:26
that white piece as an accent
5:32
i just love how this card turned out and
5:34
it was so so so fast other than waiting
5:36
for the
5:37
hot foil press to warm up anyway if
5:39
you’d like to see some more videos where
5:41
i’m using some other spellbinders
5:42
products be sure to check out this
5:44
playlist you guys have a wonderful day
5:46
and remember if i can make it you can
5:49
too see you next time
If you like this content, do all the things!
- Show me (and Youtube) that you LOVE these videos and posts by subscribing, liking, commenting, and sharing them!
- Become a sponsor of my channel and blog and help me create my next posts by making a one-time donation! All contributions are welcome!
I still have a few more projects for the Club Kits to create and share… They should be up on my YouTube Channel within the next few days!
Project Photos using the April 2022 Club Kits
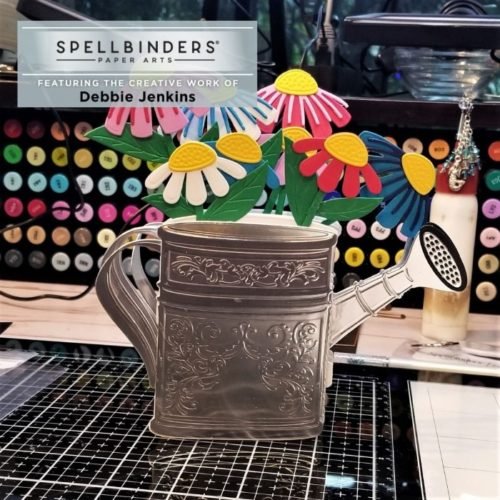
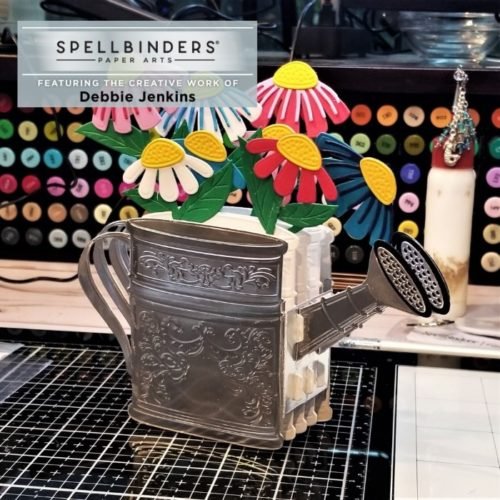
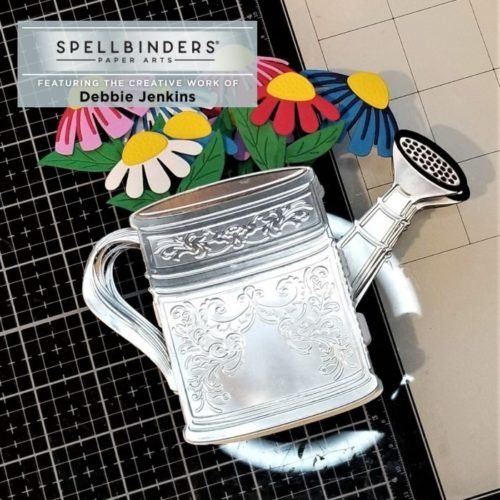
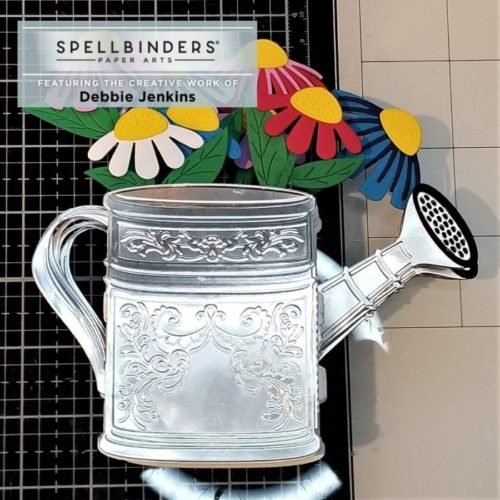

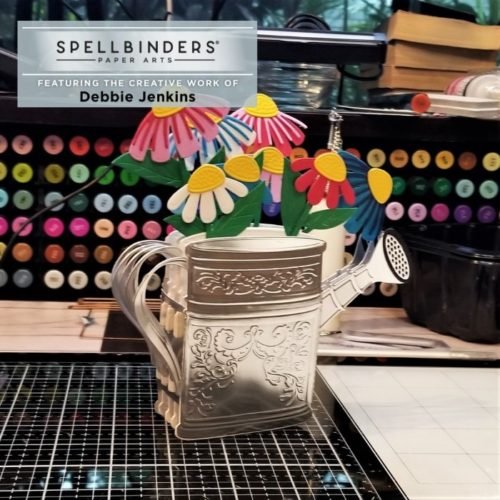
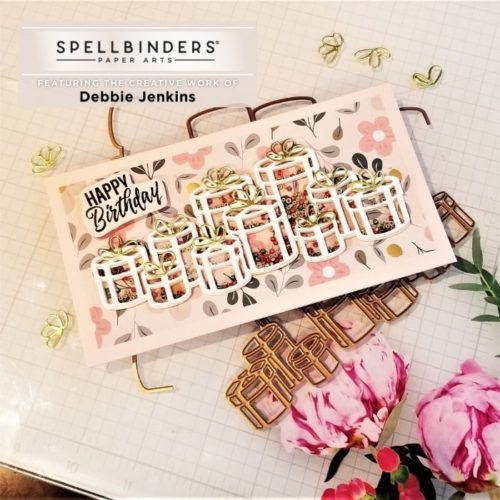
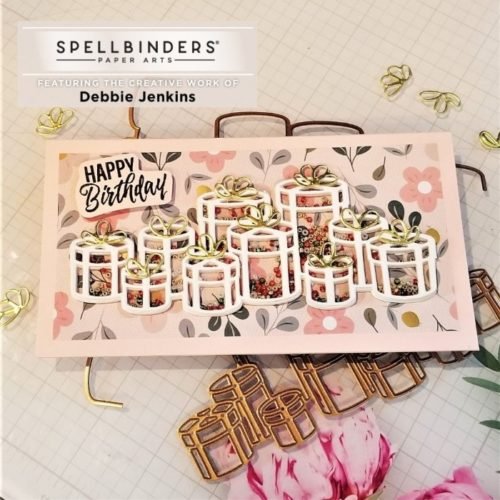
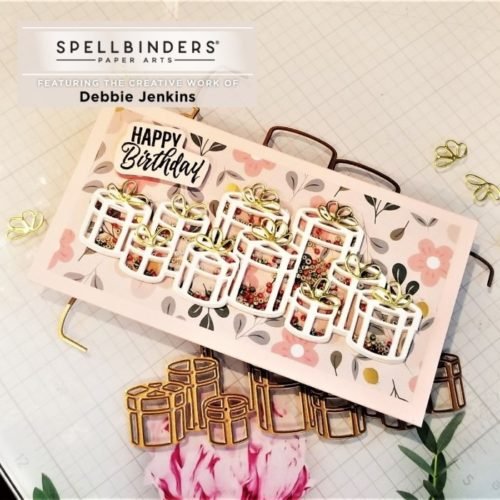
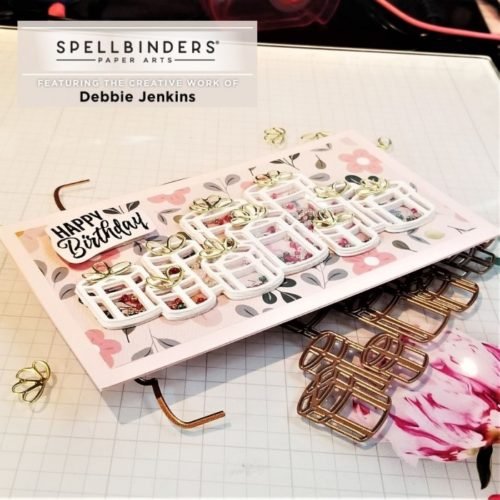
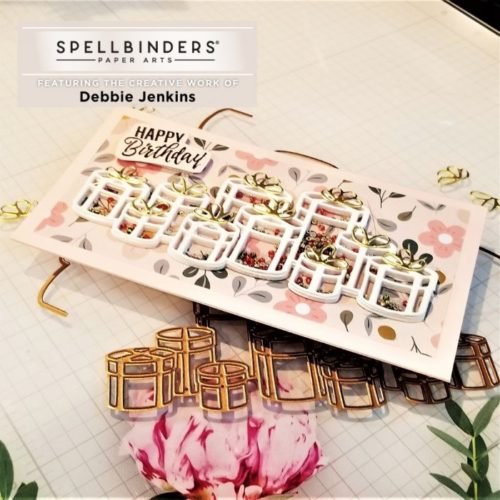
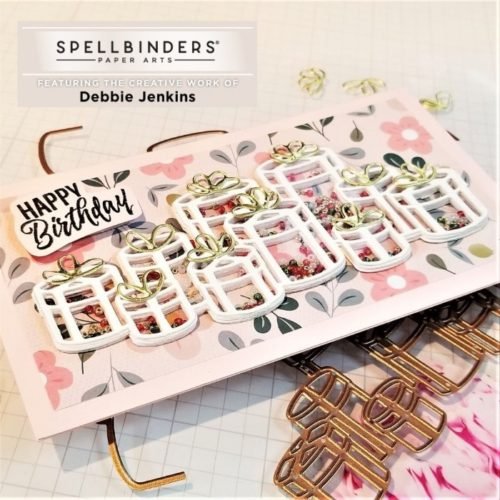
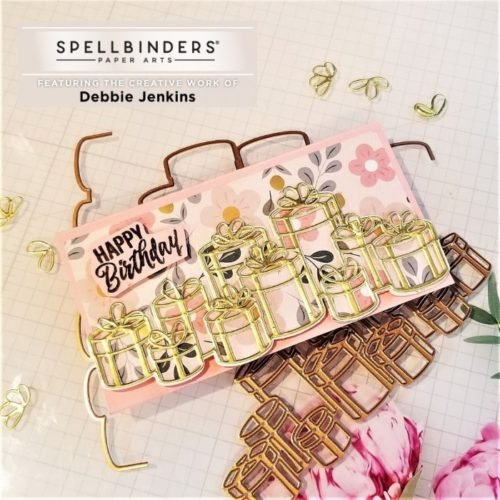
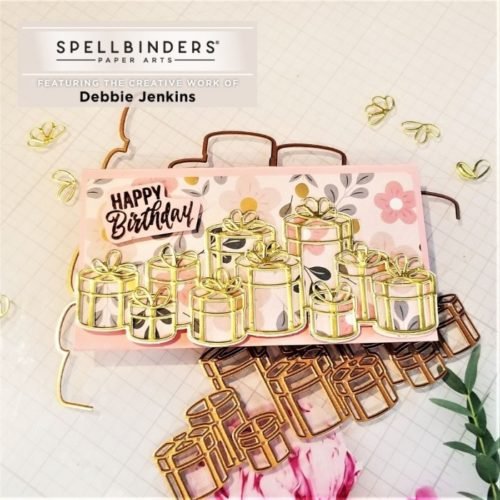
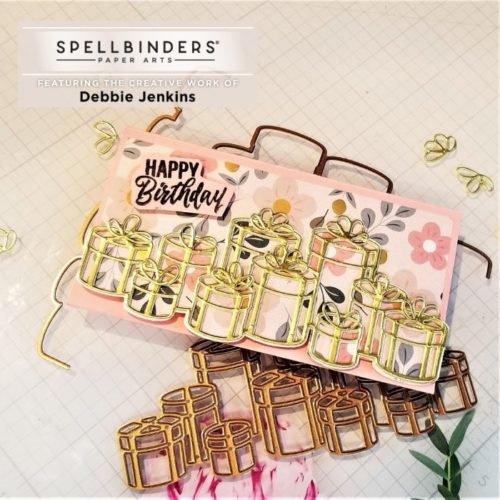
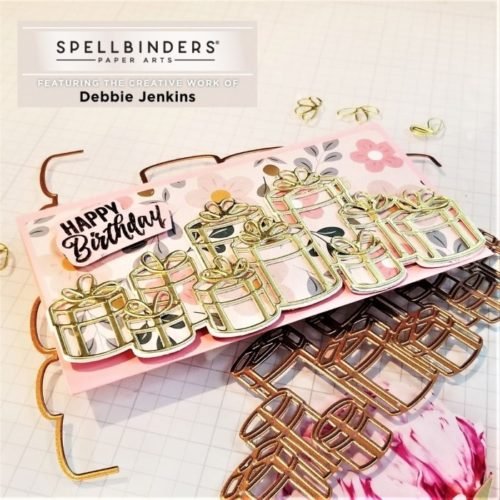
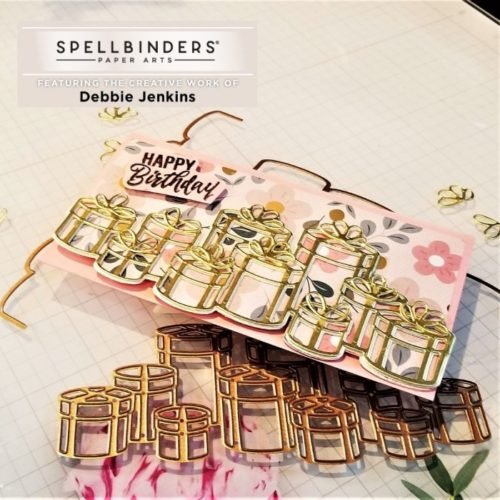
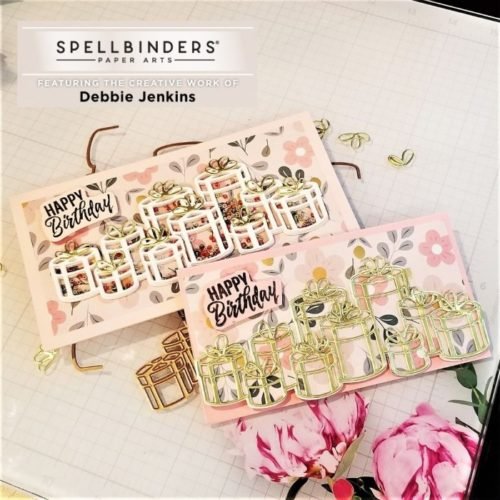
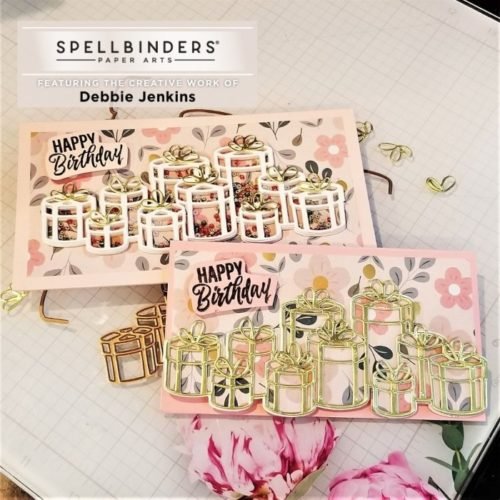
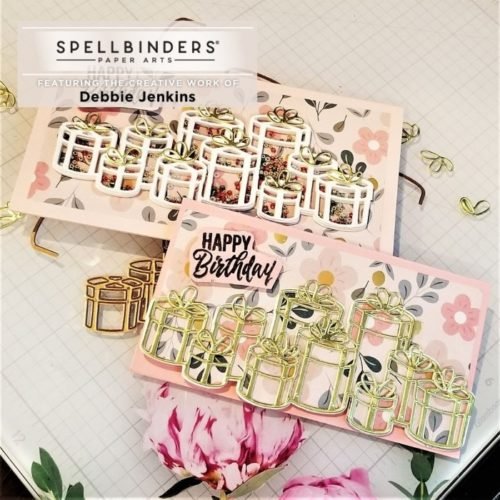
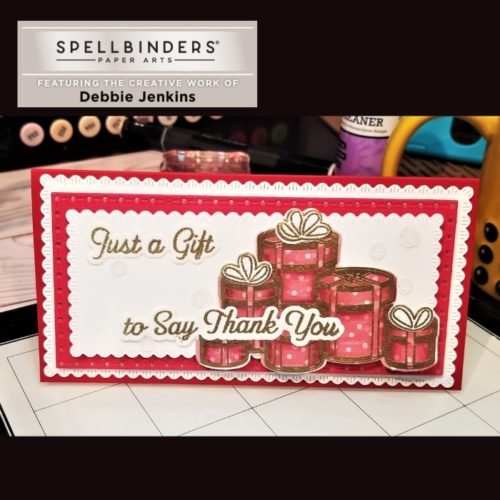
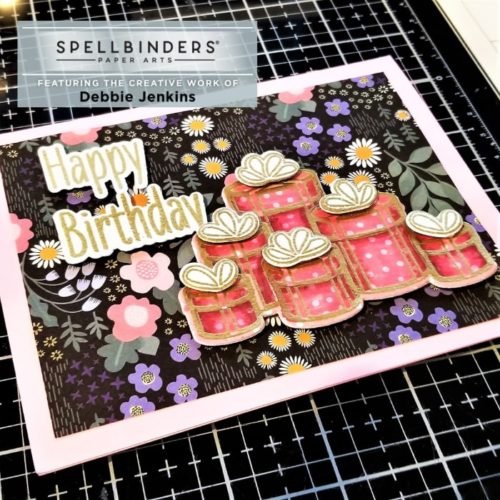
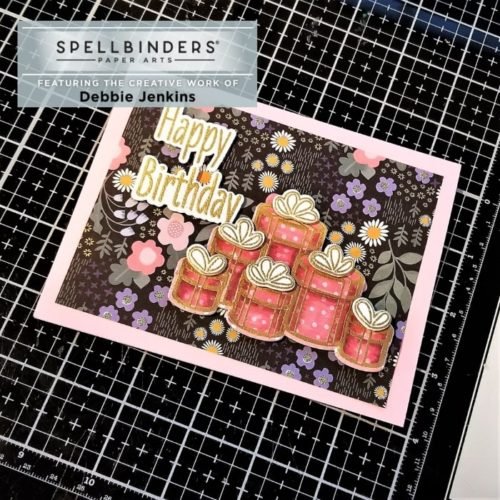
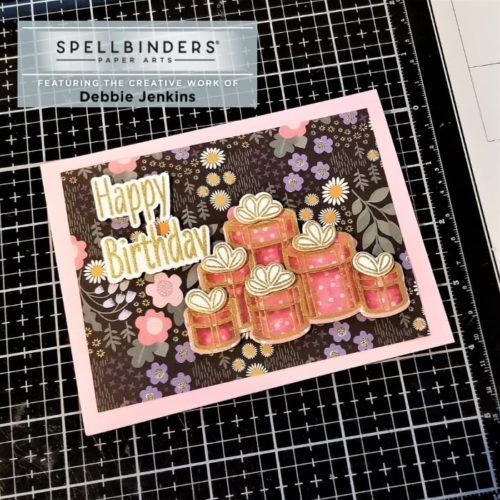
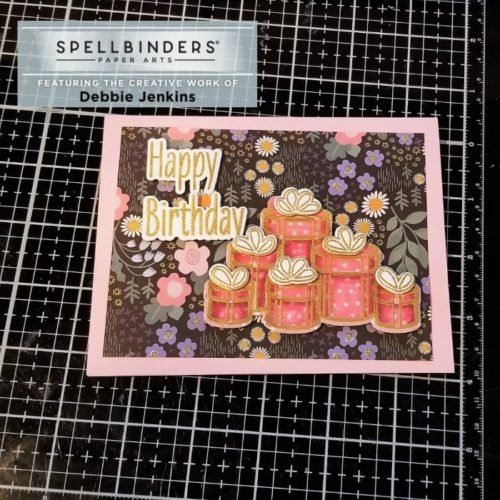
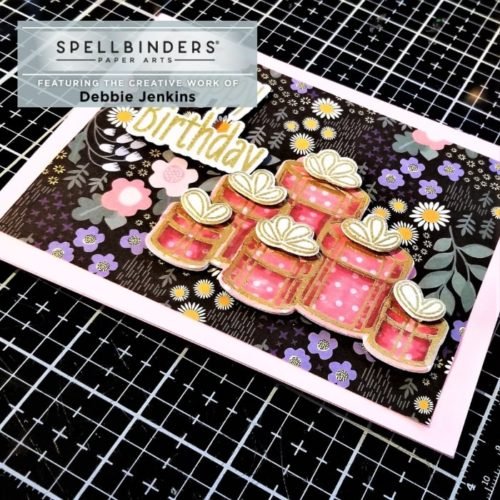
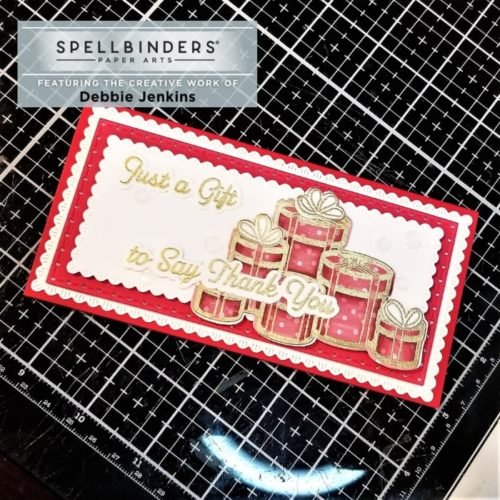
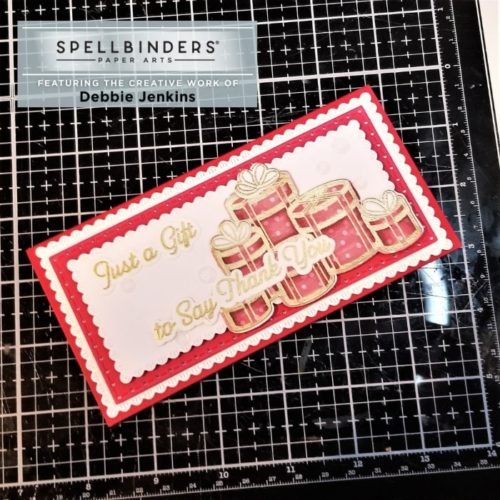
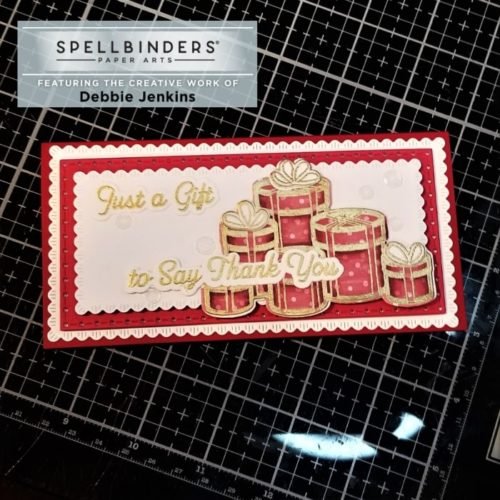
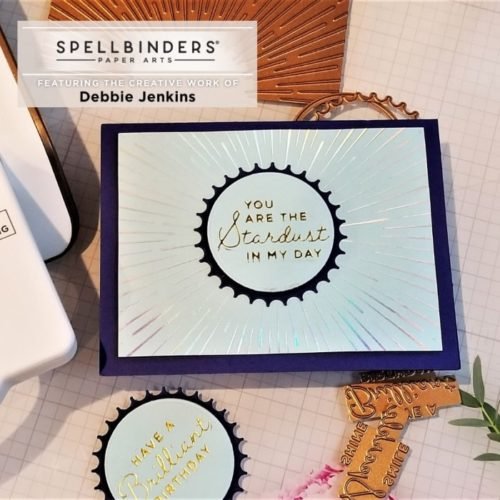
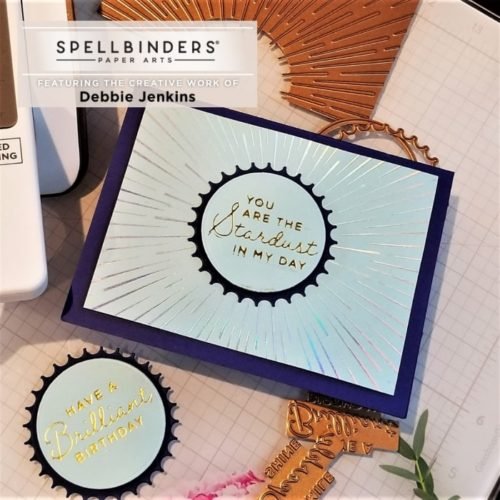
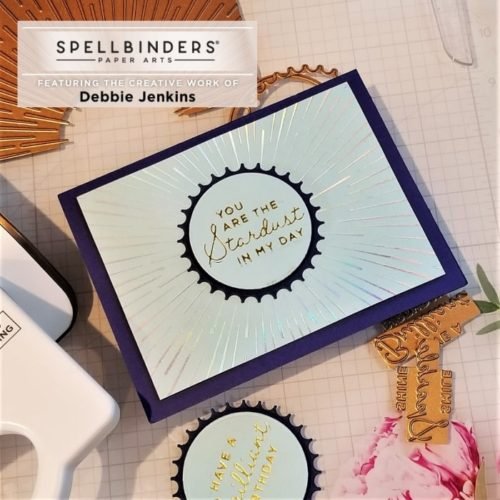
Other Crafty Opportunities!
If you just love crafting and want more ways to create with me, check out these other crafty opportunities. Each is super fun!
Check out our next Card Class!
❤To Be Announced Soon!
See you there!
Let’s hang out!
——— SUPPLIES ———
(and where to find them)
JUST A NOTE: The stamp and die set were provided to me by Spellbinders to create inspiration to showcase these amazing products. I was not paid for the creation of this post or video. I use affiliate links whenever possible in my blog posts and videos. It doesn’t change the way you purchase things, but it allows me to make a percentage off of sales. Thank you for using the links provided & helping me keep bringing you free content.
Thank You
Thank you so much for dropping by to see the cards that I created with these amazing stamps and dies from Spellbinders. Please give me a thumbs up, and comment because I love hearing from you!
I hope you are inspired to create something AWESOME!
Because, if I can make it, You Can too!
Big Hugs!
Debbie J
Check out some more projects using Spellbinders Stamps, Dies and Glimmer Plates!
- Light-up Speedometer Surprise | Spellbinders and PearBlossom Press
- Lovely Foil Butterfly Light Up Card | Spellbinders and PearBlossom Press
- First Look at Spellbinders February 2025 Clubs | Let’s Create a Card LIVE!
- Spring is HERE with the New Releases from Spellbinders for January 2025
- Spellbinders December 2024: Winter Cards using Love on the Rocks
- Doing Things Different in 2025 Starting with Lovely Spring Cards using Spellbinders January 2025 Clubs
- Fun Holiday Ornaments using the Felt Stitch & Create Collection from Spellbinders
- Spellbinders December 2024 Kits: Easy Love & Friendship Cardmaking Ideas
- You See the Best In Me | Beads Of Friendship Collection from Spellbinders
- Sparkle On My Friend | Shine Bright Collection from Spellbinders
- One Collection Six Cards | Amaryllis Christmas Collection by Yana Smakula
- It’s Party Time! | Cardmaking with the Spellbinders November 2024 Club Kits

