Simple Stamping Quick Cards

For my project today, I’m using the “Be Salty” Stamp set from Not 2 Shabby for some simple stamping to make some quick cards.

This card is another Design Team Project for the Not2Shabby Shop. I’m using the “Be Salty” Stamp Set from Not2Shabby. Being from Florida, I just love the beach vibe!

I am in dire need of getting some of the backgrounds that are just sitting turned into some cards. So I figured this set would be perfect for some of the ombre-ish backgrounds that I made in December using some stamping foam.

And I am really loving how these cards turned out! Thye are so quick and easy, and you can make one too!

If you want a chance to get this card:

  • Subscribe to my YouTube channel (so you never miss a video).
  • Subscribe to my email newsletter below (so you never miss a notification).

[yikes-mailchimp form=”9″]

Check out how I created these Quick Cards!

YouTube player

0:06
hi guys this is Debbie with Debbie j’s
0:08
crafting corner today I am doing another
0:11
design team project for not 2 shabby
0:20
and I’m using the be salty stamp set now
0:23
this is a really cute stamp set with
0:25
this nice beachy scene which
0:29
I love it mostly because you know what i
0:30
live in Florida I keep changing my mind
0:32
about which way I want these to go what
0:34
I’m going to do is I’m using one of the
0:35
backgrounds that I made in a crafty live session
0:40
about like two, three, four months ago I’m
0:42
using some stamping foam and I’m going
0:45
to basically stamp out my image on top
0:48
of that. I think that will work
0:56
I’ve actually done one a little a little
0:58
bit ago um previously and I forgot to
1:01
turn on the camera so you didn’t get
1:03
to see what I was doing and I pretty much
1:06
finished up this is a really quick and
1:08
easy car too and
1:10
this okay I need to move my stamp
1:15
so I just put the acetate over the top
1:18
where I want this to be positioned
1:20
and just lay that on top and then I’ll
1:22
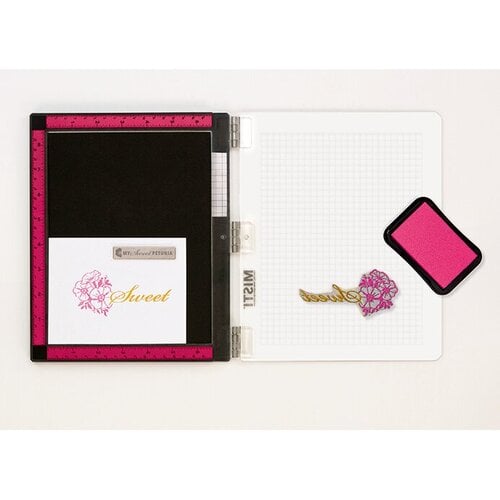
pick it up with the top of my misti
1:26
and we should be good to go
1:28
go ahead and put some more
1:30
some more versafine onyx black ink down
1:37
and straighten my card
1:47
yeah I think I like that I’m going to go
1:49
ahead and put
1:51
another coat
1:59
and then I’m going to cover that in some
2:01
clear embossing powder from wow
2:05
because it is
2:07
mostly anti-static it shouldn’t have any
2:09
problem
2:11
on my card let’s go ahead and heat that up
2:20
okay so now I have these three panels
2:25
and I think that they all look pretty
2:27
cute but I think what I’m going
2:28
to do is I’m going to add a little bit
2:30
of color not a lot but just a little bit
2:33
to some of the different areas I don’t
2:35
want to take away from that
2:37
like black on color look I don’t even
2:39
know what to call it but I do like it
2:42
but I do want to add a little bit
2:45
to these different areas
2:47
I’m going to start off with some green
2:49
this is the ag-1 which is one of my
2:52
lightest and just add that
2:54
just a little bit of quick coloring over
2:56
the fronds of my palm tree
3:09
and do the same thing on the other cards
3:21
and I like the look that this is
3:23
giving
3:26
the colors are a little bit variegated
3:28
because of that
3:29
color in the
3:30
background so I don’t know that i
3:32
actually need to add any additional
3:35
colors because you’re not really going
3:37
to be seeing the shading
3:40
for instance, this one has got the pink
3:42
behind the green
3:44
so it turns the leaves a little bit
3:46
brownish
3:53
and this one because it has so much
3:55
of that dark blue behind it kind of
3:57
looks like the dark blue is a shadow on
3:59
top of my leaves I think these are
4:01
looking gonna look kind of cool
4:04
okay so let me grab a light
4:07
a lightish brown
4:18
that’s kind of a medium but I think
4:20
that’ll still work and I’m going to just
4:22
come down
4:25
and get a little bit of shadow on these
4:30
I’m not even going to bother with
4:32
coloring in the rest of it it’ll be kind
4:34
of like
4:37
some odd highlights
4:39
this is kind of an artsy look I don’t
4:40
really do that a whole lot but I am
4:42
liking it
4:51
okay I do need a little bit of grass on
4:53
each of these down here at the bottom
4:55
so let me do a little bit of flipping of that
5:08
okay
5:13
and then let’s see
5:16
I’ve got the beach
5:18
and then I’ve got the surfboard so what
5:20
do I want to do with those
5:23
I think for the beach I’m going to use a
5:25
golden brown
5:28
and this is like the lightest of those
5:44
that looks kind of interesting
6:16
what’s really neat is you don’t know
6:18
what they’re going to look like with the
6:19
different colors behind them
6:22
and each one has a little bit of a
6:23
different look
6:25
that is kind of cool
6:29
I’m going to bring in a little bit of a darker
6:32
of the yellow just to give a little bit
6:34
of accent
6:36
a little shade underneath each of my
6:38
surfboards
6:48
okay and then
6:51
what do we want to do with surfboards
6:55
I’m thinking I’m going to just go in
6:57
with a little bit of gray for some
6:59
shadow
7:10
do
7:52
do
8:05
do
8:49
so next I’m going to trim down the edges
8:52
here and I am giving it about a quarter
8:55
inch
8:57
from
8:59
the edge of where my stamping foam was
9:02
and that also has left me a little bit
9:04
of space for where
9:05
my trees
9:09
kind of
9:10
went beyond the edge I think that’s
9:12
going to look kind of good
9:14
let me go ahead and trim down all three
9:16
of these
9:18
okay next I need to add a sentiment so i
9:21
decided I’m going to use the sending
9:23
sunshine but I think instead of using
9:26
black embossing for this one I’m going
9:28
to emboss it in a little bit of gold and
9:34
I want to make sure it doesn’t stick
9:37
after all of that
9:39
I don’t want it to stick in the wrong
9:40
spots although you know gold scattered
9:43
probably wouldn’t look too bad
9:45
and I think what I’m going to use is this
9:48
old recollections I am starting to wear
9:50
it down a little bit which is good and
9:52
I’m using my wow clear embossing ink
9:56
I can see some on there where that
9:58
stamping has done well
10:03
okay for a minute I thought I had the
10:05
stamp upside down that would kind of
10:07
suck
10:08
so let’s take a look see how this one
10:10
does
10:22
and it would do better if this was
10:24
actually fine embossing powder and it
10:26
may have been fine embossing powder when
10:28
I got it
10:29
supposed to be but it’s been about
10:32
four years
10:36
and there’s no telling how much other
10:37
stuff has kind of gotten stuck in it
10:46
and I’m heating it from behind because i
10:48
don’t really want any of it to blow off
10:51
which has happened before okay so now
10:53
we’ve got that shiny sentiment now you
10:56
do have to tilt it in the light a little
10:57
bit to see it just because that’s kind
10:59
of what gold does but I think that’s
11:01
going to look pretty good let me go
11:03
ahead and get the other two cards done
11:06
okay now I am going to mount these guys
11:09
down on some black cardstock
11:12
and I want to add a little bit
11:15
extra
11:18
I’m going to try it anyway
11:21
so there is a
11:22
a ridge on my paper trimmers
11:26
um thumb guard and I’m going to line up
11:30
the edge of the white with that part so
11:32
that it adds just a little bit more of a
11:34
black border around or at least that’s
11:36
what I’m going to attempt to do and see
11:38
how that one looks I may decide that
11:40
that is still too much of a border and
11:43
go ahead and trim it down some more
11:46
okay
11:47
so this one I’m gonna put on a yellow
11:49
card base and that is actually still too
11:52
big
11:54
so let’s go ahead and trim it down to
11:57
that little 16th that I usually go with
12:11
so it’s got that little pop of black
12:16
that doesn’t have too much it doesn’t
12:18
have too little
12:20
i figured that would probably look
12:22
pretty good
12:25
surrounding that image I do think that
12:27
that black helps it pop a little
12:28
bit and with the whole tropical vibe the
12:31
fact that this water this paper is still
12:33
is a little warped that is perfectly
12:35
fine I did try flattening it out a
12:36
little bit but I think this is going to
12:38
work just fine anyway let me go ahead
12:40
and trim these other two down
12:43
so next I’m going to add some foam to
12:45
the back now this is just some scraps
12:47
that I have of some old fun foam I’m
12:49
trying to use up the last of and it is
12:52
disappearing pretty quick which is good
12:58
because I figure that is some space that
13:01
I’ve had in my storage in my crafty
13:04
storage that I could use for something
13:06
else
13:08
instead of for
13:10
scraps of foam that I was not ever going
13:12
to be using
13:18
just adding a little bit of liquid glue
13:21
to the back of those
13:27
and what’s funny is it’s only taken me
13:29
about i’d say probably about a week to
13:33
go through all of this
13:35
to go through all of the scraps that i
13:37
had basically just pieces and parts of
13:40
different ones
13:41
okay so while that is getting good and
13:44
set let me go ahead and add this so some
13:46
of my foam has adhesive on the back and
13:48
some of it doesn’t so since this one
13:50
has the adhesive I’ll go ahead and add
13:53
that
13:54
to the back of my card front
14:12
do
14:26
okay and then I’ll just add some more
14:28
liquid glue to the back
14:31
on top of those foam strips and that way
14:33
i can just center it right in the middle
14:36
of my card
14:38
and making sure that it opens the
14:40
direction that I’m expecting it to
14:42
kind of sucks to get everything done and
14:44
then turns out that your card is
14:46
actually upside down
14:50
and crooked
14:53
but since it’s liquid glue I can shift
14:55
it around a little bit when I mess up
14:59
and because I just love my little bit of
15:02
bling I’m going to go ahead and add a
15:04
few little crystal gems to each of these
15:06
cards
15:16
and I think that these guys turned out
15:18
pretty cute even though I used them in a
15:22
different kind of way something i
15:24
wouldn’t have thought of doing it before
15:25
and I hope that this inspires you to get
15:27
out some of those background panels that
15:30
you have had sitting in your stash for
15:32
months if not years and just give
15:35
a little bit of extra new life to them by
15:37
adding a
15:39
stamp of some sort on there you guys can
15:41
do this I mean if I can do it you can
15:43
too so be sure to check out this video
15:46
over here where I’m using some other
15:48
products from not too shabby and you
15:50
guys have a wonderful day and again
15:54
remember if I can make it you can too
15:56
have a great day

If you like this content, do all the things!

  • Show me (and Youtube) that you LOVE these videos and posts by subscribing, liking, commenting, and sharing them!
  • Become a sponsor of my channel and blog and help me create my next posts by making a one-time donation! All contributions are welcome!
Simple Stamping Quick Cards Sketch

Check this out!

You can download these card sketches to create your own cards!

[yikes-mailchimp form=”24″]

If you use one of these card sketches, we’d love to see your card!

Other Crafty Opportunities!

If you just love crafting and want more ways to create with me, check out these other crafty opportunities. Each is super fun!


Check out our next Card Class!

❤To Be Announced Soon!

See you there!

Let’s hang out!

Planning Crafters Facebook Group
Crafting with Debbie Facebook Group

PIN ME

Like this project? Pin it and save it for later!

SUPPLIES

(and where to find them)

(DISCLAIMER: I was not paid for the creation of this video. I use affiliate links whenever possible in my blog posts and videos. It doesn’t change the way you purchase things, but it allows me to make a percentage off of sales. Thank you for using the links provided & helping me continue to create here.)

Thank you!

Thank you so much for joining me for this Cardhoppin’ Hop.  Be sure to check out all of the other creators because I know they will have some amazing projects for you to see.

I hope you are inspired to create something AWESOME!  Because, if I can make it, You Can too!

Logo

Deb Jenkins

Let me help you unlock your creative potential! 

Because, If I can make it, YOU CAN TOO!

Stalk me: 

Facebook Pinterest Instagram YouTube | Blog 

Visit my channel and Blog for tutorials, inspiration, and motivation! 

Leave a Reply

Your email address will not be published. Required fields are marked *

This site uses Akismet to reduce spam. Learn how your comment data is processed.